 |
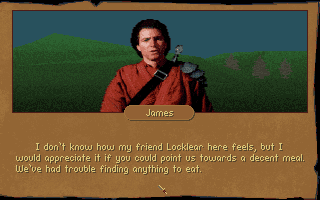
James, displaying a talent for extreme sarcasm.
|
At the end of the last entry, I expressed a desire to start wrapping up Betrayal at Krondor, and I was happy to see that the game agreed with me in the opening moments of Chapter VII: "The Long Ride." The action switches to Locklear, James, and Patrus, but they're not just outside Northwarden. They're all the way down in Dimwood Forest (and for some reason, it's the middle of the night). If I try to go north, I end up in endless battles with large groups of pirates and Moredhel spellcasters. At least, I assume they're endless. I can only survive a couple in a row, and none of the figures in the landscape seem to diminish.
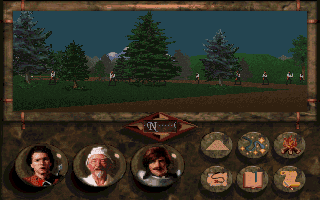 |
I guess I won't be going this way.
|
(It's interesting how the game doesn't settle on just one way to signal "you can't go this way." Sometimes it does it with a text message, sometimes with a physical barrier, sometimes with a single impossible combat, and sometimes with a series of endless combats.)
 |
My explorations this session. Again, I didn't look at the online map until I finished the chapter.
|
This party lacks the spyglass, so I don't even attempt to explore off-road. I just follow the path. It winds southwest past a battle with two Moredhel and a spellcaster, then ends at a closed tavern called the Fife and Laurel.
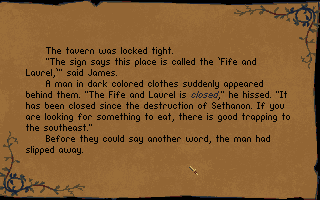 |
"If you are looking for something to eat, look literally anywhere on this map."
|
Lacking any road as a guide, we do what I usually do with open maps and work on exploring the perimeter first. I go north until I hit the mountainous border, then start working west. I go around a ridge into a little hollow in the northwest corner of the map, hit a river, follow the river far to the southeast until it ends in a point, then work my way northeast until I find a bridge. Along the way, we find:
- A fairy chest. Again, Patrus has to cast "Union" to understand it: "What goes down to the cellar with four legs but comes up with eight?" My first thought, no joke, is "my cat when it catches a mouse." MOUSER does turn out to be the answer. The chest has a sword, some armor, 177 gold, a dose of silverthorn antivenom (which is good because everyone on this map seems to have poison), and two doses of silverthorn venom.
- A group of four fairy chests. I think I'm done typing out the riddles. I'm sure they're on spoiler sites. I get them all. None of the treasures are life-changing.
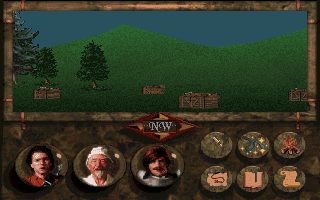 |
The moment I kind of got sick of fairy chests.
|
- Various non-fairy chests or holes with minor treasures.
- Several dead deer (or something) caught in a trap, from which we are able to obtain rations.
- 33 rations in a tree stump. What's with this game and rations lately?
- Three Moredhel and two spellcasters, who killed me on the first attempt--this party sucks. James misses most of his attacks and Patrus takes 80% damage from every crossbow bolt. On a reload, Patrus gets off an "Evil Seek" that kills two of them, but he still takes a bolt to the chest and has to be nursed back to health with herbs and potions.
- A fairly complex trap. I haven't been describing those very well. They all involve the same elements: lines between pillars, cannons, hollow prisms, and solid prisms. Stepping through a line or in front of a cannon causes you to take massive damage. Pushing a solid prism in front of a cannon blocks it. Pushing a hollow prism in front of a cannon causes it to fire but doesn't block the shot. You have to figure out the right combination to get the cannons to shoot the pillars (sometimes), taking down the lines between them and/or blocking the cannons to get at least one character safely to the far side of the map. I get most of them; worst case, you take some damage just running to the other side, and you have to heal.
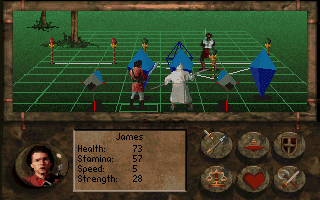 |
The solution here was to push the hollow prism in front of the left cannon, causing it to fire and deactivate the line between the two leftmost pillars, then push a solid prism in front of the same cannon, then walk through those pillars to freedom. Everything else is a distraction. Locklear doesn't have to escape his "trap" because only one character needs to make it to the other side.
|
- Two Moredhel spellcasters. They surprise us and manage to kill us all with "Fetters of Rime." On a reload, when James finally attacks first, he does 14 damage. 14. What has made him suddenly suck so bad? His statistics don't look any worse. Meanwhile, both fighters are whiffing 60% of their attacks, and Patrus manages to hit Locklear with a "Fetters" aimed at an enemy. In my third reload, not even poison on their blades and Fadamor's formula in their systems helps. I finally kill them on my fifth try by having Patrus exhaust himself with "Evil Seek" and then blast them with his Staff of Lightning. James and Locklear contribute almost nothing. When did my party members turn into the Three Stooges? Thank the gods I have plenty of healing items from the last chapter.
At one point along this journey—this becomes important later—while following the edge of a mountain ridge, we go into the ridge and come out the other side. It's an illusion. But we find nothing on the other side except the trap and the battle with Moredhel spellcasters described above.
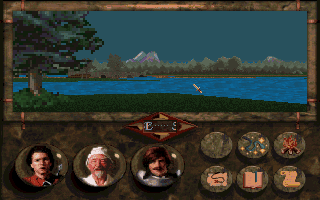 |
Looking at a river junction from the peninsula.
|
We finally reach a bridge and cross a river, then have a chest blow up in our faces and have to reload. (Patrus has the spell that detects traps, but I . . . somehow miss it until later. It's too hard to explain.) We move south along the riverbank to another bridge, encountering two Moredhel warriors and two pirates on the way, but again the battle seems a lot tougher than it ought to be.
We come to a bridge guarded by goblins. James tries to bluff past them by pretending to be Quegian mercenaries sent by Delekhan to guard the rift machine, but they attack us since we don't have the password. There are six of them, and two immediately swarm Patrus, so he can't get off a spell. The others pelt us with poisoned quarrels. James soon goes down, since on this map enemies are doing more damage with quarrels than they do with melee weapons during the rest of the game. The only way we win is through Patrus's Staff of Lightning. I have to use up an entire stack of 24 restoratives to get James away from "near-death."
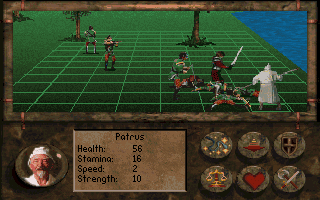 |
We cannot get a break.
|
We cross the bridge. I'll later determine that the river network divides the forest into four areas, and the southwest one, which I've just entered, is the largest, accounting for about 40% of the total map. I work my way northwest along the riverbank, around a couple of ridges, until the river ends in the northwest mountains. Along the way:
- Chests with more rations. Come on. What I really need—for the first time in this game—are buffing items.
- Three goblins. No major problems, but again I get poisoned. I'm down to three silverthorn antidotes.
- The game exploits my need for buffing items by luring me with two treasure chests that both explode, requiring another reload.
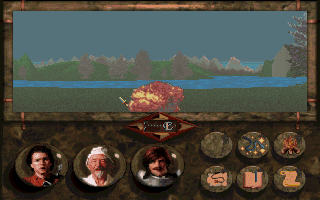 |
Some developer thought this was funny.
|
- A fairy chest has a "Grief of 1000 Night" scroll, some money, and 10 restoratives. An adjacent one has "The Unseen" spell, the "Mad God's Rage" spell, 4 doses of Naphtha, and 20 restoratives. Nice.
- Four Moredhel warriors and a spellcaster. Again, two of the warriors swarm Patrus, so I'm forced to take them out with melee attacks (which, as is par for the chapter, usually miss and hardly do any damage) and Patrus's Staff of Lightning, which has swiftly become the MVP of the chapter. When the battle ends, I only have 14 charges left, though. Patrus gets some Dragon Plate from the battle.
I follow the mountains west and south, where we soon encounter the western road leading out of the forest, but again the exit is blocked by too many figures to fight. We follow the road east and stop by an abandoned house, where we find a wooden chest with 24 "uses." I try using it, and it sends us flying up above the house, levitating in the air! That's a cool mechanic that I wouldn't have expected from a game of this era, until I remember that the engine was based on a flight simulator. In any event, if we move or even turn while in the air, we just fall back to the ground again, so I'm not sure what I'm supposed to use it for. Scouting? That would only help if there was a way to look down while in the air.
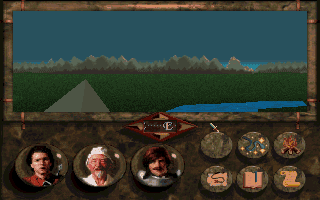 |
The view from a mountaintop.
|
In a nearby tree hollow are 33 rations. You've got to be kidding me.
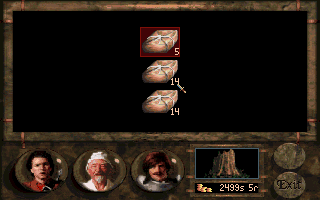 |
I give up.
|
Farther along the road, we meet 3 giant scorpions, and suddenly the characters don't suck so bad—James and Locklear kill the first two in one hit each—so perhaps the goblins and Moredhel on this map just have better weapons and armor. Two seconds later, we're attacked and slaughtered by 7 goblins, so my cockiness doesn't last long. It takes me three tries to kill them, and that's with Patrus and Locklear both knocked out and at near-death, so I waste a few more restoratives and then, since we have plenty of rations, rest until healed.
 |
With the scorpions, the game makes it really hard to tell the square that they actually occupy.
|
The road soon comes to an end, just like the northern one did, so I return west to the mountains, follow the border south, then east until we hit the road coming from the south (again, blocked by numerous enemies). Along the way:
- Some dirt piles and fairy chests give us some miscellaneous treasures.
- Six goblins attack and cost me another silverthorn antidote. I become convinced that the reason these battles are so much harder is because of equipment. Almost everyone has blessed or poisoned swords, enchanted armor of the highest type (Dragon Plate), and magic arrows. What temple is blessing Moredhel swords, I'd like to know.
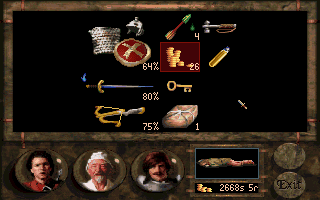 |
The loot on the body of a typical regular enemy in this area.
|
- I find 8 more silverthorn antidotes in a fairy chest, so I guess we're good.
- Near the southern road, a body with 5 rations next to a stump with 19 rations. The game is just screwing with me at this point.
- A house occupied by a sad man named Craig who says while exploring to the east, he ran into some kind of magic that weakened him and doubled his age. He needs his iron jaw trap back to be able to catch food to feed himself.
- A stump with 15 more rations.
A Moredhel NPC—the first NPC on the map so far—named Obkhar. He turns out to be one of the dissenters, Moredhel who oppose Delekhan, and he warns us about what we already know: that Delekhan is going to use the rift device to bring his army to the area and capture Sethanon. He says that we can find it "on a peninsula where the rivers meet, accessible only by passing through the illusion of a mountain created by the Six." We've been there! It was the first place we visited! I'm pretty sure there was no rift device.
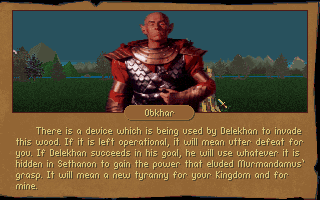 |
This is literally the only character in the game who looks halfway decent.
|
Anyway, Obkhar says that the rift gate can be disrupted by throwing something made from Waani, a foreign wood, through the gate. If anyone would have any Waani, he says, it would be the commander of the rear guard, Moraeulf, who is preparing his troops "near the southern tip of this wood." James suggests that we pose as Quegians—is that his only play?
I'm not sure what he means by "southern tip," as we're in the southern part of the map and there isn't really a "tip," but we continue east along the southern border, kill three Moredhel warriors, and then run into Moraeulf almost immediately. He's not even surrounded by any other Moredhel, just hanging out by himself near a hill. James puts his plan into motion, claiming that we're Quegians, recently ambushed, having come from the rift gate, where the mages in charge need "one of the parts they had stored away." He told us that it's hidden in a box in the southwest corner of the woods, with the password VICTORY.
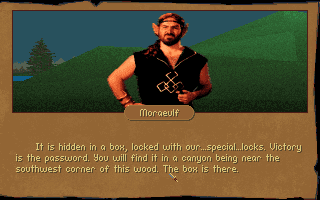 |
What a moron.
|
The game gives us no option to kill him, so we head back to the southwest, looking for any chests that we missed. We find it near two fairy chests we already opened. It seems impossible we missed it before, so I suspect it didn't spawn until we talked to Moraeulf.
The chest has 98 rations. And a note. It's signed by Phillip of the Dimwood, who found the device and worried that someone would steal it, so he brought it to his house to the north.
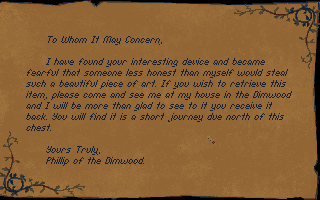 |
Nothing like telling the enemy exactly where they can find you.
|
The "house to the north" is guarded by 7 goblins, who we defeat mostly with "Evil Seek."
 |
| Aftermath. |
Squire Phillip runs out after our victory. He appears to be a member of Arutha's military, and he begs us to aid in the fight, "whether you've sworn an oath to the secret garrison at Sethanon or not." When James expresses confusion, instead of saying, "oops, I shouldn't have said that," Phillip presses on: "Has [Arutha] ever explained to you why there is an absolute ban on visitation to Sethanon? Can you recall any other occasion in which Prince Arutha or King Lyam have forbidden people to visit battle sites?" But he doesn't disclose the final mystery, just says that he needs to get a message to the garrison. He also knows Craig and recommends that we stay away from the eastern woods until some scouts can find out what's happening. Before we leave, he gives us something made of Waani, which the game says is a metal rather than a wood.
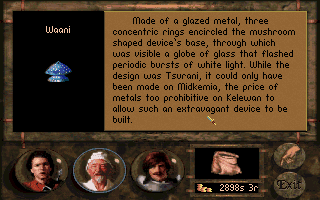 |
And for some reason a mushroom.
|
The house that Phillip occupied has—you guessed it—84 rations, along with lots of arrows, healing powders, restoratives, silverthorn poison and antidotes, plus a shovel, a hammer, and some bow strings. Clearly, the game wants us to be prepared for what's next.
 |
Crossing through the illusory mountain range.
|
At this point, we've explored virtually nothing of the eastern half of the map, but that's the type of thing I worry about with games I haven't been playing for half a year already. Instead, I retrace my steps back across the two bridges, through the illusory mountain barrier, and to the peninsula I already visited. I prepare myself for battle with buffing items, but there's nobody there. Apparently, the two spellcasters who gave me so much trouble earlier in the session were the final battle. Well, at least it was hard.
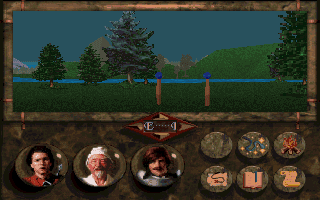 |
The "rift device."
|
The "rift device" turns out to be two stubby stakes with globes on top. It's possible it was here before and I just overlooked it. We walk up and click on it to activate it. The end-of-chapter narration takes over from here.
We toss the Waani through the posts, which causes an energy storm to burst out of the machine, creating a vortex that pulls in everything.
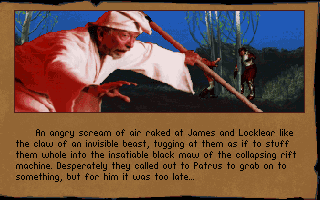 |
I know it's supposed to be serious, but I guffawed a bit here.
|
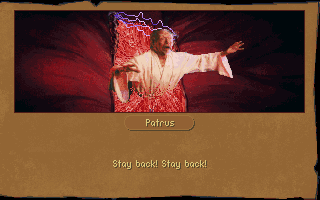 |
This actor did a decent job, I have to say.
|
Locklear and James grab onto a tree, but Patrus isn't near anything he can grab. He gets sucked through a red gateway. Afterwards, for reasons I don't quite understand, Locklear shouts, "Spellweavers!" The end. I'm not sure if something went horribly wrong or horribly right.
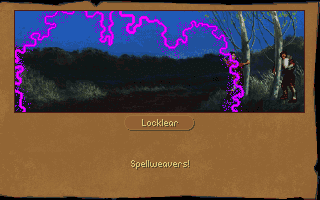 |
Whatever that means.
|
We'll pick up Chapter VIII: "Of Lands Afar" next time. In the meantime, you can tell me everything I missed on the east side of the map. Also, I'm curious how many of these things I might have encountered had I visited the forest in an earlier chapter.
Time so far: 65 hours


So the gargoyles are sacrificing Patrus as the False Prophet now?
ReplyDeleteThe screenshot, text and wizard role of Patrus reminded me a bit of the Gandalf-balrog scene in the (PJ) LotR (movies). Not sure the game event was inspired by the scene in the book, though.
DeleteHahaha! That was well played good sire or madam!
DeleteSo, yeah. Chapter VII. It's arguably the hardest chapter in the game, if only for the reasons that all the enemies are wearing and wielding the best, and you can't access shops, inns, nor temples. And also Patrus sucks, and James and Locklear are only as good as you've grinded them to be (which, in a first playthrough, probably isn't a ton).
ReplyDeleteMost of what you missed were more caches, often with unique spell scrolls. Probably the best time to actually explore the Dimwood pre-Chapter VII would've been either the end of 3 or sometime during 6. The combats are much easier (mostly just random scorpions) and you can have Owyn grab those spells instead of Patrus, who, due to being sucked into a red vortex of death, probably won't be casting any spells anytime soon.
You also missed running into Duke Martin somewhere on the east side of the map, though he mostly just gives you clues as to where the rift machine is (he ducked through it after following some moredhel, which explains why he didn't show up to the Northwarden battle). Obkhar is someone you missed earlier: he's the moredhel that Irmelyn asks Gorath to rescue way back in Chapter IV in that naphtha sidequest you skipped. I guess he got out on his own somehow.
The sidequest given by Craig (the only sidequest in the chapter) ends up opening the Fife & Laurel upon completion, which is nice, especially if you have a ton of cash, as it buys nearly anything (and anything you sell to a shop you can buy back copies, such as a Sword of Lims-Kragma, or possibly weapon/armor buffing items). The sidequest itself involves visiting the southeast section of the map and fighting some Pantathians (not as hard as the Pantathian fight of Chapter 6, but still pretty tough). It can also be completed as early as Chapter 3, and I was kind of hoping you'd wander into the Dimwood during that part of the game to do it and make Chapter 7 easier, but oh well.
Speaking of which, Chapter VII is kind of an interesting discussion point for metagaming upon repeat playthroughs. Since it's so tough, and you have no access to trainers nor temples to bless your equipment, you're stuck with what you've got when you start the chapter, including Patrus's rather pathetic spellbook compared to Owyn. One thing that's common to do upon repeat playthroughs is to gather all the spell scrolls that Patrus doesn't have in Chapter 3 and leave them in a chest near Northwarden or sell to the shop in Dencamp for him to pick up in Chapter 5. You can also find an extra Sword of Lims-Kragma in Chapter 6 (or give up the one Gorath has after he gets the Guarda Revanche) and leave it in a Dimwood chest near the north edge of the Dimwood for James/Locklear. If you want to be real cheeky, Gorath can backtrack to the Kingdom from the ruins before Elvandar, sell the Guarda Revanche at a weapons shop, buy it back three times, and leave two copies in the Dimwood.
Point is, there's some fun to be had metagaming the difficulty of Chapter VII, if you're OK with that kind of thinking. Obviously not an option for a first blind playthrough, but if you ever replay BaK you can have some fun with it.
Even without metagaming and leaving spells/weapons from one party to the other to find, exploring some of Dimwood earlier can make it easier, plus you can do it while having the spyglass. But I like that you can explore it at different chapters, it takes a bit off the linearity.
DeleteI like that enemy equipment plays such a role and really makes a difference. Too often in RPGs you get just buffed-up versions of enemies, like you have a level 2 skeleton early game, late game the designer just sets it to a level 20 skeleton, it's the same skeleton but it now has 800 hit points for no reason.
Selling the 'Guarda Revanche' for whatever reason is, of course, blasphemy.
DeleteThanks for giving me the rundown on the rest of the area and the alternate paths. But Patrus is dead? Was I just supposed to infer that from the image?
DeleteI guess they never outright say that he's dead, though Wnzrf naq Ybpxyrne frrz gb guvax fb ng gur ortvaavat bs Puncgre Avar.
DeleteMaybe shamhat is right, and he ends up on Britannia and renames himself Nystul; who knows?
I think you're supposed to infer that Patrus is dead based on the ending of Magician: Master, where destroying the rift machine almost kills Macros and Pug,and they were stronger Magicians and prepared for it
DeleteAnother good metagaming thing to do is to leave Thiful's Bird Migrations on James in Ch 2 so that Patrus gets access to it.
DeleteNice title. Can anyone explain the reason for the overabundance of rations in this chapter?
ReplyDelete"This is literally the only character in the game who looks halfway decent."
I guess playing a bald character with no need for a ridiculous hairpiece helps (you wouldn't happen to be biased there...;-)?), though the armour isn't too bad either.
FWIW, I found Moraeulf in the next screenshot to also be a halfway decent looking moron.
Maybe since this chapter gives no access to inns and temples, they wanted to make sure that underleveled/underequipped players could still rest a lot without starving?
DeleteIndeed, having a finite amount of rations means that players who rest too much after difficult battles, or just exploring, could end up going out of rations and it would make the game impossible to finish, and you'd have possibly to restart entirely if you didn't keep saves. So it's prudent to have too much. Chapters 8 & 9 are the same BTW.
DeleteIIRC I read somewhere that there were a lot less rations in the first release of the game and they added more in the second patch to make sure players don't get into a walking dead scenario. Guess they overdid it a bit, but it's better that way.
There's also fewer usable rations than it first appears, since some of them are spoiled or poisoned (all 98 of the rations in the VICTORY chest are poisoned, for example). In-universe it kinda makes sense for so many rations to be around, since theoretically you're wandering through an entire enemy *army* (or at least the rear guard) and pilfering from their supply lines.
DeleteI guess that Phillip of Dimwood poisoned the 98 rations. Makes sense.
DeleteWhat do you know, Busca, Chet is possibly adjusting his own hair piece in the rearview mirror before entering the university, Clark Kent style ;)
DeletePoor Patrus.
ReplyDeleteI hope he had life insurance.
The rift device really is underwhelming. I'm supposed to believe they sent an army through two sticks placed 2m apart?
ReplyDeleteThis would have been a place to use a unique asset (sprite or simple 3d model) for the device.
> This would have been a place to use a unique asset
DeleteLike the catapult from a few chapters back, which I found surprisingly impressive (for the era) on my first play-through a few years ago. Maybe the designers just ran out of energy/time/money by the time they got to this point of the game.
This becomes a plot point in the book: the rift machine is small because they had to smuggle it into the Dimwood without raising suspicions, and as a result they could only send moredhel through six at a time, which meant that a large bulk of the moredhel forces didn't make it through before it was destroyed.
DeleteI don't know whether that was the intention in the game, but Feist did his best to make it make sense afterward.
James suggests that we pose as Quegians—is that his only play?
ReplyDeleteThis reminds me of the webcomic Rusty & Co., about an adventuring party of monsters. The most articulate of the monsters is a mimic, whose plans always begin "First, we'll disguise ourselves as common, unassuming pieces a' furniture...."
Given how many times we've gotten through Moredhel lines by posing a "Quegian mercanaries," you'd think Delekhan would have put out a memo. "Attention: Real Quegian mercenaries wear puffy white shirts and colorful headbands."
DeleteChapter 8 was the one that made me ragequit. Hope your experience will be better.
ReplyDeleteIs it because of the crashing? See below.
DeleteNo, just the whole setup. As you noted, the game started to outstay its welcome two chapters ago, so being dropped in a whole new world without any directions and combat-gimped just made me lose the will to continue.
DeleteJust when Chapter 7 was getting me hyped for being "almost at the ending", Chapter 8 started up and gave me a long slog of combats to march through before I actually got to the ending. It's light on plot and very light on all of the delightful setting details and NPC interactions that so important to the game's balance everywhere else, and it comes at a point in the plot where you're very anxious to move it forward after all that tension and development in Chapter 7.
DeleteLooking for help from anyone who's overcome an issue where the game crashes every time you try to enter the southwest part of Chapter 8. I've tried various solutions offered online, including setting the DOSBox configuration to a 386 CPU and approaching only using the map, but nothing works.
ReplyDeleteAlternately, if anyone knows of any way to defeat the Wind Elementals without whatever I'm supposed to find in that area, I'll take a hint there, too.
Danger in Paradise.
DeleteNever mind. I got it.
DeleteYes, this was a tad frustrating. My terse notes from this part of the game:
Delete"Kill some Wind Elementals (but have to look up how to do it)."
Huh, never heard of that crash. I replayed it this year with the GOG version without issues, but I used Dosbox-Staging instead of plain Dosbox so maybe that's why. Glad you made it through.
DeleteI guess I benefited from the crash. I tried to take on the Wind Elementals, literally nothing would hurt them, and then I went and found one more thing. So it was pretty obvious at that point. If I had found the caches first, without knowing specifically that I was looking for something to beat an unbeatable foe, I might not have recognized the importance.
DeleteSorry--that comment doesn't make a lot of sense without knowing the order in which I did things. See next entry.
DeleteLooking forward to the next instalment (ROT13 for title guess) "Penfuvat gur cnegl".
DeleteWhen you said you felt like the game was decently wrapping up, I felt like BaK was about to pull an Ultima: Serpent Isle on you. Glad to see it seems to be being decent about it's play length at least.
ReplyDeleteSounds like a painful chapter. I wonder why it was scaled so hard. Juniper's metagaming discussion above is kinda interesting on it.
Obkhar says that Waani is "a word foreign to me", not "wood". It's supposed to be some kind of magic widget.
ReplyDeleteI completely missed, though, that James calls it a "wooden gem" later. I think they somehow managed to get confused by their own script.
Delete
ReplyDeleteHi Crpg Addict!
Maybe you might be interested:
Krondor Confidental Part I-XVII
https://www.nealhallford.com/t/games
Thanks! There's a lot of good material there for my final entry.
DeleteWelcome! :)
DeleteIirc Back in time when I played this, changing of the party came up as complete surprise. Prior to that I had carefully emptied everything from map that I managed to get my hands on without proceeding chapter thinking I will lose it all otherwise. Due to that other party didnt have much equipment to collect on the way.
ReplyDeleteThis entry weirdly solidified my understanding of why people adore and still talk about this game. As I mentioned before, I DID enjoy it even if I only made it a couple of chapters in before the difficulty combined with "hope you like your NEW WEAK CHARACTERS ahahaha!!!" took me out, but it never seemed hugely special beyond having a unique presentation and a decent amount of polish. But the chapter structure combined with the changing party members and the nature of the open world turns the entire game on replays into a metagame of figuring out how to set yourself up now for things to come in the future. At first, I wondered "why does this seem so appealing to me?" and eventually it hit me--this is exactly the appeal of games where you can import your characters from previous games, but even more fully than usual, as your character choices and equipment choices (even those made using other characters, if you leave caches for yourself) remain fully intact. Just replaying this one game is in some ways a miniature version of taking a party through the now-five-title Baldur's Gate 1&2 experience, but without the game taking away your money or equipment for balance purposes.
ReplyDelete