Friday, June 30, 2023

Serpent Isle: Aftermath

Usually when things are this bad, it's because I cast the "Armageddon" spell.
        
As this session begins, I have rarely felt a greater gulf between character and player. My Avatar has doubtless spent the intervening period on his knees, sifting through the debris left by his friends, cursing Batlin and screaming, "Why?!" at the heavens. As a player, I'm just glad to have the freedom not to have to micromanage a party and their never-full stomachs. 
   
Before we continue, some discussion on the last entry answered some obvious questions. No, you can't prevent your friends from being taken over by the Banes of Chaos by dismissing them from the party. If you try, when you reach the door to the chamber with the Wall of Light, Thoxa (the Monk of Xenka) appears and says that you can't enter the room without your companions. She teleports them to you, resurrecting them if necessary. If you dismiss them after you walk through the door, they still show up when you confront Batlin and shout "surround Batlin!"
       
"The overly-scripted plot requires it!"
       
Okay, but what if you kill them on the other side of the door, after Thoxa shows up? The game seems to get confused by this because it freezes several times during Batlin's ritual, but it otherwise doesn't stop the cut scene from proceeding as before. Even with their bodies scattered dead around the room, the portraits of Dupre, Iolo, and Shamino still appear, announcing their new names. The bodies remain on the floor after they depart.
   
You can save Boydon, but I couldn't think of an organic reason to dismiss him from the party before the big battle (or what we assumed would be a big battle), and like I said, I was looking forward to adventuring alone.
      
The Avatar is either talking to Dupre's body or himself.
      
But sure, my poor Avatar is a little devastated. More than anything, he wants to know what the hell just happened. So he circles the city again, re-reading books and scrolls, as I take notes to try to put it all together. This is what I come up with. I apologize that some of it repeats previous entries.
   
  • The island was known as the Lands of Danger and Despair in the original Ultima. It was jointly ruled by Shamino and the King of the White Dragon.
  • When the Hero from Another World defeated Mondain in Ultima, the resulting cataclysm somehow separated the Lands of Danger and Despair from the rest of the world. Shamino was off the island at the time, and the King of the White Dragon went mad.
  • The Great Earth Serpent spoke to the people and told them to build cities underground presumably to protect them from more cataclysms.
  • The forces of Order settled in Spinebreaker, Chaos in Skullcrusher, and Balance in Furnace. 
  • Each force worshiped a serpent that lived in the void. The Order serpent was symbolized by a blue serpent of ice. The Chaos serpent was symbolized by a red serpent of fire.
  • Each sect had its own Hierophant. Each had a great shrine. Each had three temples dedicated to the three principles of virtue held by that sect. Each had its own Wall of Lights. The blackrock serpents--I don't know where they came from--had something to do with opening the Walls of Lights.
  • Exodus somehow kidnapped the Great Earth Serpent.
  • Without balance, no one was left to mediate between Order and Chaos.
  • The two factions went to war.
  • Chaos killed the Great Hierophant of Balance and plundered Furnace.
  • Order got the upper hand and destroyed Chaos, maybe because Chaos had wasted some of its resources attacking Balance. Honestly, who attacks Balance?
  • Order kidnapped the Chaos Serpent from the void, split it into three forces, and imprisoned each in the three Temples of Order.
  • The results of the war were more volcanoes, earthquakes, storms, etc. 
  • The Order folks decided to flee the land by going through the Wall of Lights to the void, which is also some kind of nexus between worlds. Their fate after that is unknown.
     
I'm still confused where the serpents came from in the first place, whether they were around pre-Mondain, and why they waited until after Serpent Isle was sundered to speak to the people. Or did Lord British know about them back in the old days? Is that why he uses a serpent symbol?
   
The three Banes, possessing my three companions, announced themselves as Insanity, Anarchy, and Wantonness. I gather that these are the "dark sides" of the three principles of chaos--emotion, tolerance, and enthusiasm--when not balanced by their parallel virtues in Order.
   
I don't quite get where the three Banes were imprisoned, how Batlin got them out, or what happened to them after that. I went looking around the three temples again, but there were no obvious shattered gems or anything. Moreover, I don't understand how one of them got mixed up with Cantra, why Batlin killed her, or what happened to the Bane that possessed her after her death. I check my screen shots for the original conversation between Batlin and Cantra that I saw in the crystal ball:
    
  • Cantra: "Leave me alone, mage. I am but a little girl."
  • Batlin: "I know what thou art, Bane of Chaos. That body is but a shell that thou dost wear."
  • Cantra: "I can escape thee! My powers dwarf thine."
  • Batlin: "Thy powers have dwindled due to thine imprisonment. Thou art no match for me, now."
   
This suggests that somehow the Bane (I don't know which one) was freed from the associated temple, then possessed Cantra. Did Batlin free him in the first place? If so, did the other two also possess random people? If Batlin had a method of capturing them, why didn't he do so when he originally freed them (assuming it was he that did)?
   
We know now that there were three blackrock serpents. The Chaos and Order ones are curled and the Balance one is perfectly straight. The Chaos serpent faces to the right. This is the one that Batlin stole from Andral in Monitor. The Order serpent faces to the left. It's the one that the goblins gave me in Ultima Underworld II (or were supposed to). The lightning storm replaced it with Columna's stockings, and I'm not sure what happened to it after that. The Balance serpent somehow found its way into Silverpate's treasure hoard, from which I liberated it.
   
So here's the thing: Batlin had the Chaos serpent, but he was trying to open the Wall of Lights in the Great Shrine of Order. Is this why the spell went awry? Batlin mentioned during the ceremony that he had been "tricked." By who? Did the Banes (again, where did he have them?) mislead him? Why did Batlin think that by entering the void he would become immortal? Was that more lies from the Banes?
       
Batlin's serpent was facing the wrong way.
       
That's the best I can do for now. I would love your take unless I'm supposed to just PAFO.
   
Meanwhile, I've got lots to do. First up: Getting all my companions' stuff somewhere more accessible. To do that, I'm going to need some help. I return to the city's entrance, where there are several dead automatons, and I revive them with the "Create Automaton" spell. Twice during this process, I accidentally cast "Create Ammo," which is right above it in the spellbook, and thus leave piles of arrows on the floor. 
       
I also have to rest to restore spell points during this process. Since I don't have any party members to wake me up, I wake myself up.
       
The automatons aren't very good. They're all Level 1, with a strength of 20 and dexterity and intelligence of 10. They can gain experience, though I'm not sure if they can train to level up. I don't plan to keep them long, anyway. I take them back to the shrine and load them up with my departed allies' equipment. I should note here that I still don't know how to unlock the door south of the shrine, so I have to go around the long way. There's another locked door in a northern corridor. It's possible that I have the keys for both, but I've lost track of which keys I picked up where, and I'm certainly not trying all of them.
   
For some annoying reason, when my allies dropped all their stuff on the ground, all of their individual items came out of their backpacks. It thus takes an unnecessarily long time to clean everything up and assign it to the right automaton. One gets the money, one the potions, one the scrolls, and one the extra equipment. As we'll see, this careful division was a waste of time. I assume automatons are immune to cold, so I clad them in regular armor. 
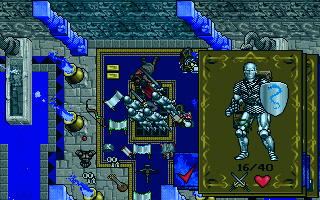
       
Loading up my new friends.
       
Another weird thing: All my party members had magic axes. The axes are all gone.
   
After getting everything sorted, we head out to the serpent gate in the center of town. In the gate hub, I dismiss the automatons, hoping they'll stay there and keep their stuff. Instead, they dump everything on the ground in one huge pile. I also remove a few things from my own backpack, which is getting quite full.
      
That's going to be fun to sort out later.
        
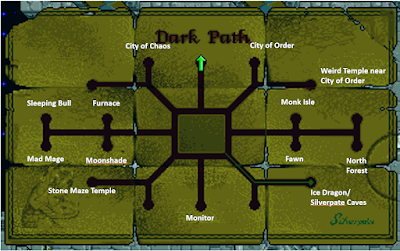
My next priority is to set about mapping where my new serpents' teeth (the ones I retrieved from Batlin's jaw) will take me. The first one I try takes me somewhere I know I've never been before--some dungeon with many locked doors and plaques that read things like "ENTRY FORBIDDEN" and "MIND TRANSFERENCE CHAMBER." A prominent blue serpent suggests that the area has something to do with Order. I head outside and find that I'm in the same mountain range as the City of Order.
   
The other gates lead to places I've already been, and when my explorations are done, this is what I have:
           
     
I have a few things on my "to do" list, principally getting the Gwani Horn, but I decide to hit the towns and see what's new. I start with Monk Isle, but the monks have nothing new to say. Cantra is still here, and still messed up ("I hunger for flesh!"), which makes no sense if the Bane has left her.
    
I then go to Monitor, and that's where things get messed up.
   
My first clue that something is wrong is that I get attacked by goblins the moment I leave the crematorium. What are they doing in the city? Weirder, they have a snow leopard with them. I kill them and move on into the city, where there are bodies and fires burning in the streets. The first live person I find is Harrna, and she has no new dialogue, as if nothing weird is going on.
   
In the tavern, Lucilla--beloved Lucilla--and Templar are dead on the ground. Lucilla's bedroom is on fire. Standarr is dead at the foot of the stairs to the training grounds. In the jail, Spektor and Marsten are dead in their cells. Krayg and Luther are dead by the town well. Caladin is dead in the park, and Cellia is dead in town hall. There are generic dead pikemen in other buildings. There are packs of goblins, wolves, leopards, and dogs everywhere (oddly, the wolves and leopards are mostly non-hostile and seem to be attacking the goblins).
        
If a cop showed up right now, this would look bad.
      
I run out the north gate and head for the Sleeping Bull. Bloodstains on the ground as I approach are a bad sign. Bears, wolves, and leopards roaming the grounds is another one. Argus is dead in the entry hall, Ensorcio by the back door, Devra behind the front desk, Byrin by the stairs to the basement.
   
But the arrogant Wilfred is alive and wandering around. He asks if I've taken vengeance on Batlin, and I say yes. He's happy about that and offers to join me. "What the #$@# happened here!" I want to ask, but the game gives no such dialogue options, and Wilfred isn't forthcoming. He speaks of Argus--dead literally feet from him--as if he's still alive.  
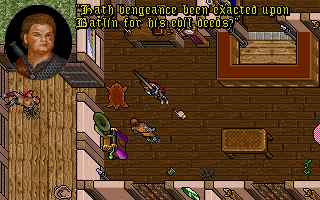
       
Priorities, man! Your brother and mother are both dead and rotting in your line of sight!
     
The Fellowship camp northeast of Fawn is deserted. As I enter Fawn, the guardsman approaches and gives the same warning about staying out of trouble, which is encouraging, until I see the bodies in the streets. Kylista is dead right at the city's entrance, Scot a few yards behind her, and Zulith in a nearby guard tower. Garth is dead in front of the palace, and Jendon and Delin inside. The streets are swarming with rats, and tentacle monsters patrol the canals. The only person I find alive is Ruggs, and I accidentally kill him when I go to talk to him; apparently, using the T)alk action when you have combat active causes you to attack the person. I guess "T" means T)arget, maybe.
      
A generic guardsman is alive but has no comment.
    
I'm almost afraid to try Moonshade, but I do. It has fared no better. The bodies of Gustacio and Bucia lie at the entrance to the academy. Gustacio's body has a note from Melino indicating a desire to get his hands on my Black Sword. Julia the ranger's body lies in Columna's house, and Columna is dead in her back yard. Flindo is dead by the docks, Frigidazzi in her house, Mosh and Pothos in the workshop, Hawk and Edrin in the tavern. Rocco and Topo are lying outside Stefano's house. Sadly, I don't find Filbercio among the dead. The various mages' automatons are alive, but none have anything to say. A few of the houses have gold chests that I don't remember, and in them are serpents' teeth. By the time I leave the city, I have only two empty spots in the jaw.
 
As with the other towns, bears and wolves and leopards roam the streets, though they're mostly non-hostile. I do have to kill a cluster of mongbats and some crocodiles.
     
Stefano is sleeping in his bed, and finally, I find someone who is willing to acknowledge that something has happened. "A terrible, glowing being came to Moonshade," he says, "and battled against all of the mages . . . 'Tis the end of the world, Gideon!" As if that isn't enough, Stefano is being pursued relentlessly by a Death Knight. It seems that Filbercio paid Stefano to steal a pair of Columna's stockings to use as some kind of leverage. Then a teleport storm whisked them away, which is why Filbercio sentenced Stefano to the Mountains of Freedom in the first place. When Columna found out that Stefano was behind the theft, she cast a curse to summon the Death Knight. Stefano has the blackrock serpent (which replaced the stockings), and he'll give it to me if I defeat the Death Knight. He joins himself to me and won't leave until the Knight is dealt with. He also gives me a serpent's tooth, which immediately gets lost in either my pouch or backpack. After trying to find it for a few minutes, I reload and make sure I have a free hand before talking to him again.
       
I probably wouldn't have done it, but I concede that I was thinking of it.
     
The Death Knight, looking like a regular guy, attacks immediately. He manages to kill Stefano before I kill him. I use the Hourglass of Fate to summon Thoxa, who resurrects the thief. I should have thought to do that for Ruggs. When I talk to Stefano, he gives me a key to his vault west of the city, where the blackrock serpent is. The key immediately gets lost in either my pouch or backpack.
       
Great! Would you mind repeating that for, uh, everybody?
      
I find Ducio the tinker alive in his hut to the north. He clarifies that the "glowing being" was Shamino. He says only himself, Torrissio, and Andrio survived. This is untrue not only because of Stefano but also because of Petra, the automaton. She says that her existence is pointless because Rocco is dead. Frell and Andrio, the students, are also alive--I'm glad Shamino didn't kill children. He says that Fedabilbo tried to stand up to Shamino, but he was turned to stone in the middle of the Seminarium. Andrio suggests that Torrissio's wand, the Philanderer's Friend, might help. 
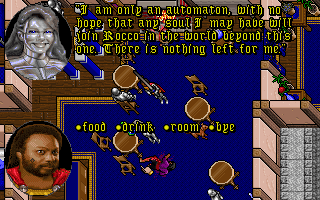
    
I love the Avatar's dialogue options. "Sorry to hear your life is over, Petra. Would you mind bringing me a cold pint and a slice of pie?"
     
Ernesto, a ranger, is alive in the winery. He calls Shamino the Anarch the MageLord of the city. "No longer must a Mage or Mundane be bound by petty rules," he says. "It is quite exciting!"
     
This is supposed to be one of Moonshade's defenders.
    
Torrissio is on the throne in the MageLord's house. I ask him about the magic wand that I gave back to him a few sessions ago, and he confuses me by saying that I have it and taking it back from me. I then remember that I reloaded and abandoned that entire session. Now I don't have the wand, though, and no dialogue option will get it back from him, so I have to reload to avoid killing him. 
     
I thought it was just a decorative statue.
    
Back at the Seminarium, I use the wand to restore Fedabilbo to life. He gives me a key that Captain Hawk gave to him; it supposedly opens Hawks' chest at the inn. While I'm talking to him, the game has me say, "I seek the Scroll of the Serpent, sir," which in fact I've never heard of. But he gives it to me, so I guess that'll be important at some point. 

Hawk's chest has a map and instructions to some hidden treasure, though given the coordinates that he provides, I think it might be a hollow tree that I already found and looted. 
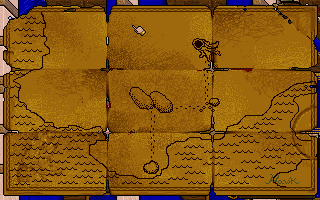
    
This might be the cache where I found the serpent crown.
      
I remembered some of what I discovered during this session from a previous play. I remembered that after the party members were possessed, some people died. I did not remember that it was this many. This is a pretty astonishing, depressing plot development, and I spent a lot of this session with my jaw open. I want to thank everyone for not ruining it with spoilers. 
   
But as many commenters have pointed out, it's clear that the game was rushed. It's insane that no one in Monitor, Fawn, or Sleeping Bull has any comment on the apocalypse. It's weird that those that do have a comment don't seem to blame me at all for--or even question me about--what my companions have done. And why are the monks just sitting on their islands doing nothing? Why can't they resurrect everyone?
       
I close this session by trying to find Stefano's vault and the blackrock serpent it supposedly contains. It takes me a while to find it because it's outside the city walls. And when I do find it, I'm not sure that I've found it, because all I find are some buildings with no doors that are completely empty. This makes me suspicious, as I had a problem with The Black Gate where items disappeared from buildings. Sure enough, I look up spoilers, and these buildings are supposed to have doors and furniture, and one of them is supposed to have the blackrock serpent.
         
Why does this keep happening to me?
      
I reload from the very beginning of this session and head right for the building, and alas, it's still in this same condition. I reload the oldest save that I have, from when I was exploring the Gwani village, head back to Moonshade, and the building is in the same condition. Fortunately, some commenters are able to help me acquire the serpent using an in-game cheat menu. I just hope this bug doesn't cascade into further problems.
      
When I started this game, all the information about Ophidian belief systems and virtues was just interesting backstory. All of a sudden, it has become central to my life. This, therefore, would seem to be a good time to dust off that Amulet of Balance and see what I can learn from it.
         
Time so far: 69 hours

Tuesday, June 27, 2023

Ambermoon: Dead Weight

 
The party arrives in a new town and immediately confronts a mystery.
          
In the last entry, I remarked that "by the time you finish a dungeon, you feel that you're a real expert on fighting that type of monster." A few hours later, I'm an expert on fighting stone golems. If I never see one of those bastards again, it will be too soon.
   
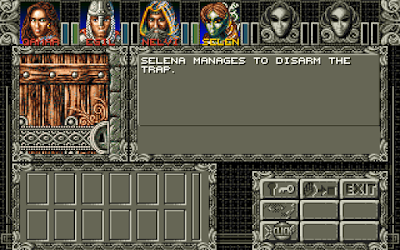
 When I closed the last session, I had just adopted Selena, the sylph thief, into my party. (Try saying "sylph thief" five times fast.) I started this session by getting her up to speed. She came with a good 40 learning points, so I spent 10 of them on "Attacking" (which got her to her maximum of 50 right away) and then spent the rest in the Thieves' Guild chambers on "Find Traps," "Lockpicking," and "Disarm Traps." That left me nothing for critical hits, but her maximum in that skill is only 2, and I figured (correctly) that she'd gain another level soon.
   
While in the guild, I remembered the Test of Thieves. It was a small area of the existing tavern cellar. The first test was simply getting through the locked and trapped entrance door. Inside, there were two doors that required keys to open, and those keys were behind more locked and trapped doors or in locked and trapped chests. There were some battles with giant spiders, cave lizards, and bandits, so it was less a Test of Thieves than a Test of Thieves and Their Friends. It also made me wonder how the guild chooses what members to sacrifice every time someone wants to take the test.
      
It makes you wonder how the guild keeps going if four of them have to die for every one person who takes the test.
       
As I had already guessed, picking locks is a separate thing from using lockpicks. Anyone can use lockpicks, and as long as the door or chest doesn't require a specific key, they always work. Using the "Lockpicking" skill, conversely, does not require a pick. Its success is entirely dependent on the thief's skill level. In this universe, I guess everyone has some base skill with lockpicks, but only thieves can do it without special tools.
   
You can try finding traps and picking locks multiple times, with no penalty, which makes me wonder if there's much utility in pumping up those statistics above a certain level. However, disarming traps has a chance of failing, damaging the party, so it's worth the investment. Selena failed at a couple of traps the first time during the test, but as far as I could tell, her failure had no effect on the party.
     
Selena gets it on the second try.
      
The centerpiece of the Test of Thieves was a box floating in a well, too far below the rim of the well for us to reach. We needed to somehow cause the well water to rise up to a level where we could reach it. The solution was, of course, found in the Aesopesque fable that I recounted a few entries ago, found in a book in the House of Healers. The game spoiled it a bit, though. First, there's a guy standing right outside the Test of Thieves who tells you that he once read an awesome story in the House of Healers. Second, there's a pile of sling stones in the room next to the well. I would have preferred that the game make the solution a bit more obtuse. What's particularly silly is that the pile of sling stones isn't large enough to raise the water to the requisite level. You have to leave the test, go to the store in Spannenberg, and buy about 100 more stones. (That is, unless I missed something in the test.) 
         
How about we just lower someone with a rope?
      
A key in the box opened the final door to a chamber with a final trapped-and-locked chest. It contained a complete set of gear for a thief, including:
   
  • Cloaking Cap: +2 armor, casts "Magical Shield" 3 times.
  • Swift Shoes: +2 armor, +10 speed, casts "Hurry" 5 times.
  • Shadow Belt: +8 armor, +10 dexterity, casts "Blind" 5 times.
  • Murderblade: +10 damage, +1 critical hits, casts "Poison" 5 times.
  • 10 lockpicks
  • 5 ropes
   
It also had 1000 gold, another Windpearl, a set of wishing coins, and a full set of excavation equipment (shovel, pickaxe, crowbar). I guess I could have sold those golden horseshoes.
   
With that accomplished, all I had left on my list was to finish collecting the ingredients for the Swamp Fever cure, and that meant going back to the Temple of Gala. I returned and went through the candle-lighting ritual that I recounted last time.
     
The temple took about three hours, its time bolstered somewhat by my own stubbornness. I had to defeat dozens of stone golems and two granite golems, easily the toughest enemies I've faced so far in the game. I swiftly learned to swallow my pride and sleep between every battle (fortunately, I had plenty of food), which usually meant waiting for half the day so that the game would let me sleep. I exhausted every single one of my healing and mana potions. 
        
Re-solving the entry puzzle.
            
The Temple was in a few major sections. Each section had a spinner in a central corridor, which just added to the level's frustration. Spinners in this game don't just spin you once. They spin you repeatedly at regular intervals of around 3 seconds. And you have to be very careful how you walk out of them because you can easily trigger them and get spun again. You want to move only directly--forward, backward, or strafe. Trying to turn takes too long. So the typical scenario is that I'm heading north along the corridor and suddenly get spun around so I'm facing east. I look at the compass and see that I'm facing east and realize that to get out of this situation, what I want to do is strafe to the . . Whoops! Too late. I just got spun again.
    
Anyway, the exit from the first area was blocked by a double set of doors requiring two stones called Tears of Gala. These were held by two granite golems, who I could only face after defeating several waves of stone golems first.
       
Solving a simple navigation puzzle.
     
Stone golems are capable of casting earth-based destruction spells like "Mud Sling" and "Rockfall." But those spells are almost a blessing next to their physical attacks. They get two per round and can hit for a dozen or so points each. A successful one-two punch could knock one of my character's health bars down by a third. They're immune to "Lame" and "Sleep." I don't know about any other status spells, but I didn't have any memorized. They could be damaged with damage spells, but my mage only had a limited number of those that he could cast. Most of the time, it came down to melee attacks.
   
Each party had between one and four stone golems. One was no problem. If I was lucky, I might not even have to sleep afterwards. I could usually defeat two, but I would need to rest immediately. Three required a lot of luck and all my spell power. Four required a lot of luck, all my spell power, and a good portion of my saved healing potions. I got a fair amount of use of the mage spell "Magical Arrow," which hits every enemy in a single row (though not for much) and "Winddevil," which does a reasonable amount of damage to one enemy. 
   
These guys are lined up perfect for a "Magic Arrow."
      
The Tears of Gala were both held by granite golems. They were easily as hard as three stone golems put together. Thankfully, there were only two of them, and they attacked individually. They're capable of casting "Earthquake" and "Earthslide," mass-damage spells with frankly terrifying animations.
    
I reloaded a lot in this dungeon, and frankly I could have made it easier on myself. My characters each gained about four levels in this dungeon alone; after one or two of them, I could have taken a break, got some more training, and spent some of my tens of thousands of gold pieces on more potions. Instead, I stubbornly fought, died, and reloaded. At one point, I found a chest with a ridiculous number of spell scrolls--something like 97 scrolls of 24 different types of spells. Some of the spells might have been useful, but I wanted to take the time to study them, not learn them under pressure just to defeat the enemies in this particular dungeon, so I loaded up my party and saved them for later.
      
A granite golem's terrifying spell sends a rolling wall of earth at us.
      
The one good thing about the dungeon is that there were a number of glowing balls of light that increased the attributes of anyone who touched them. There was no way to tell what attribute would be increased, so I gave most of them to Qamara. I think I accidentally had Egil or Nelvin as the active character when touching one or two.
    
The dungeon culminated in a large room full of teleporters. They moved around the room, so there was no way to map them. Each one took me to a small room with a return teleporter and yet another battle with one, two, or three stone golems. I was out of potions by this time and reloading more than ever when things didn't go my way. It turns out that one of the teleporters went to the exit, but I had no way of knowing which one it was. As I entered each teleporter, it vanished from the room, reducing the selection. I found the one I wanted when there were only three left.
     
This was a lot of trouble for a little water.
     
The exit took us to an outdoor area with a small pond--the Spring of Life. Walking into it completely healed our wounds. I filled up one of the vials that I had bought at the alchemist's shop. Back in the dungeon, a lever opened the way back to the beginning, and we ran out, leaving a few stone golems somewhere behind us.
   
We returned to Spannenberg and Father Anthony, who brewed a Swamp Fever antidote. We took it to the sick child. She swallowed it and recovered so fast that her icon hopped out of bed and started jumping rope after a few seconds. Her father gave me a Windpearl as a reward, and the girl gave me a Ring of Sobek. The ring, identified at the sage's, turns out to bestow 99 "Swimming" ability (Sobek is the god of the sea, apparently). 
      
The final Spannenberg quest.
     
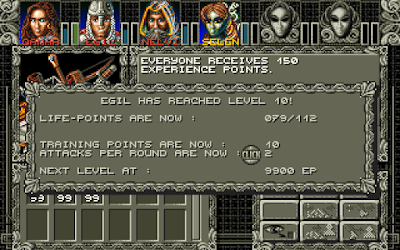
It was about 02:30 in the morning when I finished the Temple of Gala. I had to be up at 06:30 the next morning. That's how much I wanted to get the dungeon finished. When I exited, Qamara was Level 15, Egil and Nelvin Level 10, and Selena Level 7. They all had a fair number of training points available. I took Selena to the chief bandit to get her 2 points of "Critical Hits," then spent some more on the other thief skills. Egil still hasn't maximized "Attacking," but he's getting close. More important, he finally got two attacks per round on his last level-up.
      
Hallelujah!
     
With that, I had solved all of the quests on the island. The only ones left in my log required me to visit the nearby isle of Burnville. I spent some time wondering how to get there. The obvious answer--a ship--was unavailable because the shipwright was in Burnville.
         
The less-obvious answer.
      
I had just acquired a ring that allowed me to swim, of course, but it only works on one character. Some experimentation shows that the ring allows for swimming in still water immediately around the island, but not choppier water in the open ocean. There is a channel of still water that goes south from Spannenberg's island to Burnville's island, where there's a raft on a dock. After failing to come up with another solution, I shrugged, jumped in the water, let Egil, Nelvin, and Selena die, swam to Burnville, grabbed the raft, took it back to Spannenberg, went to the House of Healing, and resurrected everyone.
      
They all made this same joke.
      
With everyone alive and hale again, we jumped on the raft and returned to Burnville. Only a small part of the island, with the dock, was accessible by raft; the rest was surrounded by mountains or deep water. Walking off the dock, we found ourselves in a small valley with a dungeon entrance at the east end. There was no other way to go, so we entered.
       
Qamara makes a grim ride on the raft.
     
Almost immediately, we were attacked by orcs. It's a measure of how much we've grown since the last orc battle that we didn't need "Lame" or any other spells. After clearing out the area, we found a locked door. It opened with the key that the healer in Spannenberg had given us.
        
A few hours ago, this battle would have been unwinnable. Now, it's nothing.
        
On the other side of the door, we met the orcs' leader, a fire giant. He attacked by himself. Despite some fire-based spells, he wasn't very hard. I cast a couple of damage spells on him but mostly took care of him with melee attacks. Egil's second attack per round is really helping out; it's like having another party member. Qamara hit Level 16 after the battle. The fire giant had a nearby treasure chest with a small amount of gold and a bunch of regular weapons and armor--"the property of the victims of the fire giant," the game said. I had better stuff than anything in the chest. 
       
I wouldn't say that we're particularly "sensible."
      
The dungeon disgorged us into a desert. From there, we hunted our way around the island until we found Burnville. The town's name was prescient, it seems: "As you enter the town, you immediately see there must have been huge fires," the game said. "Almost all the houses are badly damaged and everything is black with soot. There seems to be no one around and it is deathly still."
        
Curiously, everything looks okay from the outside.
        
We hunted around town. At most of the buildings and shops, the game noted that we "searched through all the rooms, calling, but the house is apparently desolate and empty." It did let us enter one building, however--a large House of Healing in the center of town. The building was empty like the others, but on a bookcase, we found a diary and a key.
      
No idea what the key is for.
      
The diary was written by Sabine, the daughter of the healer from Spannneberg, who we'd come to town to find. In it, she recounted how a huge red dragon appeared one day and blasted the city with fire. It then spoke to the denizens, demanding that they subject themselves as slaves to his master, the Master of Fire. Sabine thought that this Master of Fire must inhabit "the old tower of black magicians." The dragon gave the populace one week to agree to this servitude, then left. The townspeople took a vote and decided to resist. When the dragon returned and heard their answers, he summoned other dragons. They gathered the townspeople in nets and flew off with them. Sabine hid and was left behind. She tried to go to Spannenberg for help, but the fire giant--also apparently in the service of this Fire Master, who he called "Luminor"--blocked her passage through the tunnels. With no other recourse, she vowed to go to the tower alone and try to free her people from Luminor.
       
Searching around town.
       
There was one other visitable place in Burnville. Through a secret door, we found a ladder down to Nalven's Magic School. Nalven, a recluse, was completely unaware what had happened above him, though he was concerned that no pupils had arrived in recent weeks. He offered spell scrolls and training on reading and using magic. I invested some training points for Nelvin. 
    
Why, yes, I do!
     
I guess the next step is to find this tower and see if I can free the people. I enjoyed both parts of this session. The stone golems were a bit too numerous, but they were authentically challenging and thus satisfying to beat. I liked the way that the game set up the mystery of Burnville; exploring the deserted town was authentically creepy.
         
Before my next entry, I want to sit down and make a list of all the spells that I'm going to consider essential so I make sure I leave enough training points for them. Then I'll look over my existing scrolls and see which ones I want to try to memorize. I'm happy to take non-spoilery suggestions on this.
   
Time so far: 33 hours
  

Sunday, June 25, 2023

Game 493: Dungeons & Dragons: Warriors of the Eternal Sun (1992)

 
"Of" the Eternal Sun?! We just found out about the Eternal Sun!
        
Dungeons & Dragons: Warriors of the Eternal Sun
United States
Westwood Associates (developer); SEGA (publisher)
Released 1992 for SEGA Genesis
Date Started: 18 June 2023
     
It's been a while since we had a console game. When I took a break from Serpent Isle, I went looking for something that would contrast well with it, and Warriors of the Eternal Sun came up in a random roll. As I researched it, a lot of things recommended it for play. First, it's a Dungeons & Dragons title, and D&D usually serves up satisfactory RPGs. Second, I believe it's the first console-exclusive D&D title since the two Intellivision games in 1982 and 1983, neither of which really had anything to do with D&D. Thus, it's the first authentic console-exclusive D&D
   
Third, the developer was Westwood Associates, a studio that got a rocky start (BattleTech: The Crescent Hawk's Inception, Hillsfar) and always seemed to be in the shadow of Strategic Simulations, their frequent employer and publisher. But by the early 1990s, the company had matured and was responsible for the first two Eye of the Beholder games (1991). Warriors comes on the heels of those successes, right as the company was being acquired by Virgin Games, just before it published Lands of Lore (1993).
   
What can men do against such reckless hate?
     
Warriors was one of two games that Westwood wrote for consoles in 1992; the second was Dungeons & Dragons: Order of the Griffon for the TurboGrafx-16. I'm relying on Wikipedia's information that the former was released in July and the latter in October to designate Warriors as the first. Both games are set in the Mystara campaign setting, appearing here for the first time in a video game. Westwood would have had to get permission from SSI to use the D&D license; you can almost picture SSI saying, "Whatever--we're not using that setting anyway."
        
Apparently, the duke doesn't have a single mage capable of "Fireball."
    
Those with more detailed knowledge of D&D will correct me if I'm wrong, but my understanding is that the Mystara setting is used as the default setting for the Dungeons & Dragons Basic Set starting in 1981, although at that time, it was just called "the Known World"; it didn't take the name "Mystara" until 1991. My further understanding is that Mystara is a fairly generic fantasy world, much like Greyhawk or the Forgotten Realms, and that it uses the standard D&D classes, spells, and many of the same monsters. I understand the races are a bit different (one blog I consulted said there are a lot more "furry races") and there are no gods--only very powerful beings with godlike powers.
   
But perhaps the most important difference is that Mystara has an inside and an outside. The world is hollow, with a red sun (the Eternal Sun of the title) at the center, and the denizens of the two sides don't typically interact. The inside has become sort of a giant reservation for creatures threatened with extinction on the more volatile outer world. 
        
Things look grim for the castle denizens.
       
It is in this Hollow World that Warriors takes place. The four player characters are liegemen of a Duke Hector Barrick, who has been fighting a losing year-long war against goblins. (I imagine they either have some help or goblins are a lot stronger in Mystara.) Just as the goblins are about to overrun the castle and the defenders are all expecting to die, the ground rumbles, there's a flash, and the castle's occupants suddenly find themselves in a pleasant valley with a horizon that slopes upward on all sides. They have been transported to the inside of Mystara through methods unexplained and for reasons unknown. I assume they came from the outside of Mystara, but I suppose it's possible that the castle was transported from one of the other D&D settings; the manual doesn't specify.
      
I'm glad it didn't land on top of an orphanage.
      
The game uses Basic edition rules, which combine races and classes. You can be a cleric, fighter, magic-user, or thief--all of which are human--or a dwarf, elf, or halfling. Judging by what the manual says, dwarves are basically just fighters, elves are fighter/magic users, and halflings are fighter/thieves. Any choice can be male or female. I don't know what levels are achievable in this game, but all the demi-human classes have level caps, so I decided to throw ambiguity out the window and create a four-character human party. And for no particular reason, I decided to make them a sisterhood.
  
Character creation also has you choose a color, from three selections, one of them for some reason represented twice. You can roll the standard set of D&D attributes as many times as you want. The rolls are favorable; I never saw anything less than 9. At the same time, 18s are extremely rare. Characters have two active slots to which they can assign weapons, spells, or active abilities. Nobody starts with more than two.
     
Creating my final character.
             
My party is:
   
  • Vanya, a fighter. She comes with a sword and shield.
  • Sarah, a cleric. She comes with a mace and a "Turn Undead" spell.
  • Zoqui, a magic-user. She comes with a staff and a "Magic Missile" spell.
  • Mezzy, a thief. She comes with a dagger and a "Hide" ability.
      
After character creation, the party is tasked by Duke Barrick with exploring the new environment and finding allies. Gameplay begins in an axonometric interface inside the duke's castle. The character icons and movement looks like it must have been inspired by Ultima VI. You control the lead character, and the others fan out behind her, moving as necessary to get around obstacles. The directional pad controls movement; the "A" button performs most actions and acknowledges messages. The "Start" button brings up a more extensive menu, which mercifully includes an "Options" selection where you can a) turn off music independently of the rest of the sound, and b) change the hit point bars to actual numbers.
    
The duke sends us off.
        
Controls are, of course, a lot simpler since we're using a three-button controller rather than a keyboard. NPCs speak automatically when you near them, and they only speak one line. If you belly up to a store counter, it's automatically assumed that you want to shop there. The castle has an armor shop, a weapon shop, a magic shop, a caravan master, a temple, and a number of other buildings where NPCs work and live.
      
I don't know what this is about.
    
From the NPCs wandering around, I got:
   
  • We all wish you well in your journeys.
  • Some spells don't work in this new land.
  • The beastmen have a camp to the northwest.
  • The beastmen come from the north.
  • I've heard a rumor there's a monster in the city's dungeon.
          
I thought he meant some city out in the game world. I guess he meant this city.
       
  • Good luck on your journeys!
  • The beastmen bear ancient markings.
  • Beware of the swamps.
  • Equip yourself well before venturing forth.
  • Praise the maker that we have been spared.
  • The duke is a kind and patient man.
  • There are dinosaurs in the swamps.
     
There's also a graveyard, with four open graves prepared for the party members. That was considerate. Each of the stones in the graveyard has a punny rhyming epitaph worthy of any Ultima game.
        
  • They came, they saw, they died.
  • Here lies Todd. He angered a god.
  • He's dead Jim.
  • Eric was given to roam; all that's left is this stone.
  • He boasted of his might. But death was his plight.
  • This dwarf was much feared till he tripped on his beard.
  • A thief that did fink has become quite extinct.
  • He quenched his thirst but the water was cursed.
  • Many ladies he cherished, and now he has perished.
  • Here lies Louise. A thief shouldn't sneeze.
  • Here lies Dwight. A knight he did smite.
  • His wandering eyes soon caused his demise.
  • Here lies poor Mel. He cast the wrong spell.
    
The graveyard makes me wonder about the specific nature of scooping up the castle and dropping it into the Hollow World, like how much soil and bedrock was included in the teleportation, and why it didn't just leave a big mess when it was deposited in its new location.
     
I guess the duke doesn't have much confidence in us.
              
After exploring the castle, we head outside. An overworld map shows us the entire valley. The castle seems to be situated on a large island surrounded by rivers. I head east for a little while and face my first overland battle against a giant leech. More on combat in a bit, but suffice to say for now that it's like Gold Box combat but with non-discrete movement. We get damaged by this one creature, and it occurs to me that we don't have any armor, so we head back to the castle to buy some (they only have leather). We also rest, which takes about two days. I hope there's no time limit on the main quest.
       
Our first battle.
     
In return expeditions outside, I keep doing well against individual monsters but am slaughtered by larger groups. And I know there are dungeons somewhere, but I can't find any. I want to show at least one dungeon shot before I end the first entry, so I take a look at the hint book to see where the closest one is--and it turns out there are dungeons right in the castle. In fact, there are three in the duke's throne room alone. I don't know how you're supposed to find them. The entrances are hidden by the oblique view and just look like walls.
         
The game world--or at least part of it.
      
If you didn't know that the company behind Warriors had also made Eye of the Beholder, you could probably figure it out from the dungeon exploration. Unlike in the outdoors, the movement in dungeons is by discrete tiles. The graphics are very similar, and combat works similarly to any Dungeon Master clone, albeit with simplified controls. You switch between characters with the "C" button and use the readied weapons, abilities, or spells, with the "A" and "B" buttons. (Using either "A" or "B" automatically switches you to the next character after the attack executes. I'm not yet sure if that's a benefit or a drawback.) I haven't experimented enough to try it yet, but I suspect you could do the "combat waltz" if the room was big enough. You can't pause except to enter the menu, so you have to be relatively quick with your fingers.
      
The first dungeon battle.
      
The first "dank dungeon" has just a few cells, one with a beastman and one with a giant rat. The message window gives atmospheric messages as you explore, which I like. The entire dungeon is only 6 x 6, and with worm tunnels. I tested for secret doors even though I didn't find any obvious "holes," and I found one. It led to a small cell with a pair of Gauntlets of Ogre Power. A random party member picks up any items you find, but you can transfer them later. Lesson learned: secret areas may be found even when they would create "razor walls." 
        
That must have required some real dexterity! Wait. I haven't made the precursor joke yet.
         
Other dungeons may get bigger, but an automap keeps track of your progress, so you don't have to map. I'm curious if there will be any Dungeon Master-like puzzles. The other two "dungeons" in the throne room are just guard towers that lead to nothing.
   
Now that I know what to look for, I find a third dungeon (technically, a tower) in the cemetery. "This tower has been converted to a crypt," a message reads as we enter. It is quite short--a few rooms housing the "noble family of Sperry Glen" and "the remains of King Offord." A secret door leads to the remains of a fighter who has a +1 chain mail. In a final tower in the northeast corner of the castle, I found a +1 sword, which I give to my thief.  
       
The game is funny if you add the phrase "with chopsticks" after all its messages.
        
Thus slightly better equipped, we set out again, avoiding for now the beastmen's camp to the northwest. I don't know whether the "world" map shown in the game is the entire gameworld or just the starting area, but either way, I print it so I can explore it systematically and take notes. It looks like the only way off the starting island is a bridge to the southwest. I decide to start there and work counter-clockwise around the island, which I'm hoping will ensure that I'm at least Level 2 before I hit the beastmen again. 
    
I don't find anything in the wilderness except combats with boars, giant leeches, panthers, flying vipers, giant racers (a kind of snake from the graphic) and beastmen. In the turn-based combat, characters and enemies go in an order of initiative that must have some random element to it. During their turns, characters can move (not indefinitely, but I'm not sure how to figure out the maximum), attack, cast a spell, or use a skill or item. The one major difference from the Gold Box is that there's no consideration of personal space. Characters can walk and stand on top of each other to get into melee range. 
   
Injuries and death are handled at the temple for no fee, which is handy. Walking back there can be kind of annoying. I assume that's quintuply true when I'm exploring the more remote parts of the valley. 
      
For a second, I could have been playing Serpent Isle.
        
It becomes clear that my mage is going to take forever to level up, so after my fighter and cleric hit Level 2, I give the beastmen camp another try. By slowly approaching from the west, I manage to encounter them in an advantageous arrangement where I can attack a couple of the beastmen close to me while the others take several rounds to even get into range. The strategy works, and I'm able to wipe out the beastmen. It helps that their THACO is pretty bad.
       
Would assume "hairy" was a defining trait for "beastmen."
     
With nothing else to hold my interest on the central island, I cross the bridge to the mainland. Halfway across, the game tells me that my mage and thief are nervous about crossing. I assume that's because they're still Level 1. I explore gingerly and run into parties of hill giants and grizzly bears. I'm able to kill a couple of them individually, getting my thief to Level 2 and my fighter and cleric to Level 3. But a large party soon tears us to pieces, and I suffer my first full-party death.
         
Who are "the townspeople" in this scenario?
Why can you resurrect us individually but not collectively?
      
I reload and return to town to find that the shops have new items. I'm able to buy better armor for my fighter and cleric and missile weapons for everyone. That should open up some more combat tactics. I'm looking forward to the mage getting more than one pathetic magic missile.
       
The weapons shop offers a lot more than when we landed.
      
So far, it's all right. I like the backstory and setting, and it makes as good use of D&D mechanics as any console game we've seen so far. Like any console game of the era, those mechanics are simplified from what you'd expect on a PC, but that doesn't mean it's bad. I've come to realize that console gaming can offer a relaxed experience that only requires half your attention in a way that a good PC game doesn't--the difference, perhaps, between watching a movie and reading a book.
   
Alternating between Serpent Isle and Ambermoon has been getting a little tiresome, so I'm going to mix things up with this third one for a bit. Any bets on which I finish first?
   
Time so far: 3 hours