Tuesday, May 31, 2022

Revisiting: The Return of Werdna: The Fourth Wizardry Scenario (1987)


The Return of Werdna: The Fourth Wizardry Scenario
United States
Sir-Tech (developer and publisher)
Released 1987 for Apple II; 1988 for PC-88, PC-98, and DOS; 1989 for FM-7 and Sharp X1
Date Started: 23 May 2022
      
In sharp contrast to a lot of things I do in life, I rarely look back on my CRPG coverage with regret. My style has evolved over time, of course, and there are probably no games from the early period that I would cover in exactly the same way, but there are also not very many that I look back on and think, "Wow, you screwed that up." But there are three games that do make me say that. The first is The Bard's Tale II, which was destined for a bad review anyway, but not for the reasons that I gave. I should have given it a chance to disappoint me with its actual failures rather than yell at it over something that I just didn't understand. The second is Dungeon Master; I simply didn't understand its sub-genre well enough when I played it. That's true of any landmark game I play for the first time, but it stings more with Dungeon Master since I grew so much fonder of it later on. The last is, of course, The Return of Werdna.
     
Any deliberately challenging game requires patience. When I played Werdna in 2010, I hadn't yet settled on my now-common approach of alternating two games at a time. If a game threw up a wall, I either had to surmount it or quit. These days, I just need to let things cool off for a few days before re-engaging. I'm not going to quit without winning it this time.
    
Despite the ad, I'm not aware that a Tandy 1000 version of the game existed.
      
Twelve years ago, upon abandoning the game, I saw some spoilers about upcoming levels and puzzles. I don't have the faintest memory of them today. I barely remember the parts I actually played. Thus, this experience will be almost new. I toyed with making it completely new by playing the Apple II version, but the AppleWin emulator makes save states too easy and tempting. By playing the DOS version, I keep myself honest.
   
Werdna is the last Wizardry game to hold to the idea that what we've been playing since 1981 have not been sequels to the first Wizardry, but rather the 1980s version of DLCs. The second and third scenarios even required the original Wizardry to run. Development started shortly after Legacy of Llylgamyn (1983). Wizardry co-creator Andrew Greenberg had checked out by this time, and his partner Robert Woodhead had decamped for Japan. Development responsibilities were thus given to Roe R. Adams III, who had built a solid reputation as a reviewer, playtester, and manual writer for both Sir-Tech and Origin. Adams was already famous as the first person to have won Sierra's nigh-impossible Time Zone (1982), and in Jimmy Maher's words, "he wanted to write a Wizardry for people just as hardcore as he was." Development took a famously long time; Sir-Tech originally announced it for the 1984 holiday season, and yet it wasn't actually in stores until 1987.
      
Werdna is still nursing a grudge.
     
Gamers' reactions at the time were identical to my reaction in 2010: they couldn't believe that after so many years, they were getting the same wireframe graphics. Unlike perhaps many other gamers, however, I've come to regret that initial reaction. As I've said before and will undoubtedly say again, graphics don't excite me until they get good enough to truly immerse me, and that is well past the age of the simple textures that we got in The Bard's Tale or Might and Magic. Until then, at least the black corridors and white lines of Wizardry don't try to fool you into thinking they're anything but abstractions. They even establish a certain foreboding atmosphere. Here, although I doubt that was the intention, they also serve the purpose of highlighting the mechanical changes that make Werdna so different from the rest of the series.
     
My map of Level 10.
     
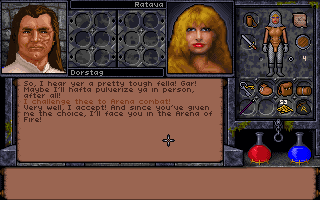
The plot of the game is encapsulated in Sir-Tech's ads: "You're Werdna. You're alive. You want revenge." Adams's well-written backstory portrays Werdna as a sorcerer absolutely obsessed with an ancient amulet that was left behind when a demented mage opened a portal to another dimension, allowing a group of gods to cross through and visit destruction on the world. Something then drove the gods back through the portal. The amulet was found the next day, hanging around the neck of a statue. No one knew if the gods had left it behind deliberately or accidentally, or if it had somehow been involved in sending the gods home. Werdna spent years researching how to acquire the artifact safely, then finally mounted his expedition--only to find that King Trebor had snatched the artifact only hours earlier. Werdna ambushed Trebor in his throne room with a paralysis spell, stole the amulet, and retreated to his 10-level dungeon beneath Trebor's castle. The events of the first Wizardry followed, and this is how Werdna describes the final encounter:
      
I was entertaining a vampire lord and several of his liegemen when the door to my study was kicked open and in burst a wide-eyed team of adventurers bent on my destruction. I was too far away from the amulet to reach it in time, and my pentagram for summoning monster allies was on the other side of the room. I quickly gathered up my energy and began to cast the awesome TILTOWAIT spell, while my guests rushed forward to my defense. Just as I unleashed the hellish fireball, I saw the vampire lord dissolved by a ZILWAN spell! So they had a high mage also. What! They still stood! That's one very tough team. Another TILTOWAIT should finish them, though. Before I could cast it, the leader of the team stepped in under my outstretched arms and delivered a critical hit to me. As my consciousness faded, I heard one of his men say, "Hawkwind, I have the amulet. Trebor will be pleased" . . . Then darkness claimed me and I slept as unto death.
        
It's almost flattering to be this feared.
        
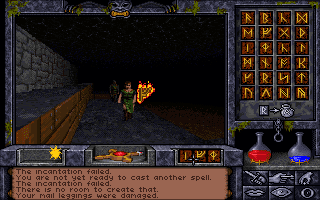
As the game begins, I awaken on a stone slab on the 10th level of the dungeon, determined to climb my way to the surface. I'm pretty weak. Werdna starts at Level 0 with 1 hit point, no equipment, and no spells. All his attributes are 8. There's a "keys" statistic that indicates how many keypresses you have to finish the game before you lose by default. The number--one million--seems to be generous, but you have to keep in mind that every keypress counts, even invalid ones or uses of the SPACE bar to speed up messages in combat. When you cast a spell and type the spell name, every letter in the name of the spell counts against you.
            
Fortunately, Werdna won't be handling most of the combats himself. Every level has a pentagram that serves several purposes. First, it's the only way to level up--there's no experience and traditional leveling in this game. The moment I step into the pentagram in the first room, all of Werdna's statistics go up by 1, his hit points go up by 9, he rises to Level 1, and he gets 9 Level 1 mage spell slots.
               
The second thing the Pentagram does is to allow Werdna to summon groups of allies. The Level 1 pentagram lets me summon three groups from among the following: bubbly slimes, creeping coins, dinks, fuzzballs, Garian raiders, gas clouds, kobolds, Level 1 mages, Level 1 priests, orcs, skeletons, and zombies. Each set of allies has various strengths and weaknesses, and I start taking note of them right away. For my first group, I summon mages, priests, and Garian raiders.
          
I still want to know what "Garian" means.
     
Visiting the pentagram saves the game, but it also restocks all of the monsters on the level, so you want to do it sparingly. You can actually save anywhere (for the first time in Wizardry history), but with the same penalty. 
 
The first major challenge of this difficult game is finding the way out of the 2 x 2 room that you start in. There's a secret door, but you need to reveal secret doors with the Level 1 priest spell MILWA or you can't use them. Werdna doesn't have Level 1 priest spells to start, so the only way out is to summon Level 1 priests as one of your ally groups. However, summoned allies don't cast spells except in combat, so you then have to wander around until you find a combat and then hope one of the priests chooses to cast MILWA during the combat (you can't control what they cast).
    
Is this just really bad spelling?
   
My first combat is with a fighter named Blue Sonja. This is an obvious play on "Red Sonja," but it might not be Sir-Tech's play. Apparently, Sir-Tech asked players of the original Wizardry to send their character disks to the company so they could use the characters to stock the halls of Werdna; thus, many of the adventurers I will encounter actually defeated Werdna back on their home systems.
   
In combat, you thus only get to specify Werdna's actions. I just attack for this combat--one enemy isn't enough to worry me. Sure enough, my summoned allies make short work of him and one of the clerics does cast MILWA. 

At the end of the combat, I have a chance to loot Blue Sonja's corpse, but here's another way that the game sticks it to you. Werdna is a mage and thus bound by a mage's equipment restrictions. He can't swing a sword or wear armor, so almost all the equipment you find during the game is wasted. Enemies do occasionally have items a mage can use, including potions.
     
This is just one big middle finger to a mage.
       
The rest of Level 10 isn't that hard to navigate. The level is organized as a series of concentric boxes, each with one or two secret doors that take me to the next ring. Stepping through three of these doors gives me a warning followed by a combat with a "guardian" apparently tasked with keeping Werdna in the dungeon.
      
A warning before meeting a guardian.
       
The harder combats are when we encounter an entire party of enemies, as I do in the third room. This is the time for mass damage spells, and all I have is KATINO ("Sleep"), which hardly ever works.
     
Between fixed and random combats, I encounter enemies every five or six steps--sometimes individual, sometimes entire parties. Names go by: Growler, a good fighter; Brightblade, a good samurai; Borehimhere, a neutral fighter; Alannon, a good bishop; Ironbar, a good fighter; Capsin, a good bishop; Darkforce, an evil bishop; Pig-I-Iggy, a good priest. It annoys me a bit that I don't get experience from any of these many battles.
     
Taking on a party of do-gooders.
      
I have to return frequently to the summoning pentagram. Slowly, I learn the monsters' strengths and weaknesses. Creeping coins seem like a good choice. They have a breath attack that reliably damages enemies for at least one point, and they can summon more of themselves. Gas clouds cast some useful mage spells, as do (of course) mages. Dinks and fuzzballs are useless. Orcs, kobolds, and skeletons seem roughly interchangeable, but zombies seem better than all of them, as they have a paralysis attack.
 
Unfortunately, the game has something worse than regular enemies. The ghost of Lord Trebor wanders the levels looking for Werdna. You get several warning messages before it happens, but if he gets into your space, you die instantly. There's no defense; the only way to avoid it is to keep moving. Even worse, Trebor advances in real time, not in turns based on your own movement. Trebor doesn't manage to get me on this level--it's too open--but I'm sure he'll be a problem later on. 
      
My name is spelt with stars between the letters, not ellipses!
        
I finally break through the fourth door and into the corridor that rings the entire level. "I am the guardian of the pyramid of entrapment," the final guardian intones, so I guess from the shape of this level, we're supposed to get the idea of a pyramid slowly tapering off towards the top. The guardian is the toughest of the lot, and he finishes off my priests with a MOLITO (mass damage) spell, but we still manage to kill him. He drops a black candle and a jeweled amulet, the latter of which casts DUMAPIC when I use it. This tells me that I've mapped the entire level upside down. Fortunately, it's not a complicated level to redraw.
      
Knowing your precise position is vital in this game.
     
One step beyond the guardian is the ladder to Level 9, but the corridor continues all the way around the pyramid. I figure I have to explore it. Fortunately, I don't encounter any enemies all the way to the end and back. At the end, I find a "Bloodstone." I vaguely remember finding stones in this game and having to protect them from thieves.
    
I return and head up the stairs to Level 9. "The Catacombs--where the dead live again!" a message announces at the beginning.
       
That's the opposite of what "catacombs" are supposed to be.
      
Since the level has just spawned, I don't see any harm in taking a save. The corridor I'm in is a long north-south hallway with two-square rooms branching off of both sides every 10 feet. It's not until the seventh room on the left that I find the summoning pentagram; fortunately, I only fight one combat along the way.
       
Monsters available on Level 9.
     
The pentagram offers an entirely new selection of monsters; I decide to try witches, poltergeists, and Level 3 priests. Werdna is promoted to Level 2. His hit points go up to 20, his attributes to 10, and he gets 9 second-level mage spell slots. I used about 3,500 of my million moves on the first level, which I suppose isn't so bad. 
    
The character as I begin Level 9.
       
This is a slow-going game, which means it's going to be a slow-going series of entries. I probably won't try to cover more than a single level per session. As you comment, please remember that I want to play this one completely blind. Err on the side of using ROT-13 for spoilers and try not to say anything at all about levels I haven't already explored.
    
Time so far: 3 hours

Monday, May 30, 2022

BRIEF: Lords of Doom (1990)

       
Lords of Doom
Germany
Attic Entertainment Software (developer); Starbyte (publisher)
Released in 1990 for DOS, Amiga, Atari ST, and Commodore 64
Rejected for: No experience, leveling, or other character development
    
Games taken in isolation are often less impressive than games taken as a group, and such is the case with the output of Hans‑Jürgen Brändle and Guido Henkel at attic Entertainment Software in the late 1980s and early 1990s. In the space of only three years, they went from the all-text Die Drachen von Laas (1991 but written in 1989) to the graphic RPG Spirit of Adventure (1991) to the much more complex graphic RPG Realms of Arkania: Blade of Destiny (1992). Between those first two titles is this game, the graphic adventure Lords of Doom. It's not an RPG, and in my opinion not a great adventure game, but you can see them developing the type of interface and programming skills that they'll need for Spirit. Overall, the four games show remarkable growth in a short period of time.
     
The attic team advertises their next game in their current one.
     
Doom takes place in a hamlet called Vertic, which has suddenly become flooded with zombies, werewolves, mummies, and vampires. Two survivors of the apocalypse, Sharon McGillis and Charlie Jackson, team up to find the hideouts of the monsters' leaders--the four titular Lords of Doom--and slay them. Early in their adventure, they find the address of famed vampire hunter Abraham Van Halen (yes, the game is full of this type of humor). A few minutes after he's wired from the telegraph office, he shows up with his assistant, Susan Leicester, to lend his aid.
   
Although the four characters form a team, each navigates the city independently; there's no way to move them together or engage in combat together. None of them have attributes or particular strengths or weaknesses, so I guess the only reason to have four of them is that you need all of the inventory slots for the few dozen items that you have to find and use. I also read on a web site that only Charlie can defeat the Lord of the Werewolves and only Abraham can defeat the Lord of the Vampires, but I don't know why in either case.
   
The core of gameplay is exploring the streets and shops of Vertic, clicking on cabinets and drawers to find items, and assembling weapons and other puzzle-solving tools. As you explore, you're occasionally attacked by a random mummy, vampire, werewolf, or zombie, and you need to use whatever weapons you have to kill them by clicking on the chosen weapon, clicking on the "use" icon, and furiously clicking on the monster. You get no feedback during this combat, so I don't know how often your clicks are necessary nor how many the game registers. Eventually, the monster crumbles to ash. If you kill the "lord" monsters, then none of the lesser ones appear in the game thereafter.
        
Fighting a random monster . . .

. . . and eventually killing one.
     
Killing the four lords involves special tools. For instance, the Lord of the Mummies must be killed with a flamethrower, as a book in the library relates. Flamethrowers are not often to be found in sleepy hamlets, so you have to assemble one by looting a nursery for a hose and hose head, then assembling them, then using a pipe ripped from a sink in a barber shop to siphon gas from a car. That sentence perfectly describes why I am an RPG addict and not an adventure game addict. I suppose I would have eventually figured it out just by clicking on things at random. Then again, maybe not--I thought the car was just a part of the background. 
       
What's the ignition source? What is putting the gas under pressure? How is the operator's hand not burned if the trigger is so close to the outlet?
       
The Lord of the Vampires has to be killed with a wooden crossbow bolt (which you have to make starting with an axe and some logs). Killing the Lord of the Werewolves involves melting down some silver jewelry to make a silver bullet. I'm not sure how the Lord of the Zombies is killed.
         
Well, that's convenient. Now, where do I melt it?
     
In addition to the core puzzles, hunger, thirst, and health are a logistical challenge. You can find food and drink in various locations (restaurant, theater, kitchen of the mansion), and there are even a couple of places, like a broken hydrant, where I think sources of sustenance are endless. You restore health by eating or drinking when your food and water meters are already at maximum.
   
The authors put their humor on display throughout the proceedings, and one thing I like about the game is that a lot of things give you messages when you click on them, just like Quest for Glory. But my absolute favorite part of the game is that the developers included a "boss key" to quickly hide the game if someone walks into your office behind you, only instead of simulating a return to DOS (like most games with "boss keys" do), the key combo actually quits you out of the game without saving and dumps you to DOS. Talk about a Sophie's choice.
    
I nearly got caught in the trap of playing this one to the end despite its lack of RPG credentials. It doesn't seem very big, and I suspect it could be won in just a couple of hours. But I got to a point where I just couldn't find anything, particularly the Lords of Doom. Maps online show places that I can't figure out how to get to. I marked a lot of my squares "instant death" because the game warns you not to try going in that direction and then kills the character if you do. Maybe there's a way to "unlock" these squares that I'm not figuring out. 
      
My map of Lords of Doom.
    
Anyway, I shouldn't allow myself to get sucked into games after I've rejected them. I leave this one for The Adventurer's Guild and move forward.


Friday, May 27, 2022

Ultima Underworld II: Enchantment!

 
The floor of the arena, after I'm done experimenting with spells.
          
Based on your revelations that I could have found a fraznium circlet near the vault and thus entered the more valuable of the two vaults on my first trip, I decide to take the time to re-do the Scintillus Academy test. I find a few new wands and scrolls along the way, so the trip isn't entirely wasted.
   
At the top of the academy, I find the fraznium circlet behind a secret door in one of the instructors' rooms and use it to get through the bars of light. At first, it looks like the room beyond is empty, but I click around frantically and finally uncover a hidden floor panel that spills out several VAS and TYM stones, a jeweled Axe of Fire Doom (I wish I'd put points into axes), and Wine of Restoration.
   
Back in Britannia, I take the only available gem facet I haven't already taken. I end up in a stone chamber with a bedroll, a fire, and some bottles of water. An old man soon appears, confused as to where I came from. He wants to know if "Dorstag's mages" sent me to kill him. He begs for his life and offers to serve me as a slave if I spare him. When I say I'm not the sort of person who keeps slaves, he misinterprets and attacks me. After one blow, he surrenders and again pledges himself as my slave.
   
The old man gives his name as "Krilner the Coward," apparently having sworn an oath to always give that name after he lost his first duel. Upon questioning, he reveals that his world is controlled by the Guardian and that we are in its most notorious prison, the Pits of Carnage. Here, warriors prove their prowess in one of four arenas, but even just walking around can get you killed if you don't have your weapon at the ready. The law of the land is that anyone can challenge anyone else at any time. The mightiest warrior is named Dorstag, and he carries a blackrock gem.
 
Up the corridor, in a small room, a man named Jospur arranges arena battles for gold. Each battle costs 5 gold, and I can fight two, three, four, or five foes for increasing returns depending on how many I beat. This seems like a perfect opportunity to test out some spells, so I start fighting two at a time. Throughout the rest of this session, I take opportunities where I can find them to test exploration spells. This is what I can report. Keep in mind that the cost of a spell is its level times three.

Level 1

  • Create Food (IN MANI YLEM): Good in an emergency. Food is pretty plentiful otherwise.
  • Detect Traps (WIS JUS): Couldn't find a place to test this. Traps are essentially a non-issue in this game.
  • Light (IN LOR): Essential; I've had it going since the beginning of the game. Replaced only by "Daylight," which I just got.
  • Luck (BET OR IN): If it ever made a detectable difference, it was many levels ago.
  • Magic Arrow (ORT JUX): Weak, difficult to target. It takes three times as many of these spells as sword blows (at my current skill with both) to kill the same enemy. It would be a good early spell against enemies that stand still for some reason.
  • Resist Blows (BET IN SANCT): Stood still in the arena against two foes with the spell inactive and died in 46 seconds. Retried with the spell active and only lasted 26. The spell had worn off at around 20 seconds. Tried again and lasted 30. It seems to me that other rolls of the die swiftly overwhelm the protective value of the spell, which lasts a dismally short time anyway.
  • UUS DES POR: This undocumented spell is found in Nystul's lab. I guess it bounces you off the ground if you jump from a height. I can see a couple of places it might have been useful in the Scintillus Academy if I'd timed it right. I had forgotten about it. 
  • BET WIS EX: The ice caves mentioned this spell, which locates you on the map. I haven't encountered any situation in which the map hasn't worked without it.
    
Level 2
 
  • Cause Fear (QUAS CORP): This spell worked nicely in the arena against two opponents. It made one flee for about 20 seconds while I took care of the other one. 
  • Deadly Seeker (ORT WIS JUX): I don't know. This one has the same targeting issues as "Magic Arrow." It supposedly "tracks down and strikes an opponent," but I don't see a lot of tracking down or striking. It mostly seems to fizzle away.
  • Jump (UUS POR): You saw it in action last time. Useful for a few occasions in which you have to jump extra high.
  • Lesser Heal (IN BET MANI): Perhaps the most cast spell in my repertoire. Heals about an average of 7 hit points for 6 mana points.
  • Rune of Flame (IN FLAM JUX): Sets up a flame trap that explodes when enemies approach. It's nice to have a trap option, but it doesn't seem to do much damage. It's hard to target unless enemies are in a narrow corridor.
      
I cast a flame rune for this warrior to walk into.
    
  • Slow Fall (REL DES POR): Fall damage is so light and infrequent that I don't think it makes sense to take time to line up the runes. 
     
Level 3
 
  • Bleeding (JUX MANI): I'd definitely been overlooking this one. Three castings were enough to kill one fighter, although three is all I can cast before I have to rest. It doesn't require space between the caster and target the way that "Magic Missile" does. I'm sure I've had the runes all game, too.
  • Cure Poison (AN NOX): Poison wears away on its own. I only bother to cure it if I have a leech or potion. 
  • Dispel Rune (AN JUX ORT): I've only encountered one rune in this game, and when I did, I forgot about the spell.
    
But I didn't forget the second time (recounted below)!
     
  • Lightning (ORT GRAV): I could kill a fighter in about four hits with this if I could hit them. The problem, as with many missile spells, is that you can't use it if enemies are too close. Thus, you have to lead them down long corridors where they'll approach along predictable paths.
  • Night Vision (QUAS LOR): Illuminates a greater area than "Light" but makes everything black and white. No longer necessary after you get "Daylight."
  • Speed (REL TYM POR): I found the extra speed essentially undetectable. I can't think of a reason I'd need to be faster anyway.
  • Water Walk (YLEM POR): Has been helpful throughout the game on water areas.
  • AN KAL CORP: I picked this up in Killorn Keep. It promises to turn undead, but I never used it.
    
Level 4
   
  • Flameproof (SANCT FLAM): I didn't have a chance to use it this session, but I can think of several times it would have come in handy, assuming it works against lava, too.
  • Heal (IN MANI): A slightly better deal than "Lesser Heal," healing an average of around 17 hit points for 12 mana points.
  • Missile Protection (GRAV SANCT POR): I dismissed this spell until it ultimately helped me in a big way--see below.
  • Poison Weapons (NOX JUX YLEM): Wow, did this one work nice! When I cast it in the arena, I was able to kill enemies in two blows compared to the five or six it was taking before the spell. This is definitely becoming part of my repertoire.
  • Remove Trap (AN JUX): If ever find a trap, I'll tell you.
  • Study Monster (WIS MANI): Basically just tells you current enemy hit points. I resent having to cast a spell to see this.
     
Like I'm going to fumble around with this in combat.
     
  • IN AN FLAM: I find this literally as I'm testing spells. There's a chamber across the way from where Jospur takes your money from the arena fights. The corpse of a mage is here, along with a note that gives the formula for the spell. I cast it a few times in the arena. It makes sparkles in the air, but I never saw any signs that it was directly damaging anyone.
   
Level 5
 
  • Fireball (POR FLAM): Nice when you can get it to target appropriately. I was able to kill arena fighters in three shots. But I had to spend a lot of time running around to line up the shots, and half the time I lost my mana without being able to shoot the spell.
  • Levitate (UUS HUR POR): Nice for certain areas--areas that I've already passed.
  • Name Enchantment (ORT WIS YLEM): Identifies items. I had pumped up my "Lore" skill hoping to not have to waste spell points on this. But I'm not wasting any more points on that skill. 
  • Open (EX YLEM): The mage's solution to not having lockpicking ability. Vital.
  • Smite Undead (AN CORP MANI): I didn't face any undead this trip; I'm still waiting to try it.
  • Telekinesis (ORT POR YLEM): I've only found one or two puzzles where flipping something from a distance was useful.
  • REL SANCT YLEM: An awesome "Repair" spell that I picked up in the prison tower. Since I achieved a level high enough to cast it, I've been casting it every time my equipment gets down to "Worn." Completely obviates the "Repair" skill. 

I repair my Chain Cowl of Valor, which has taken a beating in these arena battles.
        
Level 6
 
  • Charm (QUAS REL WIS):  Doesn't seem to work for me. I tried it on the fighters in the arena, and they didn't stop attacking. I suppose it might be useful for buying and selling, but honestly, the economy isn't tight enough to require that kind of fine-tuning.
  • Daylight (VAS IN LORE): Awesome. This game is so dark until you get this spell.
      
"Daylight" makes such a difference that I want to re-explore previous places.
      
  • Gate Travel (VAS REL POR): I guess it's an easy way to warp back to a place. It occurs to me you could use it as a navigation spell by tossing one of the moonstones, say, across a gap or up onto a ledge, then casting it. I haven't seen a reason to do this yet, but I'll look for one.
  • Greater Heal (VAS IN MANI): Fully restores health for 18 spell points, a much better deal than the other two healing spells. You have to let your health get really low to maximize its value.
  • Invisibility (VAS SANCT LOR): A great stealth spell for a non-stealth game. I tried it in combat, and it didn't seem to interrupt the enemies in their charge towards me. I'll look for an opportunity to use it elsewhere.
  • Paralyze (AN EX POR): Helped a bit in the arena. It doesn't last very long, though, and its high casting cost means I can only cast it a couple of times.
    
I "paralyze" one warrior so I can focus on the other.
     
  • Sheet Lightning (VAS ORT GRAV): I don't know. It backfired on me more than the others, and when it cast, it didn't seem to do much of anything. Maybe I need to experiment more.

The Level 7 spells backfired a lot, so I decided to save them for later. At the end of the first six levels, I still don't feel like I have a reliable offensive spell except maybe "Bleeding." I figure my best bet to defeat five enemies in the arena (the ultimate achievement) is to cast "Poison Weapons" immediately, then save the rest for "Greater Heal." But "Poison Weapons" works so well that I don't even need to cast "Greater Heal" once. In only about 45 seconds, I manage to kill five foes at once.

Enemies in the arena drop weapons, food, gold, and other items when they die, so by the time I'm done with my battles, the entire arena floor is covered with excess stuff. I've left piles of gold on Jospur's floor because I don't have the room for all my winnings. I gained 8 skill points during the process but still haven't hit Level 14. 
     
The boons of experimentation.
     
I continue exploring the Pits of Carnage. The place seems to be in the same world as the Scintillus Academy, as the NPCs mention the place. There are lower levels to the Pits of Carnage, but no one goes down there unless they get desperate. A mage named Zogith tells me that another mage named Zoria is the second-best fighter in the place. "She strikes down her foes in the Arena with fire and lightning before they can get close enough to lay a finger on her." He also mentions a powerful mage named Zoranthus who lives in the lower levels. Zogith wants me to bring him a FLAM rune. I think I found two in the Academy, but I stupidly put them both in my rune bag, and you can't take them out once they're in there.
      
The random fighters in the area give me a lot more respect.
      
There are rats and slimes in the hallways that I have to kill. In a forgotten corner, amidst some bones, I find a Small Shield of Additional Protection. This is my current kit:
     
  • Chain Cowl of Valor
  • Quiver (no idea why)
  • Jeweled Sword of Major Damage
  • Small Shield of Additional Protection
  • Chain gauntlets
  • Mail Leggings of Additional Protection
  • Chain boots
  • Silver Ring of Protection
        
In the northwest corner, I find the chambers of Dorstag. He clearly wants to challenge me in combat, but apparently the person that issues the challenge is at a disadvantage because the other person gets to choose the arena. When I finally challenge him, he chooses the Arena of Fire.
  
Doh! He got me.
    
There are four arenas--Fire, Water, Air, Earth. I've been doing most of my practicing in Earth because it's just a bare floor. The Arena of Fire has a central platform surrounded by small pillars, all sticking out of a lake of lava. This arena favors Dorstag because he's a deadly shot with a crossbow, and there's limited room to run and dodge around.
   
I try a number of strategies against Dorstag to no avail. My spell power keeps running out long before I do any serious damage to him; he hits too hard and fast for me to keep up with healing; and I already exhausted most of my healing potions elsewhere. I finally defeat him by cheesing the interface a bit. The central platform has a couple of tiers, and enemies in this game have trouble walking up steps. I force him to a lower step and then back off. He starts shooting his crossbow at me, but I cast "Missile Protection." It takes me a couple of castings, but eventually he runs out of bolts and then just stands there stupidly. I then pump all the charges from a couple of wands into him.
   
Dorstag is a tough character.
     
He dies from a "Fireball," and I watch helplessly as a lot of presumably good equipment explodes out of his body and over the edge of the platform into the lava. Fortunately, the blackrock gem he carries doesn't sink. I rest and then go retrieve it with a "Flameproof" spell.
   
I find Zaria's quarters in the southwest. It's protected by a FLAM rune, so I have a reason to use "Dispel Rune." I figured Zaria would be one of Bishop's resistance fighters, but she doesn't have much to offer. She's happy I killed Dorstag and she's eager to take his place as the ruler of the Arena. I tell her I won't be around long enough for her to worry about me, and she doesn't challenge me. 
   
There are a lot of other warriors, mages, even a goblin on the level, but I find no one else with a specific name or unique dialog. I also don't find an obvious "place of power" at which to use Altara's staff. Thus, I head down the stairs into the dungeons beneath the arenas. It opens into a set of rough-hewn caverns where I have to kill about 50 bats. Other caverns have mongbats and gazers. In the midst of massacring some headless, I finally hit Level 14.
        
I just love the way bats die.
      
I stumble upon an earth golem behind a secret door. He's guarding a treasure chest with a Potion of Regain Mana, a few runes (alas, no FLAM), several gems, a jeweled shield, and a potion I can't identify. A room with some giant spiders has a Wand of Mending.
     
I suppose I should be trying to defeat them with spells. Some mage I am.
     
I come to a room in which pits are disappearing and appearing at intervals. Very weirdly, there's a group of peaceful skeletons hanging around on a ledge on the edge of the room. I study the pattern and make my way safely across to the exit. The exit leads to a bridge that crosses high above the original cavern that I entered, then enters a new set of tunnels. A sign warns me to go back.
   
What are you guys even doing?
   
I proceed and find a familiar sight: a pentagram with the slaughtered remains of some idiot summoner. Runes are scattered everywhere, but I don't need any. Surprisingly, Altara's staff doesn't work here. 
     
This exact scene seems to come up in a lot of worlds.
       
I find a Dungeon Master-like puzzle in a set of rooms connected by portcullises, some open, some closed. A series of buttons opens some and closes others. I have to find my way to the southeast exit. This takes me to the multi-colored chambers of Zoranthus. He knows at once that I'm from another world, and he has heard of Britannia. He laments his world's takeover by the Guardian, but he has been spending his time on other pursuits, including trapping a djinn in a magic container. He gives me the step-by-step instructions for doing this, which I imagine is going to become necessary at some point. But he also says he'll give me the djinn he's trapped in exchange for the Sceptre of the Deadly Seeker, which one of his colleagues lost somewhere.
       
Zoranthus's lair is weirdly unfurnished, but he's taken the time to paint each wall and floor panel.
    
I don't know if I'll find the Sceptre in this world or another one, so I continue on. A demon called a "hordling" blocks the way to the lower level, so I kill him and go down to Level 3 of the Pits of Carnage.
     
These guys look like they should be harder than they are.
     
I soon find a puzzle room that I defeat by simply casting "Open" on the locked portcullises. There's a scepter in here, but I don't know if it's The Sceptre. Further along, I meet a reaper--a sinister black-colored one--which I kill with some difficulty. To get to a passage behind him, I first have to break up some rocks with a pick, then cast "Jump." The chamber has some decent loot, including a Leather Cap of Missile Protection, a Potion of Iron Flesh, Gauntlets of Major Toughness (these replace my non-magical chain gauntlets), a VAS rune, and a Wand of Magic Arrow. 
       
To clarify: I don't mean that all black things are automatically "sinister." It's just an evil-looking color for a reaper because reapers are made out of wood and wood isn't normally black.
       
I kill a couple more headless in a nearby corridor and I'm suddenly Level 15. I have no idea what gave me so many points since the last level. The reaper? 
   
I come to a door. An etched brick out front says: "Blog House and Rocks." Behind the door is a friendly troll named Blog who collects rocks. He wants to play a game called "white-rock-black-rock" in which the goal is to pick the white rock. The rocks aren't hidden or anything. You just have to not forget the rules in the time it takes you to pick up either a white rock or a black rock. The game goes on forever, and I have to tell Blog no, I don't want to play anymore, several times before I can extricate myself from the conversation. The only other dialogue option I have with Blog is that I need help getting a blackrock gem, but of course I don't. I guess maybe he'll help you fight against Dorstag?
     
This got old quickly.
    
I kill a few regular reapers before finding myself back at the stairs. I'm about to leave, but I check the map and see a secret area behind a dead-end passage that I didn't search thoroughly enough. I return, "Open" the door, and enter. There's a hostile ghost just beyond, which delights me because I've been holding on to a Wand of Smite Undead forever. One charge takes care of him. Beyond him are two skeletons, another ghost, and a lich, all of which I manage to kill by leading them down the corridor one at a time. The lich has some wands and potions and such, plus a FLAM rune.
        
This is an unpleasant-looking place.
     
I return to Zoranthus, but the scepter I found isn't the one he wants. I return to the upper level and give the FLAM rune to Zogith. In gratitude, he teaches me a new spell called "Valor" (QUAS AN CORP). I'll have to test it out. I also figure out the room that links to the Guardian--the pit beneath the trap door where he tosses prisoners. I use Altara's staff there and sever his connection. 
        
I guess some prisoners don't survive the landing.
      
On the way out of here, I decide to save time by leaping off the bridge that goes across the entrance cavern. Something amazing happens: I manage to leap onto the back of a bat. I didn't even know that was possible. Unfortunately, the bat doesn't fly all around the room with the Avatar balancing on its torso, which would have been awesome. It just freezes in place. I can't swing my sword to kill it at this angle, so I eventually just drop off. Still, this is the beginning of the era of fun, unanticipated stuff made possible by certain game engines.

With 28 (?!) skill points to spend, I'm anxious to get back to Britannia for some training. But a final discovery gives me an idea for how I can spend some of the cash I've been accumulating. Just before I left the second level of the Pits of Carnage, I found a Wand of Daylight with 4 charges. I've been casting "Daylight" all along, but it's an expensive spell that sometimes backfires. I'd love to be able to cast it from a wand for a while. I take it to Merzan in Killorn Keep and pay not nearly all my gold and gems to add 15 more charges to the wand.
       
I find a good "money sink." The Wand of Mending would be another good one to give this treatment.
     
Ironically, I then visit Altara, who teaches the spell "Enchantment" (VAS ORT YLEM), which recharges wands and adds new enchantments to unenchanted items. I also spend some of my skill points with her on "Casting" and "Mana." I immediately try "Enchantment" and turn my regular plate boots into Plate Boots of Minor Toughness. That's a pretty useful spell. Too bad all my stuff is enchanted now.
 
One thing I forgot to mention is that the Guardian continued to taunt me in dreams every fifth or sixth time I rested. His taunts suggest that his forces are rolling across Britannia while we're trapped in the castle. 
       
Does anyone know who any of those people are?
    
I enjoyed the Pits of Carnage. The second two levels felt like a real dungeon for the first time since the beginning of the game--a place where you don't know what's around each corner, you face a variety of monsters, and every nook might hold a new treasure. The first Underworld was basically eight levels of such exploration, and I've missed it ever since starting the sequel. 

All my fiddling with the spell system has confirmed for me that I don't really like it. The interface is the primary problem. It takes too long to transition to the rune screen, and once there, it takes too long to click on the individual runes. It's also easy, particularly in the heat of combat, to over-click on the runes and have to wipe the shelf and start over. Origin should have done several things here, including making it possible to type keys for the runes, allowing the player to store more than one string of runes at a time, and pausing the game while the spell interface is active. Thus, despite all my investigations, not to mention my class, I'll probably continue to favor my weapon for most of the rest of the game.
  
We'll pick up next time with happenings in Castle Britannia and with my visit to what has to be the penultimate or final world. In the meantime, I'm happy to hear alternate opinions on those spells. 
 
Time so far: 40 hours