
 |
| If not humbly. |
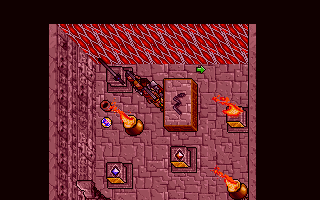
When I left off, we had entered a dungeon on the Isle of Crypts. This is apparently where the Great Hierophants of the past were entombed. We find several sarcophagi with corpses as we explore. We try "Summon Shade" on each of them, but of course the spell doesn't work except on the one corpse that it's programmed to work on. This is a little disappointing. There are books that fill in some flavor, such as Javalloja's treatise on Funeral Ceremonies; The Voice, a history of the first Great Hierophant to hear from the Great Earth Serpent; and The Great Hierophants, a discussion of the early leaders who built the temples to the various Ophidian virtues.
There are giant spiders roaming the dungeon. We barely notice them. The Ring of Reagents obviates the spider silk that would have been valuable to pre-Silver Seed players. There are a few light teleport puzzles, a couple of buttons, and a chest we can't figure out how to get to.
 |
| "Awesome!" -- any poor bastard who bought this game between March and August 1993. |
We run into one puzzle that I have to look up a hint to solve. A room has two pedestals, one with a golden serpent, the other empty. A plaque between them says "BALANCE IS WISDOM." A nearby scroll says that the golden serpent can send me "on the path to knowledge, but only if balanced by wisdom." The scroll encourages me to "use thy newfound wisdom to balance the power of gold." Clearly, it wants me to put something on the other pedestal, but what? I try just about everything in my pack except for the one item it actually wants--the very scroll that we've just read.
 |
| How meta. |
We get teleported to a new area of the dungeon, where a skeletal dragon guards two huge serpent statues flanking an object encased in a force field. "Dispel Field" takes care of the field. The object is called a "Chaos Serpent Eye." All right.
 |
| What do you bet I'll need an Order Serpent Eye at some point in the future? |
I can't figure out how to move forward from here. I start casting "Reveal" and "Columna's Intuition," and one of them reveals a secret door north of the serpents.
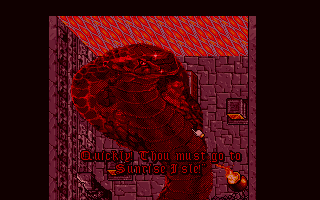
A few more corridors and teleporters, and I'm in the chamber of the Great Hierophant Ssithnos. I know this because "Summon Shade" finally works in his chamber. His ghost appears to tell me a few things:
- I need to restore the Balance.
- This is the will of the Great Earth Serpent, who has been speaking to me in visions. Ssithnos reiterates how the whole War of Imbalance started, with Exodus kidnapping the Great Earth Serpent from the void.
 |
| Hey, I won Ultima III as quickly as I could. |
- To do this, I will need the "symbols of authority" of the Great Hierophants: A serpent crown, serpent staff, and serpent armor. I have the crown, which I found in a tree hollow. The staff is in Furnace. To get the armor, I'll need to ease the "troubled heart" of someone who was "once Beauty herself" but maimed by the Banes.
- Before I can restore Balance, I'll need to "reunite the Chaos Serpent." Only the Chaos Hierophant can tell me how to do that, and Ssithnos doesn't know where I can find him. He was killed during the war.
- Once I fix the Chaos Serpent, I'll need to hie to the Grand Shrine of Balance and do something there.
Our work done here, we exit the dungeon and take the Serpent Gate to Furnace. As previously discussed in the comments, the Serpent Staff is behind a locked door. I guess one of the cyclopes is supposed to have the key, but I missed it when I first killed him, and items left on bodies have no permanence. The "Fetch" spell just fizzles. Thus, I reluctantly enable the cheat menu and drag the door out of the way.
 |
| Belt of Strength for the win! |
The person who was "once Beauty herself" must be Lady Yelinda, Fawn's former ruler, and apparently the most beautiful woman in the world if you like 1980s hair. We walk to Fawn from Furnace's egress. As always, the guard stops us on the way into the city and warns us to "avoid trouble whilst thou art here," as if the entire city isn't dead.
 |
| The Avatar has a random observation as we wander past some skeletons. |
We go through the city searching houses and bodies, finding little that we did not find on our last visit. There is a note on the body of Leon, the Fellowship leader, that indicates "Mad Iolo" had his tongue cut out. I loot some items from various houses and have the Hound of Doskar sniff them, but he doesn't pick up a scent on any of them.
 |
| "Woof woof" means "I only track uniquely-scripted, plot-relevant characters." |
Eventually, I run into Ruggs (I reloaded after I accidentally killed him in an earlier entry), who tells me that Lady Yelinda has run off to the Gorlab Swamp, leaving her diamond necklace behind in the throne room. He also says that his true love, Delphynia, is dead. He buried her in her garden. He finds irony that he, the ugliest person around, is the only one left alive in the City of Beauty.
 |
| Iolo has absolutely no reaction to any of this, nor does Ruggs seem to realize that Iolo is standing right in front of him. |
I find the necklace and summon the Hound of Doskar. It would be nice if you could just follow him once you show him the item you want tracked, but instead you have to re-summon him almost every screen.
 |
| Maybe the dog could lead instead of just pointing? |
After about 45 minutes, the hound leads us to Yelinda in the swamp. "Mad Iolo" did something to strip her skin from her body. (Iolo has nothing to contribute during this conversation. It's not even clear that the companions are aware that they were inhabited by the Banes.) She's nearly suicidal over this, the loss of Jorbin, and the destruction of her city. Oddly, she attributes all the death in the city to famine and a "strange sickness" that "crept through the city like some silent predator," putting people to sleep. This seems to mirror what happened to the gargoyles and what's apparently happening to the emps in Britannia, but it contradicts Ruggs's statement that Iolo killed everyone.
 |
| I hear that "Body Worlds" is coming to Monitor in the fall. |
Yelinda hopes I can cure her condition, and she gives me some information about what will likely do the trick: The Comb of Beauty. She'll give me the Serpent Armor (or, more precisely, the key that opens the door to the treasure room where the Serpent Armor is kept) if I give her the comb. This seems like an obvious place to use "Vibrate" to short-circuit the questline, but Yelinda doesn't drop the key when I cast it on her. I'll have to do it the long way. I know from previous NPC dialogues that the comb was in the possession of Columna of Moonshade, so I decide to return to that city and toss her place.
I do some mental math and decide that the serpent gate at the Sleeping Bull is the fastest way to get to Moonshade, so I exit and head south. Along the way, I come across the burning laboratory that commenters had warned me to avoid like the plague in a much earlier session, when I was looking for the transported Royal Mint. I save the game and stop in to see what all the fuss is about. There are two ghosts roaming around the building. I double-click on one, and what do you know: It's the Chaos Hierophant. I mean, it isn't really--I get the impression from his subsequent dialogue that Sethys (the imprisoned Order follower in the Temple of Ethicality) is supposed to have told me how to find him, and that the real Chaos Hierophant is somewhere else. But for some reason, these ghosts have the Chaos Hierophant's dialogue, so I figure that's good enough. The Serpent knows I'm not going to pass on a shortcut at this stage of the game.
 |
| "What am I doing in this house, and why are there two of me?" |
The Chaos Hierophant is reluctant to help me because he knows I'll reunite the Chaos Serpent only as a step toward restoring Balance, and he believes in the supremacy of Chaos. "Chaos must reign supreme, and not be unequally yoked to Order in the prison known as Balance!" But he recognizes that "even servitude would be better than the damnation that Chaos now endures," so he tells me what I need to know. The Temple of Chaos is in the Skullcrusher mountains, behind some bronze doors that he suggests I detonate. We then have to use a Blackrock Serpent--ideally, the Chaos one--to open the Wall of Lights. We then have to place the prisms containing the Banes on their respective altars. A flame will appear if we do this right. We then recite a mantra: "IN PRI KLI ORT AILEM, PRIIN ORT INTEN MANI!" He finally mentions that "the rite cannot succeed without an allied force strong enough to weld the Banes together into the serpent." He disappears in a black funnel.
We finish the trip to Moonshade and head to Columna's house, even though I'm pretty sure I already searched it. But Columna herself is lying between the house and a fence that surrounds it. There are bushes and trees inside the fence. It takes me a while to figure out how to get into the little garden; there's a secret door in the bedroom. If Columna's body weren't in the garden, I wouldn't know to look for a way to get into it.
 |
| One of three secret doors this session. At least I found this one on my own. |
Her body has some potions and a generic "brush." I suspect this isn't the Comb of Beauty, but I can't find anything else. So I take a save and go all the way back to Yelinda, who confirms (by having no new dialogue) that the brush isn't what she's looking for. I reload and look around some more. I move her body; I search the house; I cast "Reveal" and "Columna's Intuition" everywhere. I can't find anything. Back I go to the walkthrough. Apparently, there's a chest hidden by some bushes in the south part of the garden. I suspect my colorblindness is screwing me again. Tell me if you see it.
 |
| Am I supposed to believe that Columna went bushwhacking every time she wanted to use the Comb? |
Before returning to Yelinda, I go to Monitor and pick up four of the powder barrels that [checks entry from a lifetime ago] Marsten had secreted there as part of whatever his plot was.
 |
| I'm surprised I even remembered this room. |
Back to the swamp. Yelinda gratefully takes the comb and uses it to break the curse. She gives us the key to Fawn's treasure room. One of the Monks shows up and says he'll take her back to Fawn, not offering to do the same for us even though we're obviously heading right there. (On the matter of "Vibrate" not working, I suspect that what happened is that Yelinda's "cursed" body is a different NPC object than her "restored" body and the former doesn't have the key on it.)
 |
| You and Ruggs have fun, now. |
Thus, we walk back, head to the room below the palace, open the door with the key, and find the Serpent Armor in one of 12 chests. The others contain riches and magic swords, none of which interest us.
 |
| I refuse to spell it that way. |
I don't know what the Chaos Hierophant's "allied force" is, but I decide to see if I can just complete the damned ritual. We return to the City of Chaos and blast our way through the temple doors as instructed. (I verify later that "Explosion" doesn't work; you must use powder kegs. I don't know what you do if you've used them all.)
 |
| The party uses a "chaotic" way to enter the temple. |
Naturally, the temple isn't in the room beyond. Instead, we enter a multi-leveled maze in which we have to fight giant scorpions, giant spiders, mongbats, wildmen, slimes, and trolls. There's a music room, a weaving room, a forge, an armory, and a kitchen, and if you're still in love with the Ultima VII engine, you can use this opportunity to play songs, turn yarn into cloth and then cut it up for bandages, forge a weapon (or at least heat up a sword blank; I don't think there's a hammer), play some music, and bake some bread.
 |
| The collapse of the Ophidian textile industry. |
After multiple levels and a pointless teleporter detour to an enclosed field north of Monitor full of sheep and cows, we reach what appears to be the "final room." It has water, braziers, and plenty of serpent statues. There's even an altar. But nothing I do has any effect, and I know I'm looking for three altars, not just one. "Columna's Intuition," "Reveal," and "Dispel Field" show me nothing. Back to the walkthrough. There's a secret door behind the serpent statue that you have to reveal by double-clicking it. Ah, of course. How stupid of me. I should have just been clicking on every goddamned wall instead of foolishly casting spells like "Reveal." Honestly, how did anybody win this game when it was new? [Answer: Apparently, there's a button on a wall that I missed.]
 |
| I had one more chance to upset my party over wasted ale. |
The temple with the Wall of Lights is on the other side. There's an indentation for the Blackrock Serpent and three altars for the Soul Prisms, but also (ominously) a fourth altar. I put the serpent into its crevice, which causes the wall to light up. I put the prisms on the altars, which cause flames to appear when you put the right prism on the right altar. But nothing happens after that. I run through absolutely everything in my backpack on the final altar, but nothing works.
 |
| The Black Sword is one of many items that doesn't qualify as an "allied force." Note that in this screenshot, I have the wrong prisms on the first two altars. I did eventually fix this, but I still couldn't get anything to happen. |
Unwilling to walk my way back, I reload from outside the dungeon and try to figure out what to do next without consulting the walkthrough yet again. I remember that Xenka told me to return to her if I was unsure how to proceed, so I do. She has a new ominous keyword: "Sacrifice." I try it, and she explains that the imbalance has grown so powerful that one of us will have to kill ourselves. Huh? Before we can process this, she has us draw straws and she says that I drew the shortest straw: "Take comfort that thine ashes shall bind the wounds of the land." How, exactly? What does any of this have to do with the "allied force" that I need to reunite the Chaos Serpent? And who's going to restore Balance once I'm gone? Shamino? That actually wouldn't be a bad idea, but there's no conversation about it at all. My companions don't even react.
Xenka's mum on these issues, too. She just tells me to go jump in the oven at the crematorium in Monitor. At least the game will be over, I reason. (Aside: if all your companions are dead when you talk to Xenka, she still insists on the "straw-drawing" ceremony even though you're the only one there.)
 |
| Doesn't this violate literally every prophecy you made? |
Of course, the Avatar doesn't sacrifice himself. I remember this part. But the dumbest part of an already-dumb sequence is that there's no way the Avatar could sacrifice himself. If anything kills him, the Monks just resurrect him. So the only option would be to throw himself alive into the oven. But he can't stand on the trap door leading into the oven and pull the lever, so clearly something else is going to happen.
What happens is that Dupre intercedes, claiming he can't let the Avatar kill himself nor live with the deaths he's caused (this is the first time any of the companions have mentioned this). Before we can say anything, he drops all his stuff on the ground and dives into the oven, emerging a few seconds later as an urn of ashes. None of the companions have any reaction. What an utterly ham-handed episode. The self-sacrifice of one of the Avatar's longtime companions deserved a lot more justification and reaction.
 |
| Come to think of it, who pulled the lever for Dupre's sacrifice? |
You may wonder what happens here if Dupre isn't in the party. The answer is: nothing. You can't sacrifice yourself. The door to the oven just opens and closes. Dupre doesn't rush in from wherever you've left him. There's no way to progress in the game, with no indication of what you're doing wrong.
Back on Monk Isle, Xenka says Dupre's ashes are what's needed to power the reunification of the Chaos Serpent, which makes no sense, but at least the game is coming to an end. She also says that my destiny will be found on "the island known as Sunrise Isle." She gives me a Serpent Sword that will have some role in the final ritual. I talk to Gwenno while we're here, and she's suddenly willing to join us.
We go all the way back through the dungeon and perform the ritual, this time putting Dupre's ashes on the final pedestal. There's an explosion, and then I get an image of a serpent speaking to me in Dupre's voice. (I took screenshots of the text version, but the audio version of the episode has Dupre pronouncing his name as "du-PREE." I've been pronouncing it wrong for almost 40 years.) [Ed. No he doesn't. I'm not sure how I heard that on my first and only pass at the recording. He clearly pronounces it du-PRAY.] He says his soul has been fused with the Chaos Serpent, which allows him to restrain it from attacking me. He tells me to hurry to Sunrise Isle. If that's not enough, Xenka suddenly teleports in and also reiterates that I should go to Sunrise Isle.
 |
| Does anyone have an idea where we should go next? Anyone? |
Naturally, she doesn't just teleport me there, so I have to take the long route back out of the dungeon. When I get back to the serpent gate hub (I think the game's official name for it is the Dark Path, which I haven't been using), I study my options because I can see Sunrise Isle on the game map, off the north coast, but I don't know how to get there. I suspect that where I really need to go is the Temple of Balance, which may be on Sunrise Isle, but it's hard to tell since once you get there, you're never outdoors.
Hoping to bring a hasty end to the game and subtitle this entry "Won!," I take the gate to the Temple of Balance, but it becomes clear that the temple is going to be yet another Whole Thing, thus pushing the conclusion of the game by at least one more entry.
Time so far: 107 hours
Comments on Level 8/9 Spells
Level 8
Create Ice. Creates a block of ice. If you cast it on a target, it freezes the target for a while. Otherwise, it just provides a barrier. This is one of many spells that would be cooler if combat were more tactical and less random. I can't think of a good reason to use it here.
Mind Blast. Fires a bolt of energy. I've never had it not kill an enemy, so I guess it's pretty powerful. If any single enemy in this game was both a) hard to kill with weapons, and b) not immune to magic, it would be my go-to spell.
 |
| The Fawn guard told me to "avoid trouble" one too many times. |
Delayed Blast. "Explosion" but with a five-second delay. As with its counterpart in D&D games, it would be useful in a tabletop session but not very useful in this game's engine. Enemies move out of its range too fast and anything that you might want to destroy with it is destroyed to the same degree by "Explosion."
Fetch. Lets the caster retrieve an object in view. Through testing, I learned that doors are no barrier, not even locked doors, but it only works on small things like potions and keys. It doesn't work on weapons or pieces of armor, including the Serpent staff. That still makes it theoretically useful, but I didn't find a single point in the game where there was an object that a) I needed, b) I couldn't reach normally, and c) was sitting in plain view (instead of in a chest or on a body).
 |
| The one place it would have been useful. |
Invoke Snow Serpent. Summons an adorable little blue snake that does absolutely nothing in combat.
Serpent Bond. Changes the Avatar into a serpent, which sounds like it would be useful in a million places but is actually only useful in the Temple of Ethicality puzzle. I guess some players use it to break the game's scripting (moving over trigger points as a serpent doesn't trigger the scripts) and keep NPCs alive who are supposed to die.
Firesnake. "Explosion" but with a superfluous trail of fire between the caster and the explosion.
Swordstrike. An offensive spell that creates a vortex of blades. Not as powerful as "Mind Blast," but can damage multiple enemies. The only caveats are those I attached to "Mind Blast."
Level 9
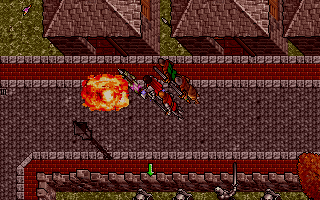
Death Vortex. Probably the best offensive spell in the game. Creates a black cloud that zeroes in on an enemy and kills him usually instantly, then often lingers long enough to kill someone else. Again, it would have been nice if there were more enemies in the game that required such a devastating spell. I found myself casting it towards the end of the game just to get people out of my way.
 |
| A "Death Vortex" heads toward Mad Iolo. |
Mass Death. Sends a "death pulse" outward from the caster and kills everything, but it also significantly damages the caster (usually), so it must be followed immediately by a "Great Heal" or "Restoration." Still, it's immensely powerful and useful for packs of enemies.
*Invisibility All. Turns everyone invisible at once. I never got it, but I assume it's about as useful as multiple castings of "Invisibility," which don't last very long. I think I'd rather spend the points on one of the death spells. Again, I could see this being handier if it were harder to just run past enemies when you didn't feel like fighting.
Spiral Missile. I don't know why it's called this. The spell causes each enemy on screen to suffer a little individualized "Explosion" that does a small amount of damage. Why would I cast this when I can cast "Mass Death" for the same number of spell points?
 |
| "Spiral Missile" fails to even kill goblins. |
Stop Storm. Messes with the weather and turns stormy weather clear. The effects are mostly cosmetic, but there are times in a game that inclement weather animation is annoying. I remember using its analogue in Skyrim a few times just because I found the constant snow oppressive. Still, it's hard to imagine using the points on it unless you knew you wouldn't be needing those spell points for a while.
Summon. Summons monsters to help in combat. I usually get trolls, skeletons, or ghosts. Companions are already pretty useless in combat, and summoned creatures even more so. Plus, a lot of the time it doesn't work (i.e., no one appears). I suppose you could use the spell for grinding, since killing summoned creatures gets you experience and, in the case of trolls, gold and gems. Summoned creatures never turn hostile even when you're attacking them. In general, I can't see wasting the points on it when "Mass Death" is right there.
 |
| Some mongbats come to my aid. |
Time Stop. It's supposed to stop time, which could be useful in combat. It could also be useful out of combat, if it stops traps or explosions and similar mechanical events. Unfortunately, it fizzled every time I cast it, and I gave up trying to make it work.
*Imbalance. According to the description in the manual, it casts a "wave of fire fields, explosions, and streaks of lightning" that is "difficult to control" and thus should be "cast only in dire emergencies." Sounds dramatic. Alas, I never found it, and I can't think of an emergency so dire that one of the death spells wouldn't solve it.
"Imbalance" occupies the spot given to "Armageddon" in The Black Gate. I can only imagine that they replaced it because a Serpent Isle player would cast "Armageddon" the minute that he discovered it without a second thought. This place sucks.


