Showing posts with label Eye of the Beholder. Show all posts

Tuesday, February 13, 2018

Eye of the Beholder II: Summary and Rating

           
Eye of the Beholder II: The Legend of Darkmoon
United States
Westwood Associates (developer); Strategic Simulations, Inc. (publisher)
Released in 1991 for DOS, 1992 for Amiga, 1993 for FM Towns and PC-98
Date Started: 2 January 2018
Date Ended: 6 February 2018
Total hours: 43
Difficulty: 3.5/5 (moderate-hard)
Final Rating: 40
Ranking at Time of Posting: 231/282 (82%)
      
Eye of the Beholder II is a generally-pleasant but sometimes-uncomfortable fusion of Dungeon Master-style real-time gameplay and Advanced Dungeons and Dragons rules. It isn't significantly better, worse, or even very different than the first Eye of the Beholder, but of course both games were released in the same year and there wasn't a lot of time to change things. Because of that, as I wrote this entry, I found myself wanting to simply cut and paste entire paragraphs from my Eye of the Beholder summary. Here are two that still work nearly unchanged:
       
I'll say right away that Eye of the Beholder is not a better game than Dungeon Master, and if it rates higher than Dungeon Master on my GIMLET, we'll know that the GIMLET is broken or I rated the previous game too low. What Beholder gains through NPCs and better quests, it loses in fundamentally worse character development, combat, magic, and puzzles. I'm sure it's possible to blend Dungeons & Dragons rules with an action dungeon-crawler, and Beholder is an important step in that direction, but it's not the destination.
          
But let's not start with too many negatives: Beholder is still on the "recommended" side of the divide. From the opening animation . . . it promises and delivers a solid dungeon crawl that lasts just about the right amount of time for its content. The puzzles tend towards too easy . . . which is regrettable, but better in my book than games where the puzzles tend towards impossible. I enjoyed the process of mapping, carefully annotating certain squares for later return and investigation, and methodically uncovering the mysteries of each level.
          
But I note that in my Eye of the Beholder summary, I took a look at a speedrun and found someone who finished it legitimately in 8 minutes. That wouldn't be possible with the sequel. The developers quite literally tightened the maps, making it impossible to avoid many of the monsters that you could simply dart around in the original. Moreover, many of these unavoidable foes are quite hard and require at least most of a living party to defeat. The record for #2 seems to be nearly 2 hours, which is practically an eternity compared to the original. The player cheated by maxing some character statistics and all hit points, too.
      
No matter how much you plan, there's no way around this guy.
      
After I finished, I consulted the game's official cluebook to see what I had missed. Some highlights:

  • I missed a few items, mostly trivial, because I didn't deliberately fall down every pit.
  • There was a secret corridor in one of the dungeon levels that I didn't map, but it doesn't seem to have had anything it. It was just an alternate way to get around.
        
Almost this entire level is made up of pit destinations that I didn't map.
         
  • The cluebook is quite blatant about supporting the combat waltz. On dealing with mind flayers, for instance: "Engage it in melee, swing once or twice, dodge, and then prepare to swing again." Similarly, with beholders: "Always try to attack a beholder's flank." Finally, at the end: "Remember, it is better to nickel and dime a powerful opponent to death rather than try to fight him face-to-face."
  • There were two locations with resurrection ankhs off the main level. I don't know how I missed that. Each is capable of 3 resurrections, so I could have had 6 instead of just 3.
  • I missed a Ring of Feather Falling in some niche.
  • I could have gotten unlimited Spheres of Fire from a niche near the end.
  • The cluebook places Insal the thief on the penultimate level. You're supposed to encounter him "if the party freed him from his prison on catacomb level 1." I didn't find him despite freeing him, but he wouldn't have had the stolen items anyway. I can't believe I just blithely let that long sword +5 go without reloading.
  • Fighting my way through all of those mind flayers would have rewarded me with a crystal ball and "visions of the party's past and/or future." There aren't even any cool items in the mind flayers' chambers!
           
I loaded an earlier save and ran past the creatures to check it out. This wasn't really worth it.
            
  • The Amulet of Life would have resurrected a character. The Amulet of Death, if used, would have killed a character.
  • The Starfire Scepter would have indeed protected me from Dran's attacks. I'm skeptical whether it would have protected enough to truly be useful.
       
I'm a little annoyed it didn't clear up some of the item mysteries, such as why I found a stone cross so close to the endgame.

Finally, as an anonymous commenter noted, if you try to close a door in the dragon's path, he actually plows through it, breaking it. It doesn't slow him for a second.
           
Oh, yeah!
          
Without reference to the first game, let's see how close the GIMLET gets. I think it will fall somewhere between I and Dungeon Master.

1. Game world. Darkmoon tells a decent but not spectacular story. It's a little goofy that the big bad's name is an anagram for "dragon danger," and its attempts to tie to the first game are forced. However, I like that you encounter Dran at multiple points along the way--that he seems like a growing menace rather than just an endgame afterthought like Xanathar in the first one. Then again, the first game had a slightly more interesting world with the Drow and dwarves occupying the dungeon. I'd say it's a wash. Score: 4.
       
Frequent encounters like this kept a sense of tension throughout the game.
       
2. Character creation and development. AD&D 2nd edition allows for satisfying but not amazing character development. You get some hit points, maybe an extra attack, maybe a new spell level. This is all good, but games with skills and perks do it better. You don't gain many levels during this outing--not unless you grind a lot--and it feels like the game could be beaten by the starting characters. Getting a new spell level is always fun, but it just doesn't seem crucial here the way it does in other games.

There are no plot reasons to change up your selection of races, sexes, classes, or alignments, but it would be fun to periodically try the game again with a challenging party combination, like all mages or all clerics or something. Score: 4.

3. NPC interaction. I always like games that let you find new joinable NPCs while the game is in progress, but I was a bit disappointed that they didn't have more to their stories or more to say. At the beginning, it seemed like some of them would have plot-related dialogues or their own personal quests to complete, but this idea fell apart fast. You don't even get speeches from newly-resurrected NPCs the way you did in the first game. Score: 3.

4. Encounters and foes. This is a category that improved from the first game, I thought. The enemies are more interesting here, with a variety of strengths and weaknesses that factor into combat tactics. Non-combat encounters were more plentiful and offered some basic role-playing options. I also thought the puzzles were more challenging and more interesting, rising to Dungeon Master quality in a few locations. Score: 6.
        
Role-playing options like this were a welcome addition to the game.
        
5. Magic and combat. Also slightly improved. The higher-level spells offered more advanced options in combat and spells in general seemed far more necessary here than in the first game. As much as I defended the "waltz," I like that it failed in so many places, since you face a lot of enemies in narrow corridors and the developers slightly adjusted the enemy AI. The final level and the absolute necessity of bobbing and weaving around the enemies was a little disappointing, and I'm mystified at the lack of certain AD&D spells--"Resist Cold," "Resist Fire," "Enlarge," "Fire Shield," "Globe of Invulnerability"--that might have made a face-to-face fight possible. Nonetheless, the overall improvements to the magic and combat systems were steps in the right direction. Score: 5.

6. Equipment. The "Improved Identify" spell did wonders for this category, although I was disappointed at the relative weakness of items found in Darkmoon in comparison to the first game, and I don't feel like I ended much more powerful that I started. I also wish the game had been clearer as to the distinction between quest items and non-quest items, and while it's nice to know the names and pluses of items, we still lack any true statistics or descriptions of the inventory pieces. I also think the developers missed an opportunity to enhance replayability by randomizing some of the item locations. Score: 4.
        
We're sure bringing a lot of junk into the third title.
         
7. Economy. Still none. I know that some of you will say that the game doesn't need it, and that the absence of an economy isn't the same thing as a "bad" economy, and so forth, but I maintain that my experience would have been enhanced by a little stall in the forest area where I could sell excess goods and buy rations, potions, and scrolls, and perhaps save up for a few high-value magic items. Score: 0.

8. Quests. There's a clear main quest, but Darkmoon lacks the side quests of the first game as well as the special level quests. It only has a few side areas. Score: 3.

9. Graphics, sound, and interface. The graphics are superb for the era, even more detailed than the first game, and both sound effects and ambient sounds were top-notch. On the other hand, I had more problems with the controls than the first game. When you're frantically clicking around in combat, the proximity of the weapon icons to the character's name, which moves his position in the party, is more than mildly annoying. I also didn't appreciate the frequent freezes in the middle of combat while I was trying to swap equipment or open spellbooks. I can't remember if these were present in the first game, but if so, they didn't bother me as much. Overall, there was a little too much dependent on the mouse and too little on the keyboard. Score: 6.

10. Gameplay. When I started playing, the game felt very nonlinear, but what seemed like multiple choices for staircases, doors, and portals soon collapsed into a fairly linear experience, far more so than the first game. I also wouldn't call it very replayable, except (again) to try challenging party combinations. On the positive side, the level of difficulty and length of play were both perfect, although keep in mind that I say that having imported my characters and their equipment. Score: 5.

That gives us a final score of 40--one point lower than Eye of the Beholder! That was a surprise. But looking over my review of the first game, it makes sense. While I appreciated the encounters and combat more here, Darkmoon gave up some elements--including better NPC interaction, a couple of side quests, and a less-linear approach--that led to an accumulation of 1-point losses.

Even with my usual caveats--40 points is reasonably good on my scale, less than 20% of games have achieved it, etc.--this rating is bound to be controversial if you love this style of game. Before you comment angrily, please reflect that a near-perfect dungeon crawler in the Dungeon Master style is not the same thing as an excellent computer role-playing game generically. My GIMLET is naturally designed to produce high scores in the kinds of games I prefer, which include a full set of RPG features (including an economy), meaningful character development, tactical combat rather than action combat, and lots of role-playing choices, side quests, and nonlinear gameplay. I do agree that Eye of the Beholder II is a good exemplar of its particular approach.
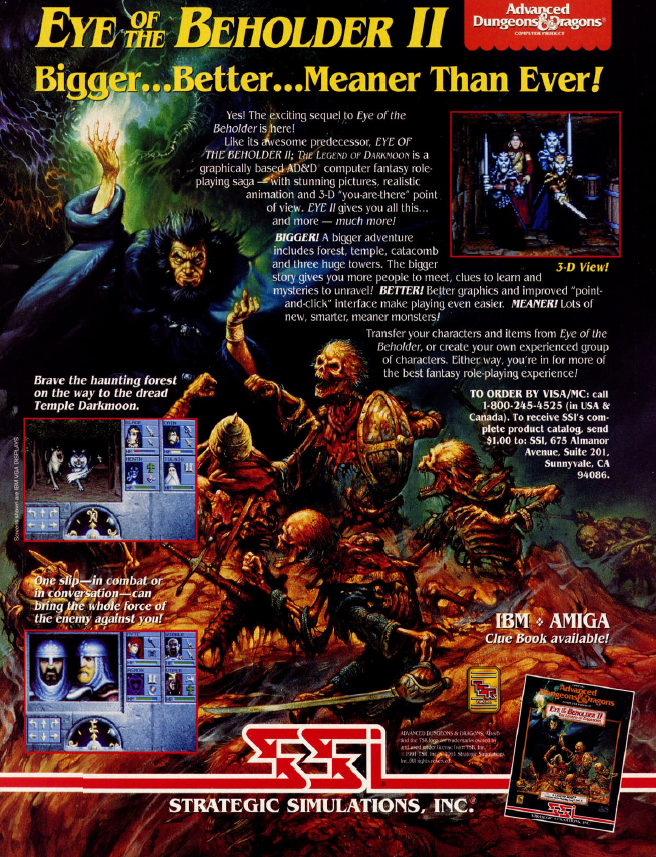
            
Were separately-sold Day 1 cluebooks as controversial in 1991 as Day 1 DLC is today?
           
Scorpia reviewed Darkmoon in the April 1992 Computer Gaming World. (I note with some amusement that the same issue has a review of Bloodwych, which I played nearly 6 years and over 200 games ago. That highlights how little progress I'm making.) It's not one of her better reviews, full of spoilers and going into unnecessary meticulous detail about a handful of enemies. But she agrees with me on the interface issues, quoting a friend in saying, "It's only real-time for the monsters." She bemoans the freezing that accompanies spellcasting and swapping equipment. She also complains about something that I didn't think to complain about but was a problem nonetheless: the need to use the mouse in combat and the keypad to move forces you into an awkward position in which your left hand is on the right side of the keyboard, meaning that your arm is either at a weird angle or you're off-center from the computer monitor. Overall, it's clear that like me she prefers games that eschew manual dexterity for more cerebral combat tactics.

She talks about the improved ending, contrasting it with the "drop to DOS" ending of Eye of the Beholder, which I've read repeatedly and absolutely isn't true. Yes, there's more of a cinematic here, but I didn't think it was so much better than the first game to deserve extra points. In the end, though, I find it hard to disagree with most her final paragraph:
         
Overall, Eye of the Beholder II: Legend of Darkmoon is a more substantial game than its predecessor. There is more to do, a bigger variety of critters to fight, and a larger area to explore. Graphics are a bit finer than in EOB I. Sound effects are about the same. Some of the problems with the earlier game (poor ending, lack of save positions) have been fixed, although the combat interface remains a sore point. If you enjoyed the first game, you will definitely like this one.
         
Dragon gave the game 5/5 stars despite having some complaints about the lack of an automap and support for all sound cards. Again, I have to note that a magazine dedicated to tabletop role-playing seems to praise everything but tabletop-style mechanics in its reviews of computer games. Nonetheless, the review by Patricia Hartley and Kirk Lesser does a good job evoking some of the more visceral elements of Darkmoon, which I experienced but perhaps didn't blog enough about. There is a wonderful sense of anxiety as you creep down a corridor, not knowing what to expect around the bend, wondering where those mysterious sounds are coming from, hoping that something hasn't respawned in the corridor behind you, literally jumping out of your seat when something attacks you from the rear. As much as I love the Gold Box titles and prefer them to Dungeon Master-style gameplay, I do admit that they generally lack this delightful trepidation.

If you want to get angry at a review while still agreeing with its score, check out the July 1992 Amiga Computing. This is easily the worst-written review I've ever seen in a gaming magazine. With only six precious columns, the reviewer wastes 3 of them blabbing about everything but the game, and not even making sense in his extraneous dithering. He expresses contempt for the entire RPG genre, bemoans that there are too may RPGs out there, describes Eye of the Beholder II as more of the same old thing, and then inexplicably says, in the final paragraph, "On balance, Eye of the Beholder 2 is the best RPG around." Where did that come from? He bases his opinions, judging by the five screenshots, on the first 10 minutes of the game. Every time I think I've gotten used to the lack of journalistic quality in 1990s Amiga magazines, someone manages to lower the bar even further.

Darkmoon is so well known, of course, that there are plenty of modern takes on the game, too. Corey "Dingo" Brock offered a retrospective in 2011 on Hardcore Gaming 101. He makes a good point on the relative ease of navigation in the sequel, with fewer teleporters and redundant stairways and more hints about secret door locations. My particular approach to playing and mapping doesn't really favor those changes, but I can see why some players would prefer them. He also notes the increase in encounters with role-playing options. In contrast, I can find nothing to agree with in GameSpy's brief description of the game in a 2004 history of RPGs. There were times that the game was difficult, but it did not feature an "insane level of difficulty." And I guess I'm just jaded from modern games, but most reviewers seem to be far more in love with animated introductions and conclusions than I am. I mean, I suppose I prefer a cinematic to plain text, but only barely. I'm more interested in the quality of the story than the way it's presented, and while watching the mages cast lightning bolts at Darkmoon until it vanished was cute, it made about as much sense as Khelben's ignorance to the danger posed by Dran Draggore. 
      
Did they send it back in time!?
          
Unfortunately, I read ahead in Brock's review and noted some of the problems with Eye of the Beholder III: Assault on Myth Drannor (1993), but that's on the other side of a lot of fantastic 1992 games. It's somewhat ironic to see the failure of the third game blamed on Westwood Studios' absence from game development. The company started out shaky ground with titles like Mars Sage (AKA Mines of Titan, 1988), BattleTech: The Crescent Hawk's Inception (1988), and Hillsfar (1989), all of which produced more than one moment of baffled rage in my reviews. But I have to admit they improved their game for the Eye of the Beholder titles, and I look forward to seeing if the upward trend continues in the Lands of Lore series (1993-1999).

And with that, believe it or not, we are at last done with 1991. It only took 2 years and 9 months. We'll have the retrospective coming up next, but I can tell you the "Game of the Year" nominees right now: Disciples of Steel, Pools of Darkness, Might and Magic III, Fate: Gates of Dawn, and I'll make a case for Eye of the Beholder, but don't get your hopes up.


Thursday, February 8, 2018

Eye of the Beholder II: Won!

That would be a good title for a different game.
            
The rest of Eye of the Beholder II was almost entirely about monster difficulty, not puzzle difficulty. The bit I relayed last time with the pressure plates, teleporters, and glass walls was the last challenging puzzle. In replacement, the game severely increased the deadliness of enemies in its final stages.

It began on the fourth level of the tower that started with the "mark of Darkmoon." Aerial servants attacked as I entered. These are tough enemies, hard to hit, who do a lot of damage. From this point on, I had "Haste" active almost continually, and I was a lot more liberal with my spells. As a consequence, I also rested a lot more, which the game thankfully did not limit.
       
Philosophical inquiries later, San-Raal.
       
The level was a huge maze populated by medusae. I'm going to type it that way because the Blogger spellcheck is cool with it, but not "medusas." To even enter, I had to prove that I possessed six mirrored shields by hanging them up in an entry hall. I didn't actually have six shields when I first arrived--I only had four--so I had to spend a little time returning to earlier levels to grab the last two shields, which I had discarded for redundancy.
       
Accurate maps made this not as annoying as it could have been.
       
The shields were not the perfect protection that I hoped. Medusae repeatedly petrified my characters, and as I didn't have Level 6 spells yet, only the half dozen pouches of "magic dust" found early in the game were able to cure my characters. The creatures spawned and respawned like mad, often hitting us from multiple angles. Meanwhile, since I had to hold shields in my off hands, my lead characters had to return to single-weapon combat, which really sucked after I had gotten used to the speed of dual-wielding.
       
De-stoning a character during combat.
      
There was one fun puzzle area, reminiscent of a similar area in Chaos Strikes Back, where I had to lead four medusae onto four pressure plates, then close the doors on either side of the plates so they would remain in the area, weighing them down. They were too fast to do it normally, but I soon found that "Hold Person" actually holds medusae. That was a surprise. With the help of the spell, I was able to get them all in place and move forward.

The level culminated in an area so choked with aerial servants, who respawned so fast, that I couldn't even get through them. If I charged as far as I could, I would find myself in unwinnable combat with packs of them on at least three sides. I eventually won by running as far as I could and then throwing "Wall of Force" behind me so I'd only have to deal with one pack of enemies. Even then, it was hard. Manual dexterity mattered a lot more towards the end, especially with "Haste" always active and thus no reason to take a couple seconds' break between attacks. Whoever decided that right-clicking on the character's name, which is mere pixels from his primary weapon, should initiate the "move position" process, ought to be banned from ever working on a game again.

Eventually, I made my way to a area where glass walls came crashing down around me and an image of Dran Draggore appeared to gloat for capturing us. He then transported us to prison.

The "prison" was a small level full of frost giants. I gather they were also Dran's prisoners, but I don't know why. The graphics showed how cramped they were in a dungeon not designed for their size. My pity only lasted a short while, however, as the frost giants repeatedly punched us into oblivion. Two punches ensured that at least one party member died; three was often enough to kill the entire party.
          
I'd be angry if I was that cramped, too.
         
The short corridors of the level, which offered almost no open spaces, made it difficult to employ the usual tricks. Areas with blinking (appearing and disappearing) pit traps also made it tough to retreat. Making everything worse, the immediate presence of more than one frost giant slowed down the game and screwed up the careful timing I'd spend the previous 30 hours unconsciously calibrating. Still, the level was small, and there were some areas that the frost giants refused to pass by, so except for a couple of corridors, I was generally able to find safe spaces. I assume my characters were repeatedly thanking the creators of this universe that enemies disappear when slain. Otherwise, the corridors would have been choked to the point of impassibility with frost giant corpses.

The level ended in an encounter with the frost giant king, who recited a badly-metered poem saying that Dran had trapped them. It didn't say why. At the end of his poem, he turned to dust for some reason. Behind him was a teleportation door, and fortunately I'd found a stone dagger to use on it at some point.

I was back on the second floor of the temple, near the main entrance. A crimson key found at some point during my journey opened up the final locked path on the second level. I reached a wall (I forgot to take a screenshot) with impressions that required me to place an eye, blade, and hilt "of Talon," which not only opened the way but came together to create a +4 long sword. A stairway soon led upward.
        
           
(Side note: what if I hadn't found all of the Talon artifacts in the previous levels? Would I have been able to repeat my journey, get captured again, end up in the halls with the frost giants again, etc.? I should have tested it.)

The final area consisted of multiple small levels with a crimson theme and intricate wall and carpet patterns. The area started with a bunch of teleporters and levers that turned them on and off. There were a lot of small areas connected by stairways and a couple of places where I had to put crimson rings on the wall to teleport forward. Enemies were wizards, and I learned to dart around corners to avoid their spells. Honestly, the puzzles in this area were minor and not really worth relating, and I'm writing this days after winning, not having taken clear notes on them all.
       
The final area had a starker color and more intricate graphics than anything so far.
       
Towards the end of the level, we were attacked by hellhounds, one of the few enemies from the manual not yet encountered. They died in about two hits, and there were only about four of them. A pathetic appearance from an underpowered enemy.

A hole in the ceiling brought us to the final level. It consisted of a large central area with openings to the west and east that led to networks of corridors and rooms. Salamanders swarmed the area and did a lot of damage if I couldn't avoid them; fortunately, they were susceptible to the side-stepping trick.
          
A welcoming party on the last level.
        
The western opening led to rooms occupied by mind flayers. I have no idea what treasures there were to find within those rooms because I gave up after about an hour. The mind flayers have an invisible ranged attack that paralyzes one or more characters. I could barely approach them. I tried to lead them out of the area one at a time and dance them to death, but one screw-up could paralyze half my party. I soon ran out of "Remove Paralysis" spells, and there was a lot of reloading. Eventually, it became clear that the mind flayers were re-spawning and I wasn't making any progress. I moved on to the eastern exit.
        
These guys are real bastards.
        
To get through a door, I had to cast "Dispel Magic" on two alcoves, one of which had an Amulet of Life and one of which had an Amulet of Death. I assumed they were plot items, but I never ended up using either.
            
        
Beyond the door was a single special encounter with one of Dran's servants, but then no more battles or encounters until I found Dran. When I reached him, he was working on some kind of spell, but he sensed our approach. In his subsequent villain's exposition, he related that he had ordered the Drow to build Darkmoon "long, long ago" but "the fools destroyed themselves and I was greatly injured in the cataclysm." When he recovered a long time later (presumably recently), he began reconstructing the temple and allied with Xanathar, the beholder from the first game, to take over Waterdeep.
          
The thinnest thread ties the games together.
           
He finished by saying that a new skeleton army--of which we had destroyed "one legion" back towards the beginning of the game--was preparing to march on Waterdeep and "destroy Khelben."

We had come upon Dran unaware, and thus un-buffed by spells, so my heart wasn't in the first attempt at defeating him. After a reload, with "Bless," "Prayer," "Protection from Evil," "Haste," "Aid," and a few others active, we tried again. Dran flung spells most rounds, so again we resorted to dodging to avoid them. We couldn't really do a "waltz" or "side-step" with him because he varied his pattern of movement, sometimes stepping forward, sometimes strafing, sometimes just wandering off down a corridor. But with patience, we whittled him down and defeated him.

Or so we thought. After he collapsed, he boasted that our "pain will be legendary, [our] agony exquisite!" He rose again and revealed himself as a red dragon. (I guess "Draggore" should have given it away.)
          
         
After his little speech, when combat resumed, the dragon blasted us with a breath or spell that immediately killed Starling and put almost everyone else into the single digits, hit point wise. I had to reload and defeat the human Dran all over again. This time, I was able to side-step in time to avoid his opening blast. When I did, rather than risk losing any more progress, I ran out of the room, down a long corridor, and into another 3 x 2 room before quickly saving the game.
      
Our first (unsuccessful) combat against the dragon.
       
That was the pattern for the rest of the combat, really. The dragon was so deadly that if I let my guard down for even one attack, a few of my party members would be killed. I settled into a process of hitting him a few times with a mixture of weapons and spells, then running down the corridor to save. He'd follow, I'd hit him a few more times, then run back down the corridor into the other room and save. A little pathetic, I guess, but when you have an enemy so over-powered, the fun is mostly gone anyway. I was just looking to survive and get to the end.
      
My party is brutal. We didn't just kill him; we tore out his heart and sacrificed his body on his own altar.
      
Of course, we defeated him in the end, prompting the endgame screens and text:
    
Finally, Dran has been defeated. Suddenly, your friend Khelben appears. "Greetings, my victorious friends. You have defeated Dran! I did not know Dran was a dragon. He must have been over 300 years old! His power is gone. But Darkmoon is still a source of great evil. And many of his minions remain. Now we must leave this place so my forces can destroy it once and for all. Follow me."

Powerful mages stand ready for the final assault on Darkmoon. The temple's evil is very strong. It must not be allowed to survive!
                 
What are they casting? Is there a Level 9 spell called "Destroy Building" that I don't have for some reason?
            
This is accompanied by a cinematic of a bunch of spellcasters blasting the temple with lightning. Eventually, it disappears and the dark skies turn bright blue. Khelben pops his head in the frame one last time to say, "Thank you. You have earned my deepest respect. We will remember you always." And the "The End" followed by the screen at the top of the entry.
       
Any chance I've also "earned" something more tangible?
         
There's no final save of the game, so I guess characters imported to Eye of the Beholder III don't get the experience from defeating Dran Draggore. [Edit: I was wrong. I just missed it. The game automatically creates a "FINAL.SAV" file.]

Some notes and thoughts on the final session and ending:
    
  • The mapping of the click areas is off for the character in the sixth position. Right clicking on roughly the top fifth of the left-hand object activates the right-hand object. San-Raal was constantly throwing daggers when I meant for him to cast a spell.
  • At some point, I found a stone cross for the teleportation door, but I don't think there was any way for me to get back to the teleportation door (at more than one point, the final areas become one-way). Maybe that's what the mind flayers were guarding?
  • It's funny that the chief bad guy of both games attacked alone, without a supporting party.
  • It's left open-ended why Dran Draggore wants to rule Waterdeep so bad. Why do evil creatures always want to "rule"? Don't they understand what a headache that is? If I was an evil boss, I'd just be trying to make enough money that I could buy a house on a beach, play video games all day, and fly first class to New Orleans once a month.
  • I was in the midst of writing a paragraph challenging anyone who thinks it's possible to win the game without dodging to show me a video of someone doing it, because I doubt you can survive against the dragon or the mind flayers without some level of dodging. To verify that someone hadn't already posted such a video, I checked out YouTube for endgame videos. In the videos I watched, the players absolutely dodge (or try to), but they also repeatedly use the "Starfire" scepter to cast a "mystic defense" spell that I guess helps against some of Draggore's spells and the dragon's breath. I completely forgot about that scepter.
  • Other items that are a bit of a mystery: several leftover keys (copper, Darkmoon, skull, crystal), the Amulets of Life and Death, "Jhonas's Cloak," "Brahma's Boots," and two extra crimson rings.
  • I guess the different sections of tower levels make sense when you look at it from the outside. There are multiple towers extending from the central keep, offering multiple ways up and down. It even makes sense that some of the top levels are bigger than some of the lower ones.
  • The endgame credits confirm that San-Raal is a Drow. It would have been nice to have a little backstory there. In general, it's too bad that the NPCs didn't get more story. I never encountered the thief Insal again (or got my stolen items back), Khelben didn't seem too bothered that I never resurrected Amber, and I suspect that Calandra never re-unites with her sister.
  • My final experience point total was 578085. Starling the paladin ended at Level 9 and only gained one level the entire game. Bugsy the fighter/thief ended at levels 9 and 11 having gained 2 fighter levels and 3 priest levels. Marina the mage ended at Level 11 having gained 2 levels. Gaston the ranger/cleric ended at levels 9 and 10 having gained 2 ranger levels and 3 cleric levels. According to the manual, the game supports experience points up to 1.5 million, so there's room for some serious grinding. In my case, Starling was only 22,000 experience points away from hitting Level 10, but everyone else would have required at least a couple hundred thousand.
       
I look forward to browsing a cluebook before the GIMLET, particularly seeing what I missed on the other side of those mind flayers. In the end, I think I liked it better than the first Eye of the Beholder, but not by a lot. I expect it to score higher in "encounters" for offering more special encounters with basic role-playing options, and in "magic and combat" for enhancing the importance of spells. We'll soon see.

****

We've had a bit of a massacre on the "upcoming" list.

DC Game (1988) is actually a construction kit that goes by about 17 different names. On its title screen alone, it is called "Graphics Adventure Game System," "Graphics Adventure Game Builder," and "Generic Adventure Game System." Most of its documentation refers to it by the executable names: DC-GAME or DC-PLAY, with the hyphen sometimes there, sometimes not, and the text sometimes in all caps and sometimes in proper case.

We already saw the output of the builder in The Rescue of Lorri in Lorrintron (1991). I was going to play the sample adventure that comes with the builder, except that a) its graphics and features are limited until you pay the shareware fee, which of course you can no longer do; b) it's not much of a game. (General rule: any game in which you must play a character named "John Doe" is probably not worth playing.) Even the 1988 date is suspect. Most of the documentation offers "1988-1991" or "1989-1991" for the copyright dates, but I can't find a version older than 1991, and that seems to be the date of the sample game. Since we already saw the kit at work in Lorri, I don't see any need to mess around with this.
        
The kit limits you to CGA graphics unless you pay.
       
The game called Demon's Maze at MobyGames is just called Demon on its own title screen. It's a senseless little variant of The Wizard's Castle (1980) in which you don't even have a real map, just a "concept map," and all action is controlled abstractly from a kind-of control panel. There's no documentation with it, including no developer's name and no real proof of the 1988 date. I'm rejecting it based on the notability guidelines in Rule #4. I'm not going to play everything that someone whipped together in two hours just because someone else bothered to preserve it.
          
Demon makes playing an RPG as fun as filing taxes.
       
Escape (1988), a roguelike for the Atari ST, seems to have existed at some point, as there are screen shots on MobyGames, but I can't seem to find it. It doesn't help that there are a bunch of other games with the same title or the word "Escape" in them.

Fountain of the Gods (1988) is another title in the DND line that stretches back to the earliest PLATO games. This one was directly inspired by Telengard (1982). It's certainly notable enough to play--one of the few titles released solely for the Atari 800. Unfortunately, either it's severely bugged or something is amiss with the emulator. I can only explore about 15% of the game before the game freezes on a gray screen every time I try to exit a room. It also has persistent problems by which I exit one room via a hallway and find myself embedded in the middle of a wall on the other side. I'm working with the developer to see we can solve the issues, but until then I can't really offer a full entry on it.
               
Fighting a demon in Fountain of the Gods.
       
Moving on, Gold of the Realm (1988) is a console-like action/adventure. Only GameFAQs thought it was an RPG, and they're almost always wrong when they go up against MobyGames or Wikipedia. Last Armageddon (1988), a Japanese game, was mistakenly on the list because it has an English translation for the NES, but not for any PC platform.

That jumps us all the way to The Legend of Blacksilver for the next 1988 title pending a discovery of Escape or getting Fountain of the Gods to work.


Saturday, February 3, 2018

Eye of the Beholder II: Poorly Coordinated

The bad guy makes threats.
           
Things are starting to get much more difficult in the temple of Darkmoon.

When I last wrote, I had just achieved the "mark of Darkmoon," which would allow me access to a previously-inaccessible area of the temple's second level. The magic mouth let us pass with no problem. There was some kind of glass shield blocking passage on the other side. I just swung away at it with my weapons, and it shattered.
            
Every bit of vandalism advances our cause.
        
The corridors led to a stairway, which led upward to a very small level with no enemies and not much treasure. It was oddly purposeless. I was worried I had missed something but I tested every wall--even those that shouldn't hold secret doors--and only found one. It led to a teleporter, which led to a small area with a couple of treasures and another teleporter back to the main area. Ultimately shrugging, I continued upward.

The next level started with a curious puzzle involving two busts of the same elf stationed in alcoves. San-Raal reported that the statues were "sources of powerful magic," and a nearby plaque said, "disperse the magic," so I tried casting "Dispel Magic" on them. It worked; casting it on each bust opened a secret wall.  
         
Ours is not to reason why.
        
In a room nearby, I found the old elf from whose visage the busts had been carved. What he said didn't really make a lot of sense. He had come to the area to study the magic of the bulettes--more on them in a second. Apparently, there was some rumor that the creatures released magic when they died. He goes on:
       
I constructed this dais to siphon the magic and store it as a reservoir. To my horror, the dais not only collected the magic but the creatures' intelligence as well. It binds my body here, feeding off of my magic powers. It wracks my mind and body with unbearable pain. It laughs at my pleas to release me or let me die. If you would allow me to physically touch you, I could release the inherent magic from my body and my body and spirit would finally be free of this magical snare.
            
Ah, the old "I'm trapped by a curse and need to physically touch you to free myself" ruse. You must think we were born yesterday, you old perv.
       
None of this makes any sense, but whatever. I let him touch Gaston and he died and Gaston got a bunch of experience and rose a level. I do like that Eye of the Beholder II offers so many of these special encounters, but they could have tried harder to make them coherent.

It wasn't long before I encountered one of the bulettes, also known as "landsharks." I read up on them in the first issue of Dragon magazine, where they first appeared, and it doesn't sound to me like they're particularly intelligent or release magic when they die. (I did learn that the name is pronounced "boo-lay." Well la-di-dah.) What they do is pound you for an incredible amount of damage. Two bites can kill one of my lead characters. "Hold Monster," damage spells, and dodging worked reasonably well when the geography cooperated. It often didn't, and they occasioned a lot of reloading.
            
These guys are hard.
         
The second monster introduced on the level was the lesser basilisk, which is theoretically capable of petrifying characters. I say "theoretically" because I couldn't even make them do it. Either I have good saving throws or they were just getting the worst rolls. Either way, I think Bugsy got petrified once, when we entered a room literally full of them. Otherwise, the creatures died from regular attacks about as easily as the dire wolves at the beginning of the game. It's good that they weren't too hard because they respawned like crazy.
             
I couldn't make these guys turn me to stone.
            
This level way overdid it with the navigation puzzles. There was an area of multiple teleporters that I had to carefully map. There were areas of "moving pits" where I had to time my travel down a corridor to avoid falling in. There was one fun puzzle with two rows of pressure plates in front of a moving piece of wall. Every time I stepped on a plate, the wall moved closer to my side of the room. Since it only had three squares to move within, stepping on two consecutive plates brought it right in front of me and prevented passing. (I'm aware that I'm not describing this well; if someone can do a better job in the comments, please give it a shot.) To pass, I had to throw an object to a pressure plate on the other side of the room, "faking" the wall and darting past it before it returned to my side.
         
By far, the worst area of this level was in the northwest, where there was a series of about 10 pressure plates in various corridors and an equal number of vents bellowing fireballs in various directions when you stepped on the plates. I had to carefully map which plates triggered which fireballs in which directions, then find ways to dart around the area, avoiding fireballs, and finding pockets of safety, all of this involving the kind of manual speed and coordination that I'm not good at. Complicating things was the presence of at least half a dozen bulettes, who wandered the area and often triggered the plates themselves. I must have spent two hours and a dozen reloads in this area alone, but it produced some clearly-necessary keys. 

Note all of the annotations on the western side as I tried to figure out how to get safely through the area.
         
I determined two things during the experience. First, "Wall of Force" stops fireballs and is thus a godsend in the right location. Unfortunately, I can only memorize one of them. Second, if you kill enemies by using the traps against them, you still get the experience. This came in particularly handy on the next level.
    
The party prepares to experience another death-by-fireball trap.
       
This area opened the way into the toughest challenge of the game so far. I encountered a magic mouth that challenged me to enter a teleporter after dropping my spellbooks and holy symbols in an alcove--I could cast no spells on the other side. ("Your spellcasters would make this battle a lopsided affair.") After saving and casting all the buffing spells I could think of, I dropped my items and entered. I found myself in a small area with three bulettes with no room to maneuver, but after a couple of reloads, I was able to kill them with a combination of melee attacks and a Wand of Lightning.
      
Fighting with no spells was lopsided the other way!
         
Nothing special happened after I returned, and the mouth acted as if I hadn't accepted the challenge. I started to move on, but then I realized that I had forgotten to drop my paladin's holy symbol in the pile. When I did that and entered the teleporter, I got taken to a new area. This one also started with a bunch of bulettes. They did a rough job on us. Shortly afterwards, we ran into a wall that we had to smash open. The kicker is that the wall did 8 points of damage to every party member every time we hit it, and we had to hit it 6 times. (Range weapons and spell scrolls didn't help.) This posed a problem, since Shorn and San-Raal don't have 48 hit points total and my other characters had been damaged by the bulettes. I had to reload from outside the area, enter again, and make sure that my party took virtually no damage from the bulette fight, then rely on potions and scrolls to heal everyone enough to pass through the wall.

The area culminated in a battle against some kind of fat abomination with wings, curly horns, and an elephant's trunk. It doesn't appear in the game manual. The next level was full of them. He started down a long corridor, so he wasn't hard to beat with my Wands of Lightning and Fireball and various ranged weapons. Beyond him was an "Eye of Talon" that I needed to open the way to the next level.
            
Anyone know what this is called?
       
I should mention here that both this level and the next were full of small areas interconnected by up- and down staircases, pits, and teleporters. Mapping them all was a bit of a nightmare, and I gave up on trying to keep track of what "level" I was on at a given time. This setting really needs some kind of "Locate" spell that will give X, Y, and Z coordinates to facilitate proper mapping.

Next level was full of these lumbering elephant monsters, which pack a punch but aren't as hard as bulettes. When they're close, they make a loud rhythmic thumping that's suitably intimidating. Midway through the level, I found a corridor with a pressure plate that launched two fireballs every time I stepped on it. A little alcove allowed me to dart to safety. There were at least 15 of the monsters in rooms at the other end of the hallway, so I spent a long time leading them back to the hallway and killing them with the trap.
           
Letting a fireball trap weaken the elephant-goat-bat-bear thing.
         
The level had a lot more of the "moving pit" traps, including two 3 x 4 rooms full of them, and it only took me a couple of experiences falling to the previous level before I started just saving and reloading if I fell. Again, challenges of manual dexterity aren't my strong suit, and I fell a lot. It seems a little unfair that my characters can all have dexterity of 18, but their success depends on me--perhaps another way that AD&D rules don't really fit this engine well.
           
Thread your way through this! (It's a little sped up.)
          
The hardest puzzle on the level was at least an intellectual one. It involved an area with four pressure plates, two teleporters, and six more pressure plates behind glass shields. I soon determined that various combinations of the original four pressure plates "configured" the destinations of the teleporters. There were pits in front of the teleporters preventing me from walking into them, but I could throw objects into them, and they would appear behind the glass walls on one of the six pressure plates there. The goal was to get an object on every one of the six plates. Through trial and error, albeit quite long, I figured it out, which opened the way forward and also allowed me to enter the previously-glassed-off areas and collect my stuff.

Towards the end of the level, there was a humorous moment when "Khelben" appeared in a vision. He told me that Dran Draggore was planning on unleashing some horrific magic against us, but we could prevent it by taking a magic amulet, letting Draggore's minions kill us so that Draggore would believe us to be dead, and then letting the amulet resurrect us. It was a nice try on ol' Dran's part, but even if I had believed the story for a second, the fact that the amulet was cursed kind of gave him away.
       
Sure, sounds legit.
        
We killed the minions as normal. The vision re-appeared, with "Khelben's" face dissolving to reveal Draggore. He ranted and threatened us and disappeared. On we went to the next level.

One thing that's starting to annoy me is the number of places where you have to take unavoidable damage. It started with the "light pads" an earlier level and continued with a "glyph" on the floor here, and a few places where I don't think there was any way to avoid a fireball. Also, that part where I had to just stand there and take the damage from hitting the door. Maybe there was a way around some of these, but I don't think so. I feel like there should always be a way for a clever or agile player to avoid damage.
         
The party takes damage from an unavoidable glyph on the floor.
         
This session was good for levels. Bugsy went to Level 10 as a thief, Marina went to Level 11 as a mage, Gaston increased to Level 9 as both a ranger and cleric, and San-Raal went to Level 10 as a mage. I didn't get any new spell levels, though.

On equipment, I have a lot more keys than makes sense, but perhaps there are redundancies on the tougher levels. No weapon upgrades, but we just found some kind of wand or mace called "Starfire" that casts some kind of "mystic defense" spell. Also, rather ominously, we keep finding polished shields that resolve to "Medusa shield" when "Improved Identify" is cast on them. I swear I've found about six of them so far. I guess the game is giving a fair chance to all six of the characters, but not all six of them are capable of carrying shields. Medusas, incidentally, are also not in the manual.
       
The game is starting to over-do it on these shields.
     
Checking on monsters, I still have mind flayers, salamanders, hell hounds, frost giants, and aerial servants left to experience. That would suggest three more levels, but since this session showed that the game is capable of introducing monsters not in the manual, I have no idea how many levels there really are. I'm still enjoying it, but not all of the time, and I wouldn't mind if it wrapped up before the 40-hour mark.

Time so far: 34 hours

*****

Those of you who said that Heroes of the Lance was not an RPG are correct. I knew you were correct before I started playing, but I thought it was important to document it as a D&D game, since D&D is responsible for so much we experience in the RPG world. After an hour with the game, I no longer think so.