 |
| All this because I answered some dogmatic questions and performed well in a test when I knew I was being tested. |
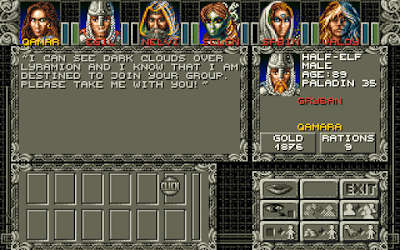
All right, so the Banes of Chaos have been released and are inhabiting the bodies of my three former companions, who are holed up at the Castle of the White Dragon. Meanwhile, the people that the banes used to inhabit--Gwenno, Cantra, and ????? (unless it's confirmed somewhere in the game, my headcanon is that it was the guy dressed like a jester in the woods)--have been resurrected, but their minds are still messed up. The reason for their current psychological state is a result of a virtue imbalance caused by their former possession. To restore the balance, I'll have to imbue them with the virtue they lack. When I closed the last session, I thought I knew that Gwenno was expressing insanity and Cantra wantonness, and thus needed Logic and Discipline respectively. But talking to them at the beginning of this session, I'm not so sure. They both say very similar things. I may have to save and try multiple buckets.
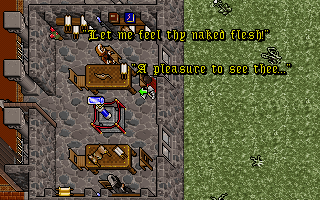 |
| Is this a sign of insanity, wantonness, or anarchy? |
To instill those virtues, I have to go get some water from the associated temples. (I wish it were this easy in real life.) My first quest as this session begins, then, is to find buckets. Buckets are one of those things you see everywhere but don't really register. I'm trying to remember where I know for sure that they exist. Fortunately, poking around Monk Isle, I find two. In the basement are four more. That should do it.
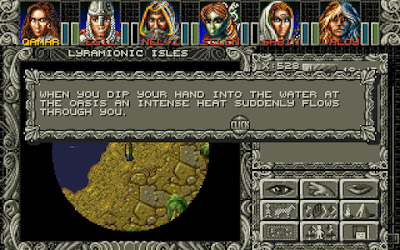
Back at the serpent gate hub, I dump some excess items from my backpack and try to figure out where to go first. My destination map has annotations like "weird temple" and "temple with stone maze." Only one of them, the Temple of Ethicality, is labeled with a specific virtue, and it's the one I don't need. I try the one labeled "Lodestone Temple." This takes me to the one outside the City of Order where I helped the girl's spirit stuck in the wall. I go to the edge of the water in the temple, put a bucket on the ground, double-click on it, and click on the water. The bucket is full. It is labeled "Bucket of Water." Great. I look back through my previous entries, and apparently the girl in the wall told me that I was in the Temple of Emotion and I would have to put the lodestones on the appropriate pedestals to create the "Water of Emotion." I go through the ritual, and this time when I fill the bucket, it says "Water of Emotion."
The problem is, I didn't need emotion. Emotion isn't even an Order virtue--it's a Chaos virtue. So anyone suffering from an imbalance of it would have to have been possessed by a Bane of Order. Unless I'm misunderstanding this whole thing, which I probably am. On the other hand, the temple clearly exists for a reason, so I assume I'll need this water eventually. That probably means I'll need all the others, too. Good thing I found six buckets.
My next stop, via the hub, is a new destination opened by the tooth the Gwani gave me. It takes me to a large stone building with large wooden doors on the north and south sides. Before each door is a set of three pedestals, blue to the north, red to the south. These clearly represent Order and Chaos. A book in a little room beneath the serpent gate tells me that I'm in the Temple of Balance. It says that "only a true serpent of fire and serpent of ice will bring thee to balance." I'm not sure what to do here, but I suspect I'm too early anyway.
My next attempt is "Weird Temple Near City of Order." This one has a blue serpent statue in the center, surrounded by water. There are a bunch of doors and a table with two "y-shaped depressions." Plaques read: "MIND BODY ENVIRONMENT" and "MIND TRANSFERENCE CHAMBER." A barrier comes up when I try to enter an eastern room that says "ENTRY FORBIDDEN." It's full of automatons and has a broken "bane jar." I guess this is where Batlin freed one of the banes. I find some documents in a desk that indicate I'm in the Temple of Discipline. There's an insane automaton in the same room; he babbles something about an automaton fetching water.
Most of the doors around the edges are locked. The "Mind Transference Chamber" is open, with two pads and a button. I suspect that I can transfer my mind to an automaton by having it stand on one pad and standing on the other, then hitting the button with "Telekinesis," but I don't have any particular reason to do that. Another chamber has three plaques, reading: "DISCIPLINE OF BODY," "DISCIPLINE OF MIND," and "DISCIPLINE OF ENVIRONMENT." It looks like there were three platforms in this room, but two have been destroyed by collapsing rubble.
Buttons in the two southern rooms open the rest of the locked doors, leading to stairways up and down. In a basement, I find a bunch of urns of ashes on pedestals. A nearby scroll says that they're the ashes of the people who volunteered to transfer their minds to automatons. A northern chamber has a bunch of coffins; I don't know who those people are.
Upstairs, I find a bunch of chambers, most of them walled off from me, and a bunch of books. It's a measure of how tired I am with this game that I groan at the sight of the books. I usually love books. The War of Order and Chaos is an interesting one, as it tells of a titular war "300 years ago," in which Order won and "imprisoned the Chaos Forces," then decided that they missed them. This sounds a bit like the Ophidian War we've been hearing about all along, except that a) Order destroyed Chaos; they didn't imprison them; and b) the book would have had to have been written recently, which seems impossible given the remoteness of the temple and the fact it's written in Ophidian. That suggests there was an even earlier war between Order and Chaos. I probably already knew that. As I think I said last time, this game has been going on so long that I'm actively forgetting it while I'm playing.
A book called The Symbol of Discipline indicates that I'll need to place a quartz symbol in the left slot and an obsidian symbol in the right slot. A book called My Journey by someone named Shartmannah indicates the way to the fountain (where I presumably will find the Water of Discipline) is coated with acid. Body Transference confirms my thoughts about how the transference chamber works and indicates that the body of the living person is not destroyed automatically; instead, the newly-ensouled automatons were expected to slay their own former bodies as the ultimate test of Discipline.
Another stairway takes me to a different basement where several coffins are completely walled off. I see an invisible chest in one of the "rooms," so I start clicking around for secret doors and soon find one. The chest has a key which opens a door in one of the upper-level rooms. I find the quartz y-shape in a chest. A secret door opens another upper room, where I find a desk with the obsidian y-shape and another key. There's also a shelf with four more damned books. Our Great Leaders may have some clues about the Temple of Balance. It basically says that when ceremonies were conducted there, they required the Hierophants (Order, Chaos, and Balance) and six Masters (three Order, three Chaos). The Importance of Meditation gives me the mantra of Discipline: ISSIT. Our Blessed Serpent Isle and The Book of Discipline seem like just flavor.
I take the y-shapes back to the altar and place them in the slots as the book instructed. Nothing happens except that I get occasionally zapped by a lightning bolt from somewhere. I try reversing them and a bridge appears to the island in the center of the chamber. Seriously, are any of the hints in this game accurate?
Downstairs, I find two locked doors, one to the north, one to the south. The key I found upstairs opens the south door. Inside sits a golden chest on a table. It has a key that opens the north door. There's a perfect microcosm for this game's absurd padding right there. Why not just have the key from upstairs open the north door? What possible value does the extra door, key, and chest have?
My irritation at the game explains my next choice. The north door leads to a little winding path where a pool of acid spawns every few steps and does 5-10 hit points of damage to me. I walk into it too quickly the first time, die (which is a pretty gruesome death, when you think about it), and have to reload. Clearly, the game wants me to go switch bodies with an automaton and then walk through the acid, although I don't know why it wouldn't damage a metal automaton as badly as me. I decide to stubbornly push forward and see what happens if I just cast "Great Heal" every few steps. I make it through the acid with no problem.
"Thou hast proven, through thy Discipline, to be worthy," a scroll says on the other side. I agree. I think it takes far more discipline to walk through acid, feel the pain, and heal yourself rather than change places with an automaton. That's not disciplined; that's just clever. I fill a bucket with the water, wait a bit for my spell points to recharge, then make the return trip and head back to the hub.
Next stop: The Temple of Ethicality. The serpent statue and water are up the stairs and outside at this one, but just using the bucket on the water doesn't do anything, probably because the basin at the north end is dry.
I head back down into the basement to see what I can do. There are a bunch of skeletons lying on woven mats. Each has a scroll on its body, blathering about Ethicality, which is how I knew what the temple was in the first place. "Never, NEVER surrender to thine enemies," one advises. "Fight to the death, but do not abandon thine Ethics." What if I could save the lives of millions by surrendering? Clearly, the Order folks believed in deontological ethics. Other scrolls have similar questionable adages. A particularly long scroll argues that wealth is antithetical to ethics because it invariably corrupts.
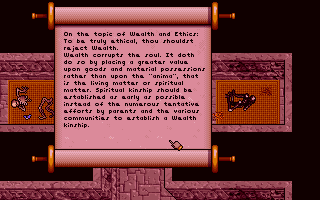 |
| This sounds like it was written by someone who has plenty of money. |
A note written by whoever among the forces of Chaos sacked the temple says that the Chaos soldiers tortured and killed the Order people here but never got any answers. "These sheep all went to their deaths with smiles on their accursed faces!" He questions whether their calm has something to do with their meditation. "Those who desire to meditate need only kneel before the serpent." The problem is, the game doesn't really give you any ability to kneel. I went outside and stood in front of the serpent, and double-clicked the ground, but that didn't accomplish anything.
Looking around inside, I find a carpet with an image of a snake. It looks like a serpent gate, except in fabric rather than stone. I double-click on that and am teleported to a small stone room with an automaton. "I am the Educator," he says. "It is my task to determine how far thine Ethicality hath already progressed before the test may begin." I say go ahead, and he asks me these questions:
- "Question One: If thou didst come upon one who was sure to die, would it be Ethical to risk death trying to save the doomed person." I feel like one of the scrolls addressed this specific situation, but I don't remember what it said. However, knowing that Order's sense of Ethicality is heavily weighted towards the ethics of duty, I say yes. He says I got it right. "Ethicality demands that thou must seek to preserve the life of others, as thou wouldst thine own."
- "Question Two: If thou didst come upon a room of untold wealth within a structure where thou didst not know if the owner lived, would it be Ethical to take the money if thou wert in sore need? Or wouldst thou leave the money to possibly be used for evil ends?" Ha. CRPG protagonists face this situation every day, and it's rarely a dilemma to them. But knowing this is a Test of Ethicality, I say no, you've got to leave the money. I am again correct.
- "Question Three: If thou wert faced with the certainty of thy death at the hands of an unethical man, wouldst thou yield to him to save thy life? Or would Ethicality demand that thou shouldst continue the struggle unto death?" Ooh, I know this one. I quoted it above. "Continue." The automaton congratulates me for being right. "Ethicality demands that thou shouldst maintain thy virtue and oppose evil, even at the cost of thy life."
These Order Ophidians are really something. They've tied up their concept of "ethicality" with pure "duty," which admittedly is one interpretation of ethics, but only the most facile one. Even then, I don't think you can make a deontological argument that everyone should always fight to the death. Even Kant would probably say it depends what the stakes are.
The automaton is as pleased as punch, though, and sends me off to the actual test. I'm suddenly naked in a cave with a pile of gold in one hand, a gem in the other, and a gold bar in my backpack. Is that one of the Level 8 spells I'm missing?
I come to a door. "CHOOSE," a plaque says, and the door swings open. I walk in and find a man standing in the middle of a ring of fire. He's screaming in pain. "The button!" he yells. "Press the button!" He's referring to a pillar, also surrounded by flames, on which there is a button. I blithely walk past him and am teleported back to the automaton. He says I failed the test and that I should meditate and try again. I just wanted to see what would happen.
 |
| Ah, yes, the classical ethical dilemma: A man is on fire and screaming, and you can put the fire out by pushing a button. Do you push it? Discuss. |
I try again and--duh--press the button. I take damage but the flame dies out and the man praises my ethicality. I'm teleported back to the automaton, who echoes this praise and sends me to a new location--a corridor. "A WISE MAN KNOWS THAT BLOOD IS MORE IMPORTANT THAN WEALTH," a plaque reads. There are a couple of chests in the corridor with golden serpents and a pedestal. It takes me a couple of tries to figure out what the test wants, which is for me to sacrifice my riches on the pedestal--as if I have anything else to do with them--and not take the serpents.
For the third test, the automaton sends me into a room with Batlin. "Fool!" he says. "Thou dist think me dead . . . But now it is time for thee to die!" Before I can do anything, he blasts me with a fireball and knocks me over. "Yield to me, and perhaps I shall spare thy life!" he offers. Good lord. This again? Of course I say no. I'm teleported back to the automaton, who congratulates me and sends me back to the temple. Of course, all my stuff is screwed up. I have to spend a few minutes putting things back where they're supposed to be. Oh, and I have the riches from the test. I'm not sure whether this is another test. I leave them all on the floor just in case.
Outside, the water is flowing. I fill up a bucket and head back to the serpent gate hub.
Next up: "Stone Maze Temple," which I suspect is going to be the Temple of Logic. I screw up and go to the place I found Mortegro, which I realize now is a Chaos temple. I know it's not Emotion, and the guy in the basement mentioned he'd been at the Temple of Enthusiasm when it was destroyed, so I guess this must be Tolerance. I try dipping the bucket into its waters to no avail. There doesn't seem to be any other puzzles here, so I leave and go to the temple I was trying to get to originally.
What I assume is the Temple of Logic has me find my way through a three-level maze (which is why I thought it was Logic), cross a checkerboard floor with fire and lightning shooting at me, and enter a library full of books. They're clearly written from a Chaos perspective, and when I head outside to the well and fill up a bucket, it says "Water of Enthusiasm." Damn. At least I didn't have to solve a puzzle. There are some other things in the temple that I don't understand, including what looks to be a little museum, with plaques that say "CRYSTAL SKULL OF THE MYSTICS" and "GLASS VIPER OF SESSENRA." There's a Sceptre of Enlightenment and a Hammer of Dedication, both on pedestals, and some kind of magic rod in a stone receptacle south of the temple. I grab them all to take back to the serpent gate hub in case I need them.
So where the hell is the Temple of Logic? I look at my destination map. Origin loves predictability and symmetry in these types of things. In this case, look at the map and see what you think:
It's got to be where I've written "Ice Dragon/Silverpate Caves," right? I warp there. Some ice trolls attack as I explore, accounting for most of my spell notes this session.
I come to a passage I don't remember from previous explorations. It has three ice blocks and two dead bodies next to them. In the room beyond are four teleporter pads. One of the bodies has a journal identifying the owner as Dolfo. The journal indicates that the teleporters are a kind of puzzle: "Red directly precedes White: Blue follows yellow: Yellow directly follows Red: Yellow and White do not immediately follow one another."
I've solved this kind of puzzle a bunch of times, but I don't understand this one at first, since two of the statements seem to contradict--unless Red is used twice. Which it turns out it is. Even then, there are two potential orders: RED, WHITE, RED, YELLOW, BLUE and RED, YELLOW, BLUE, RED, WHITE.
It doesn't matter anyway because I can't tell what the colors on the screen are, so I just solve the puzzle through trial and error.
I get teleported to a room with four runes on pedestals and a locked double door. The runes have Ophidian runes on them but Dolfo's journal uses regular letters: "I tried W.O.B. and C., none of the runes were in the correct position. I then tried C.B.W. and O.--again, none of the runes were in the correct position. I then tried the O rune in the first position, which is not where it belonged, and knew I could discern the puzzle."
This is relatively easy. If W, C, and O are all wrong in the first position, it must be B. If C and O are wrong in the fourth position, and B is in the first, it can only be W. If O is wrong in the second position, that leaves C. So the order is BCOW. I just have to cross-reference the runes with the manual, and line them up in front of the door (as the journal says). That could have been harder, but I'm admittedly losing patience with the game.
The temple is a mirror of the Temple of Discipline, with the "bane jail" in the same place (I just realized I didn't see that in the Temple of Ethicality). I'm hoping I can just grab the water, but no, there are more puzzles. @$#% my life.
The automatons are on about something. The key to the fountain is missing. Number 7 is missing last seen with Number 2, but Number 3 thinks Number 5 is lying, blah blah blah. I kill all the automatons and loot the key from the body of one of them. (I call this the "Gordion Knot" approach to logic puzzles.) Of course, it doesn't open the way to the fountain; it opens the way to a room with another puzzle. Slide these stones around so that yada yada yada, a scroll reads. I bypass the puzzle with a "Dispel Field" and grab the key. A few steps later, I have the Water of Logic.
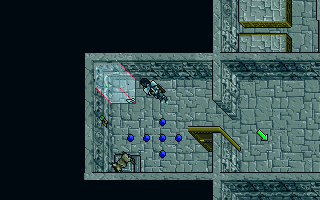 |
| This one, too. |
Back to the serpent gate hub, back to Monk Isle. Gwenno is in the library. I make a save, because I still don't know what water she needs. I try Logic: "Come, allow me to feed upon thee!" Ethicality: "Blood, blood everywhere!" Discipline: "What a relief to see thee again, Gideon." I reload and do it again.
Gwenno is back to her old self. She says I'll have to work quickly to undo the damage that Batlin has caused. She warns that the peril to the Serpent Isle--which she calls "New Sosaria"--also imperils Britannia and Earth. She reiterates a bunch of stuff about the Ophidians that I figured out ages ago.
She says I'll have to cage the Banes again if I want to "rid this land of the threat entirely." She suggests I ask around Moonshade. She also mentions that it would be useful to talk to Xenka's specter. There's a "JOIN" option, but she says she'll be more use if she stays on Monk Isle and conducts research. I think "Summon Specter" would allow me to talk to Xenka, but I don't know where to cast it. The monks aren't even sure she's died.
A commenter already warned me that you can't heal Cantra, but I reload and try anyway. She just continues to rant and rave even after getting doses from all three buckets.
Some commenters have mentioned that Serpent Isle seems to have become a pure adventure game in these latter stages. This entry illustrates pretty well what they mean. I don't completely agree: I don't think an RPG changes its genre just because it stops using its RPG mechanics. It just becomes a bad RPG. That said, there were a few combats during this session--a skeleton in one of the temples, a giant rat, a couple of wolves, a handful of ice trolls. But those types of battles have become worse than "inconsequential." The Avatar really just brushes past them, occasionally swinging his axe if I feel like pausing long enough to do it. I'm not sure how I feel about that. As we approach 100 hours, I don't want anything that delays the endgame longer than necessary. On the other hand, a lack of balance and enjoyable mechanics is what makes 100 hours "too long" in the first place.
Time so far: 94 hours
Comments on Level 4/5 Spells
Level 4
Blink. Fizzles every time I try to cast it. I'm not sure why I would want to cast it anyway. It supposedly teleports you "to a new location about twenty paces from the original location" but doesn't let you go through locked doors or other inaccessible locations. What good is it, then? To confuse you momentarily?
Deter. "Often discourages hostile, non-sentient animals from attacking its subject." I try it on a pack of wolves, and it works on three of them, sending them wandering off while a fourth continues to attack. It's not a bad spell from a role-playing perspective. I didn't like killing snow leopards. I should have used it then.
Flash. Creates a flash, "blinding all creatures within the affected area, save the caster." So it blinds the rest of the party, too? That's not very helpful. I try it on some wolves, but it doesn't seem to change their behavior. If it makes them less effective in combat, I can't really tell. (They're wolves.) Seeking tougher foes, I go up north to a bear cave and try it there. If it makes them any less effective, I can't discern it.
Mass Curse. Supposedly works like the third level spell "Curse" ("severely hampers the subject's abilities in combat") but on everyone in the area. Let's try this one scientifically. I take off my magic armor and leggings and head into the bear cave. I stand there while he swings away at me. It takes him 34 seconds to kill me. I reload, head back to the cave, and this time cast "Mass Curse." The bear takes 31 seconds to kill me. I'd say the spell is useless, but it wore off after about 5 seconds, so it simply didn't have any impact on the battle at all. I don't bother to test whether it makes the enemy easier for me to kill. The bottom line is that I'll use this type of spell sometimes in a turn-based, tactical game where I can see the effects. In a game like this, I need more tangible evidence before I waste the spell points and reagents.
Reveal. Negates invisibility. In the Temple of Discipline, I confirm that it works on invisible chests. The problem is that you're probably not going to go around casting the spell in every room, just in case. And if you already perceive an invisible chest (which frankly isn't that hard to see), then you don't need the spell. It's the same problem with "Columna's Intuition," which also makes invisible chests sparkle. Are there any invisible enemies in the game other than the one in the Knight's Test? I can't remember.
 |
| The chest in the middle was invisible a second ago. Trust me. |
Transcribe. Extremely essential. Turns spell scrolls into permanent spells in the book. I'm pretty sure you can't win the game without this, as there are key puzzle spells that only show up once in scroll form, and you need to cast them multiple times.
Unlock Magic. Another key "puzzle" spell, although this game has far fewer magic doors than its predecessors.
You may note that I've only listed seven spells. I don't know what the eighth is; there's a blank space in my spellbook, and the manual doesn't list any more spells in this circle.
Level 5
Conjure. Summons wild beasts to help fight for the caster. When I tried it, it summoned some deer, who stood around doing nothing. Tried it indoors against the bears and nothing happened; I guess it doesn't work indoors. Went hunting for some outdoor bears, found it, tried it again. This time it summoned more deer and a couple of foxes, none of whom seemed the least interested in attacking the bears.
Follow-up note: You can kill the summoned deer for food. That's messed up.
Explosion. What any other game would call a "Fireball." It half-kills polar bears. The problem with this one is targeting. You don't want to catch yourself in the radius, but the game screen isn't big enough to target enemies far away. Even if you catch them at the edge of the screen, they can close most of that distance in the time it takes the spell to cast. In Ultima VI (I don't remember if this is true in The Black Gate), the spell was basically a substitute for a powder keg. It would destroy doors and other obstacles, and thus you used it more for puzzle-solving than for actual combat. Here, that doesn't seem to be true. I tried "Explosion" on the rubble that I had to attack to clear in The Silver Seed, for instance, and it did nothing.
Great Heal. Fully heals one person. One of the few essential non-puzzle spells--and as we saw above, it can even be used to bypass puzzles. Just like I'm an "ask forgiveness rather than permission" sort of person, I'm also a "heal the damage later rather than preventing it ahead of time" sort of person, at least in RPGs.
Invisibility. Turns a single target invisible. Not a bad spell. I verified that enemies don't attack while it's active. Useful for just blowing through an area, although only if you're a single character or can cast it on everyone. Extremely short duration, though. One of the more interesting things is that it changes the colors on the screen, washing everything out in white. This actually makes it easier to identify certain things, like invisible chests, at least for me. When you use it on characters, you can still kind of see them, with a whitish outline. If you use it on enemies, they completely disappear. You can bring them back with "Reveal." Yes, I know--why would you?
Mass Sleep. Puts everyone in the area to sleep. This one is pretty useful, I'll admit. The sleep duration is extremely variable, but in a group of three or four, it has a decent chance of taking at least a couple out of commission until you're ready to deal with them. They don't automatically wake up when you start attacking, either. I often think how awful it would be if this spell existed in real life. Imagine you're a soldier entering combat and suddenly you fall to your knees, your eyelids drooping, and your last thought is that the enemy is going to be able to do whatever they want to your unconscious body, and you won't even know.
Summon Shade. I just got this. It will turn out to be a puzzle spell, allowing me to speak to the ghost of someone dead. Like "Seance" in Ultima VI, it ought to work in a hundred places in the game, but of course only works in the one place that the plot directs.
Erstam's Surprise. Causes clouds to radiate away from the caster, variably causing fear, poison, or sleep on the enemies they encounter. I don't know. I prefer to know what's going to happen when I cast a spell. Neither fear nor poison are as useful as sleep, so why wouldn't I just cast "Mass Sleep"? Even when reagents were a problem, "Mass Sleep" requires fewer of them.
 |
| Whatever joke you're planning to make in the comments, everyone's already thought of it. |
Still have four levels left to cover. If I do two per entry, will I run out of entries before I run out of spell levels? That would be a nice problem to have.


