Saturday, October 30, 2021

Dark Sun: Desert Power

 
It's a dry heat.
 
In the last session, the party learned about a mysterious figure named Dagolar who created the Tari and the skulls that housed the Tari ancestors. We learned that to get into his domain, we would need to use the Staff of Parting in the northeast corner of the dungeon. We did that, which drained the water there and allowed us to access a new part of the sewers.
   
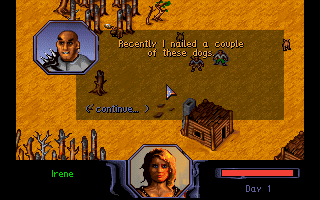
I think Dagolar's area was entirely optional--nothing that happened there was required for us to leave the sewers and continue the main quest. It was fun anyway. Despite his relatively benign act of creating the Tari, Dagolar was a corrupt, twisted mage whose domain was full of pain, torture, and horrendous experiments. A particular creation called "Dagolar's Slimes" patrolled the corridors. They hit hard, cast "Web," and had damaging psionics. Although the manual claims they have "nil" magic resistance, clearly that wasn't true because none of my spells seemed to affect them. Human guards, zombies, and shadows--which could only be damaged by magic weapons and spells--were the other primary enemies.
   
There's something I don't quite understand about combat. Sometimes when you encounter an enemy, the game immediately goes into combat mode. Other times, it remains in normal mode until the enemy reaches you. During those times, if you time it perfectly, you can "attack" them from regular mode and do some damage--sometimes killing them--before combat even begins. Other times, you can walk right up to enemies who seem to remain ignorant of your presence (even if you have no stealth or invisibility active) and initiate combat by, again, attacking them from outside combat, and often killing them immediately. It's a nice bonus when either of the latter things happens, but I don't quite understand the variances.
    
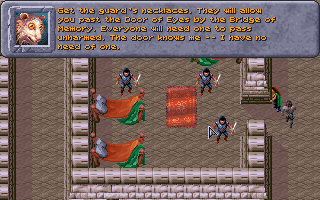
The Master of the Water Gate encourages us to kill some guards.
        
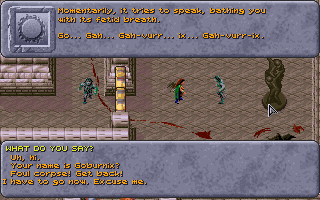
After we fought a few slimes, we opened a door and ran into a talking rat, Master of the Water Gate. Eager to escape his slavery, he offered to help us kill Dagolar. I don't think he was a Tari. He helped us in the next few combats and had some commentary about the things we saw in each of the rooms we explored. He told us that to pass through something called the Door of Eyes, each character would need to be wearing a special necklace. We got them by killing a few guards.
    
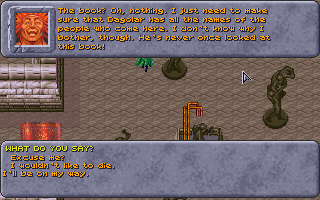
On the other side of the Door of Eyes, we ran into Keldar, who the rat told us was Dagolar's second-in-command. "He is insane!" Keldar did seem to be a little off. He insisted on writing our names in a book and then asked how we wanted to die. When we insisted that we didn't want to die, he teleported out of the room and left us to kill a bunch of slimes, zombies, and shadows. This happened a second time in a later room. Unfortunately, the Master of the Water Gate was killed in the first of these combats and never got to experience his freedom.
     
Keldar had a screw loose.
      
Every room had evidence of Dagolar's crimes. Skeletons were everywhere (some with minor treasures), along with iron maidens, racks, and other instruments of torture. One room had statues of people fused together in grotesque masses. They cried out in pain saying that Dagolar had sentenced them to torture until the end of time. I couldn't seem to do anything for them, not even after Dagolar was dead.
   
We found a room full of bottles of "Dagolar's powder" and a vat for mixing them. Mixing one bottle produced a zombie that joined our party. A second bottle caused Violencia to drop all her inventory. A third teleported us to another part of the dungeon. We stopped after that.
    
There were several contraptions like this where I couldn't find anything to do, but I wonder if there was something to do just the same.
    
One chamber was marked with a plaque that read: "Goburnix, my only mistake." Goburnix was Dagolar's brother; we had found his journal in the Tari warrens, outlining his quest to find Dagolar and stop his abominations. He had apparently failed, as the room contained the living husk of Goburnix, a zombie barely capable of thought or speech. But he was non-hostile, and with gestures and slurred words, he indicated that he wanted to come with us to find Dagolar. A scroll on his person was written from Dagolar to Goburnix, apologizing for what he had done, asking forgiveness, and promising to face Goburnix again when he'd built up the courage.
        
As usual, the party had "evil" (or at least impatient) options.
          
Dagolar's chambers were beyond an archway of fire, but Goburnix walked through and activated the pressure plate that allowed us to pass safely.
     
We encountered Dagolar in the northwest section of the dungeon. He was appalled to see Goburnix with us, and even more appalled when Goburnix started approaching his brother, his arms open wide for a hug. Before Goburnix could reach his brother, Dagolar blasted him to ash. He started ranting at the party for involving Goburnix. Keldar, also in the room, objected by reminding Dagolar that, "it was only a rotten corpse." Dagolar responded by blasting Keldar to ash, too. (I assume that if I hadn't picked up Goburnix, the battle would have been harder with Keldar's involvement.) Dagolar then summoned 10 slimes and attacked us.
         
This was a bit heartbreaking.
          
Yester, my preserver, had achieved "Fireball" (of course it was the first Level 3 spell I selected) a few combats ago, and the room was laid out perfectly for it. Practically quivering with glee, I called it up and cast it:
     
My first use of "Fireball" was a dud.
         
Well. That was disappointing. The slimes are apparently immune to "Fireball." Only Dagolar was injured. That was enough, though. Unable to cast spells his first round, he unwisely chose to charge us in melee combat, and Sunstroke pounded him to goo. Rather than face the 10 slimes in open combat, we retreated down the corridor to another room and dealt with them one at a time as they came around the corner. "Prayer," "Bless," "Barkskin," and "Aid" all helped.
    
Sometimes, I could kill them without even entering combat.
     
When we were done, we looted Dagolar's corpse and the rest of the area. Dagolar had a "Living Cloak" that keeps "Intertial Barrier" going constantly, which halves damage from certain attacks. He had a wand that casts "Control Body" and a +3 dagger. There were plenty of gems, rings, and piles of coin, too.
     
I love how clear the game is as to the capabilities of the various objects you find.
       
There were lots of empty rooms in the southwest part of the dungeon, and I suspect that if I'd adopted a different exploration pattern, I would have encountered things in these rooms before killing Dagolar. I wonder what would have happened if I'd reached him with the Master of the Water Gate or if I'd not picked up Goburnix. I'll have to remember to look these alternate paths up in a cluebook later. Until then, suffice to say that I love that the game gives so many potential options for these encounters, in both a macro sense (the order that you explore the map, big decisions) and a micro sense (dialogue and encounter options).
      
The party finally breathes fresh air.
       
We returned to the warrens and took another exit, emerging from the sewers into the sunshine at last. For a game set on an apocalyptic wasteland, Dark Sun has sure taken its time actually exposing us to that wasteland. In fact, it would continue to take longer, as we emerged into relatively lush fields of wheat and other crops, tended by a bunch of nameless serfs "too old to fight in the pits and too weak to help with the pyramid." They told us we were in the fields outside Draj. They warned us that the perimeter is patrolled by guards--increasing numbers lately, as the sorcerer-king seems to be preparing some major campaign. There are vicious beasts in the wilderness outside, even if we could get past the guards. When asked for help, they directed us to "Old One-Eye."
   
Although we were outdoors, we couldn't just walk across the fields. Mounds and canals kept us to fixed paths, much like dungeon corridors. The outdoors was really just a dungeon with outdoor textures.
    
We tangled with a few (easy) guards as we looked around for Old One Eye. We eventually found him in the center of the map. He told us there are two ways out of the area: kill the guards or knock down a weak spot in the eastern part of the bone wall. We chose the second, and he led us to the location, asking us to "come back and destroy this blasted city." He also gave us a scroll of "Armor."
        
The party attracts some attention destroying the fence.
    
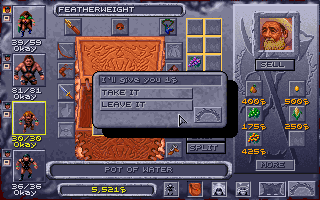
We managed to bash down the wall just fine, but we had made such short work of the guards that I figured we might as well clear them out of the area. Also, I hadn't really explored everything. I'm glad I took the time, because on the west side of the map, I found my first "shop"--a serf selling magical crops. He had pears capable of "Cure Light Wounds," grapes of "Bless," lemons that restored psionic points, "Barkskin" corn, and grapes of "Neutralize Poison." Moreover, he bought all the extra junk I'd been lugging around. I sold him everything I could spare and bought a healing pear. I wouldn't mind if the interface had offered an easier option than clicking on each item and then dragging it over to the "sell" button.
      
The manual said water was more valuable than gold, but this guy will only give me one coin for a pot of it.
    
Elsewhere, a serf wanted us to agree to let him follow us out in exchange for a gem that someone had stolen from an obelisk in the area. We agreed. The game let us put the gem back in the obelisk, but I'm not sure what it accomplished, if anything. Maybe we're just meant to sell the gem.
   
After we'd wiped out the guards, we took the north exit. The serf bid us farewell and said he could handle the wilderness, but his methods were too technical for us "barbarians." He was then immediately eaten by a bulette (I guess that bulette had a buffet!) that we had to kill.
 
Just outside the exit, we found a body with a scroll on it. The scroll's message had been written by someone in the palace named Rajak. The message warned that the armies amassing in Draj are "not for some far away campaign," but rather to destroy the free villages in the area. Rajak begs the recipient to flee, as "I see no band of 'heroes' that will come and save us from the might of Draj's army." This apparently refers to a prophecy from a "visionary." 
     
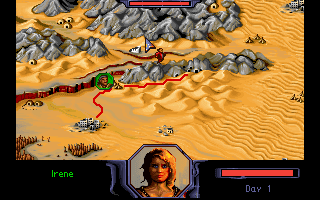
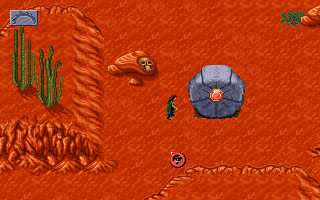
This is the desert map I was expecting!
      
An old man immediately wandered over after we'd read the scroll.  He introduced himself as Egrus. He had read the message, too, and said that the carrier had been bound for the village of Teaquetzl to the north. He suggested that we forget we read the scroll, as nothing can stop the sorcerer-king's armies. We told him we would, but that would give us nothing to do for the rest of the game.
   
We wandered north, fought a couple of easy enemies called "sand howlers," and met a lizardwoman named Laussa, "of the Grey Isles tribe." (The "isles" are boulders poking out of the sand.) She had left her tribe after some human merchants engineered a coup that left the former leader, Laussa's lover, dead. Laussa is seeking a new tribe, away from humans. I couldn't find any way to help her, and she kept referring to us as "prey," so I left via an eastern exit into a red-tinged area. I had frankly expected a world map to pop up once we were outside, but instead there seems to be a series of interconnected maps.
   
The red area was sparsely populated. In the southeast corner, I met an "animal trainer supreme" named Demothi. He was in the process of domesticating a large mastyrial, which is basically a giant scorpion. He had named it "Alita," intending to sell it to a tribe in "The Hinterlands." We had a dialogue option to ask to buy the beast, but Demothi wanted refined salt for it, and of course we didn't have any.
     
No idea what these are about.
     
As we walked away, an old man named Algernon approached, fawning over us for having escaped the Arena. He said that we must be "from the Veiled Alliance." When we protested that we'd never heard of the organization, he chuckled, assuming we were just keeping their secrets. He had something to say about each of the magic items we had collected. He "donated" two items to us as we left: a wand that can detect metal, and a gem for an obelisk in the area. As before, it fit into the obelisk's hole, but I still don't know what these things are for.
   
An elf named Notaku had set up a laboratory on the central mesa in the region, selling spell components for mages. He offered us 500 gold pieces to carry a bag of "ranike pith" to Father Garyn in Teaquetzl. He also said he'd buy any sand howler eyes and fire eel tongues that we found. Teaquetzl is reportedly one square west and one square north. 
          
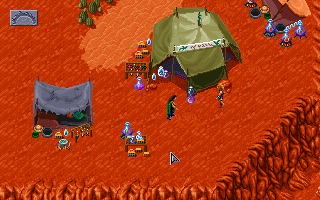
Notaku's sweet setup.
       
We should have headed directly there, but the inscrutable exhortations of our souls drove us south instead, to another region of red sands. Shortly after we arrived, we ran into a group of "magera"--basically the orcs of this setting--escorting human prisoners to slavery. After a failed initial attempt to kill them without much preparation (they hit hard), we reloaded, buffed, and tried again. We used the old "catch 'em in a 'Grease' trap and fill them with arrows" trick and managed to kill the party. 
     
A tried-and-true tactic.
        
The rescued slaves told us that the rest of their party was nearby, "with no supplies or defense!" We escorted the group back to their destroyed wagon but got trapped in a circle of NPCs--I couldn't find any way to get them to move out of the way--and I had to reload.
        
You have to get out of the way!
       
After we defeated the second group of magera, the grateful humans gave us a magic +1 bone hornblade. We had the option to tell them "I'm allying against Draj's army," which was news to us. They said they'd join us and asked where we should all meet. We responded Teaquetzl. I think I was supposed to visit Teaquetzl first. The game has so far been better about not allowing such plot developments outside of our exploration order.
   
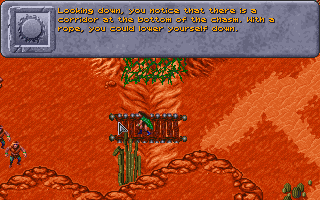
As we crossed a bridge in this area, the game alerted us to a "corridor" beneath us. If we had a rope, it said, we could lower ourselves down. I didn't have a rope, so I left the area to the west, which took us back to the farmland and the bone gate we'd previously smashed. We headed back north, defeated a pack of wild muls led by a couple of defilers, rested at Egrus's camp, and continued on. We fought some more sand howlers, this time taking care to grab their eyes. Another north exit, we were in the town of Teaquetzl.
       
Good thing we crossed the bridge!
       
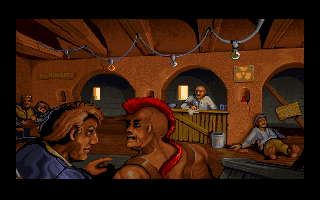
A guard posted at the entrance demanded our business; we said we were there to see Father Garyn, but there were other options that probably would have gotten us in. The guard said we should talk to Chahl, their leader and founder of the village. The guard let on that the town was more prosperous than most of the free desert villages because of a well that has never gone dry. He also told us about a crazed halfling called "the visionary" who's ranting about something.
 
In the council chambers, Chahl immediately welcomed us as the prophesied heroes (the Visionary had apparently drawn them a picture). He and Kwerin, the chief lieutenant, said that we're supposed to save them from an army coming from Draj. Chahl thinks the solution is joining with the other gladiator villages while Kwerin thinks Teaquetzl should try to stand alone. Ignoring some more obnoxious dialogue options ("I have no wish to help you," etc.), we agreed to do our best. Chahl, overjoyed, assigned us a house (with "gifts") to the southeast. He suggested we visit the other villages while his people collected intelligence on Draj.
      
The party acquires the main quest.
        
I'll cover more about Teaquetzl next time. A few miscellaneous notes until then:
   
  • I haven't mentioned in previous entries that the game offers two methods of seeing the party while in exploration mode. In the default, the party is represented by only one of the four characters. You can switch among them with the number keys. But hit the 5 key, and all four party members appear, like they do in combat. Exploring in this mode reminds me strongly of Ultima VI, and I wonder if the developers weren't a little bit influenced by that game.
          
Exploring Dagolar's place in "group" mode.
         
  • I'm having some significant pathfinding issues in combat. I'll click on an enemy so a character will walk over and attack him, but the character will turn and walk in the opposite direction. Apparently, he can't find a direct path so he figures he'll circle the entire dungeon and come at the enemy from the rear. This happens even when there's a fairly obvious direct path.
  • Chahl is said to have escaped from the fighting pits in "Nibenay." I can only imagine that Bethesda took the name of the region of Tamriel from this setting.
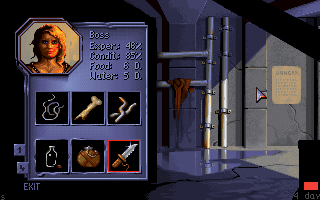
  • The manual says that gladiators reach Level 8 at 150,000 experience points, but the character sheet for Violencia says that she'll hit the level at 125,000.
  • As I close, Violencia is a Level 7 gladiator (out of 9). I had originally planned to dual her to a preserver or psionicist at Level 8, but I think maybe I'll just max her as a gladiator after all. That requires 300,000 experience points, and she's only earned 98,266 so far, so it's not exactly close. Sunstroke is a Level 6/6 fighter/cleric. Featherweight is a Level 6/7 ranger/thief. Yester is a Level 6/7 preserver/druid. 
     
I'm still having a great time with the game. It's fast and fun with great encounters and combats. This would be a great game to replay on a higher difficulty level, once I have a good sense of the new enemies, spells, and combat rules. 
   
As I mentioned in my Pool of Radiance entry, though, I think I still find Gold Box combat marginally better. That might still change as I get more expertise with Dark Sun's, but for now I feel that Sun has perspective issues (e.g., characters or monsters hidden behind other characters or monsters), pathfinding issues, and ambiguities that the Gold Box mercifully lacked. On the other hand, Dark Sun is a clear winner in its game world, character creation, NPCs, and quest design. Right now, I'm thinking it's possible that we're going to end this with a new "top game."
   
Time so far: 14 hours
      

Thursday, October 28, 2021

Revisiting Pool of Radiance (1988), Part 3

Neither are any of us, you bigot.
      
As we closed last time, the party had finished clearing the slums district Sokol Keep, and Kuto's Well, including the bandit hideout beneath the well. As we started this session, the Council had given us several missions, and by the end I had a couple more:
    
  • Councilor Cadorna, whose motivations I covered last time, wanted us to retrieve a treasure from his family's old estate in the textile complex. 
  • "The Council is offering a reward for books, maps, tomes, etc., which provide useful information about Phlan before the fall." The module indicates that this mission is coming from Cadorna, too, although in the game you get it from Sasha. Cadorna is obsessed with figuring out who the ruler of the evil monsters is.
    
How do you put a value on information?
         
  • Infiltrate an auction at Podol Plaza and figure out what "weapon of great power" is being sold. In the module, you're not supposed to get this mission until you've cleared the textile complex.
  • Clear out a large group of thieves at Kovel Mansion.
  • Braccio, bishop of Tyr, asked me to clean out an evil temple to Bane on the other side of the river. He offered an acolyte named Dirten to accompany us.
  • Stop a tribe of nomads from allying with the evil forces.
       
I decided to proceed in roughly this order. Our adventure starts at Mendor's Library's ridiculously difficult front door. Multiple rounds of bashing and picking failed to open it, but Galadreish had learned "Knock" from a scroll, and that got me through.
   
As with Sokol Keep, the map for the area in Ruins of Adventure is entirely different, although it has many of the same encounters, and it doesn't even mention that the front door is locked. In fact, where in the RPG, the library is a 13 x 12 structure within the 16 x 16 map, in the module, the library takes up the entire map. Its north doors open directly into Kuto's Well and its west doors open directly into the textile complex. It has southern and eastern doors, too, but don't ask me where they go, as even in the module, there's supposed to be ocean in those directions.
      
Mantor's Library in the module (left) and Mendor's Library in the game (right).
       
The bigger change is that the area is called Mantor's library in the module and Mendor's library in the game. However, an encounter in Sokol keep in the module confusingly refers to "the sage Mendor," so I'm guessing the name was changed for the module but they forgot to change it in all places. It was a dumb change; "Mantor" was the villain in Questron (1984).
   
Both libraries feature a few rooms of "library stacks" in which the players can search for useful books. In both the module and the game, the "Mathematics" section never has anything useful; the module has an additional "Rhetoric" section with useless items. The "History" section has three items and the "Philosophy" section two. Some comments on these items and other findings from the library:
    
  • In both products, the characters can find an atlas of Phlan and areas to the north. These maps are actually shown in the game's adventurers' journal, while the module doesn't actually depict them.
  • Both products have a book called The History of the North in which the characters find a "passage of particular interest." It appears in the journal as entry 8. It describes a "barren and dead country called Lee-wai" located "ten days' ride north of the Varm." As far as I can tell, this country is never mentioned again, let alone "the Varm." I have no idea why it's supposed to be of "particular interest."
  • The module says that the characters have to search about an hour to find all the useful material. My team in the game had to search for well over a day, passing round after round. I bet a lot of players give up well before they find all the texts. 
  • There are miscellaneous texts that you only find by title, but which have no passages in the journal. These include Meditations, The Harmony of the Rock, and The Chronicles of Arram. They are again identical between both products, and I think they just improve your city council reward.
  • There's a "scholar's garden" in both products. It serves as the home to several green slime colonies that the party might encounter. In the module, you can fight them in regular combat, but in the game, you just either avoid them or take damage from them without actually being able to kill them.
  • One of the most confusing findings in the game are several sheets of gold foil that you find in the librarian's chambers. There are three per location, and they seem to do nothing and sell for nothing. The module makes it clear that the foil was used to illuminate manuscripts, and each piece is supposed to be worth 3 gold pieces. Something got screwed up in the programming.
    
Not to mention the grammar.
       
  • The game has you find three potions of healing in the master librarian's chambers where the module has you find Keoghtium's Ointment.
  • Both products have a collapsed area in which a basilisk has made his home. Whether you kill it without getting any of your characters stoned is a matter of luck or foresight (if you bought mirrors back in town). The module says that he has a Potion of Strength, a Potion of Healing, and a Bag of Holding. In the game, I found two potions and a Cloak of Displacement. However, there are online discussions that insist there's a Bag of Holding in Pool of Radiance, so I'm not sure what the real story is.
  • Both have an encounter with kobolds who will surrender and "describe the surrounding area." In the case of the game, that means sketching a rough map of the textile complex that you can see in a journal entry.
    
Both products offer a Grand Historian's Records of the Arts of War with identical passages on Tyranthraxus. They describe him as a "powerful general" who "strode before his armies cloaked in flame." He conquered the kingdoms of Barze, Horreb, and Vane, razing and murdering as he went. "But the flame that surrounded him consumed him, destroying his body." This allowed him to fly around and possess his men. Somehow, a baron named Schodt imprisoned him in a vial of water and tossed him into the "watery depths" of Lake Longreach.
    
This is a cool story, but I have no idea when it was supposed to have happened. The module makes it clear that Tyranthraxus first appeared in the Forgotten Realms a century ago, when he tricked a bronze dragon named Srossar into bathing in the Pool of Radiance. The Pool--more ancient than Tyranthraxus--was always "a portal to one of the darker planes," and all the legends of its supposed benefits had been fabricated to deceive powerful creatures into entering it, allowing entities from that plane to possess them. The module indicates that Tyranthraxus then headed down to Phlan from the north, conquering along the way, until he sacked the city and made his headquarters in Valjevo Castle. There he remains. When did this business with Baron Schodt supposedly happen, then? 
  
Elsewhere, we find Urgund's Description of Darkness, "an account of [Urgund's] imprisonment in the lower realms." This is the one that lists the "lesser  powers" found in the "Hall of Minor Courtiers": Maram of the Great Spear; Haask, Voice of Hargut; Tyranthraxus the Flamed One; Borem of the Lake of Boiling Mud; and Camnod the Unseen. These were the people that Tyranthraxus left behind when he jumped through the pool. And calling him "the Flamed One" makes sense in relation to the story in the Records of the Arts of War, but not in the backstory given by the module, where he immediately possesses the same bronze dragon that he's currently possessing, and nothing about him is "flamed."
    
You can encounter a Mad Man in both products. He rants some clues about Tyranthraxus and will accompany you back to Phlan if you insist. I don't believe I ever took him back in previous games. I didn't even mention him when I covered the game in 2011. If you take him with you, he stays with you indefinitely. He's a Level 1 true neutral fighter. In the module, if you take him back to town, "doctors, surgeons, and clerics who examine him" conclude that he can only be treated by having his mind wiped; otherwise, "he becomes a problem for the community, unable to control his actions or stay out of violent trouble." In the game, he does occasionally attack people at random as you walk around town, forcing you to fight or run away from the guards. 
     
This is a new role-playing challenge.
          
If you bring him to the Temple of Tyr, the priest recommends that you drop him from the party and they'll take care of him, but there's nothing scripted after this. You have to camp and drop the Mad Man through the usual interface. I decided to keep him just to see how long I could. He surrenders in almost every combat, which for some reason causes his hit points to drop to 0, and I have to spend a spell healing him. However, he seems to stick around if I cast "Bless" before the battle.
       
Forgive me if I don't necessarily trust psychiatric care in this pseudo-medieval society.
        
While I was wandering around looking to heal the Mad Man, I accidentally stumbled into the rear offices of the Temple of Tyr, where Braccio gave us Dirten. Dirten, spelled "Dirtan," is in Ruins of Adventure, and he's a Level 5 cleric just like in Pools, but he's a gnome in the module. (That goes better with his age of 67 years, frankly.) In the module, he approaches the party independently and asks their help in retrieving some relics from the old temple.
   
The textile house in the game bears little relation to the one in the module. The maps are entirely different and virtually none of the encounters line up. In the module, the entire place has been taken over by gnolls, led by a large gnoll chieftain, while the game map is full of hobgoblins led by an ogre. No undead escaped from Valhingen Graveyard prowl the streets of the module's textile house, and the party doesn't get the journal entry in which "the Boss" is said to be angry about the evil force gaining power in the cemetery. More crucially, the module map lacks the hidden Thieves' Guild beneath the streets of the textile house.
       
The textile house in the module (left) and game (right).
      
A thieves' guild appears in the module, but it is not given a physical location. It is only mentioned in the context of a couple of NPCs who do not show up in Pools. Phanal is a 12th-level dwarven thief, "high in the ranks of the guild," who will give the party information about the town in exchange for gold. Galarrian is a 15th-level human thief, second-in-command of the guild, "and in love with the prince who has become the head of the guild." Nothing else is said about this prince. Galarrian will help smuggle the party into Valjevo Castle. A guild agent also tries to extort the party for protection money in a random encounter.
    
Restal does not appear in Ruins of Adventure.
      
Both products feature an agent of Cadorna's, a fighter, who meets the party in the map. In the module, this happens as soon as the party enters the map, and the man is called Tarask. In the game, he is a prisoner of the hobgoblins and his name is Skullcrusher. (I couldn't take him because I already had the Mad Man and Dirten.) Both situations end similarly: the party finds Cadorna's treasure chest. In the module, it contains only treasures (statuettes and such) and the party cannot keep it. They get shook down by guards when they return to Phlan. In the game, the party not only can open the box and keep the treasures, which include Gauntlets of Ogre Power, they get far more experience for doing so than for finishing the quest honestly--around 1,900 experience points vs. 600. The only negative is a tongue-lashing from Cadorna when they return to the council chambers. Moreover, there's a way that the party can visit the thieves' guild and have them re-forge the broken seal on the chest so Cadorna doesn't know they've opened it.
     
Oh, no. The evil man doesn't like me.
     
Podol Plaza swings the other way and is virtually identical between the module and game, including the maps. The council sends you there on a rumor that a "powerful magic item is to be auctioned." The party is just supposed to collect intelligence. As you enter the area in the game, you're given three options: stride boldly forward, sneak, or disguise the party as monsters. The module offers that the party's "best chance for success is to disguise themselves as evil denizens of the city." It has various rules for which races have the best chance of success and what the odds are. I don't know if the game implemented those probabilities. We weren't discovered in any event.
   
As you wander the streets of the plaza, the rumors you hear are the same between the two products: wondering what's going to be sold, wondering if "the Boss" will show up in person, and so forth. When you approach the auction block, the action begins. I don't know if I played this section optimally in any previous attempt at Pools, but I tried several routes here, reloading frequently. The best route seems to be to move closer to the action, at which point the party realizes that the "item of great power" is a simple Wand of Fear. Tyranthraxus's agent, accompanied by an ogre bodyguard, bids on the wand, and you can piss him off by upping the bid. At that point, he casts a darkness spell and escapes with the wand while the ogre serves as a distraction. If you get close enough, you hear the auctioneer say, "Garwin, I'll get you!" At that point, the event is over, and you can return to the clerk with your account of it as a reward.
     
I don't think I got this far in any previous game.
      
The module has the same facts, including Garwin (Tyranthraxus's agent) and Buldwar, the ogre bodyguard. It goes into more detail about Garwin and Buldwar's capabilities and attributes (including the fact that Garwin can cast "Darkness 15' Radius"). The module outlines a path by which the party can obtain the wand and return it to the council, but I couldn't find one in the game.
   
Beyond the auction, the game has three special areas in Podol Plaza that the module doesn't have: a secret Temple of Ilmater, a Minor Temple of Bane, and a monster bar called the Pitt where the party gets into a one-on-one fight with a buccaneer (and loots some magic items) and a huge brawl with some monsters.
   
I'm trying to get more use out of "Stinking Cloud" this time.
    
When I got back from the Podol Plaza mission, the clerk gave me the mission to clear out Valhingen Graveyard, which is way ahead of our current level. But the mission came with a two-handed sword +1, +3 versus undead, and several scrolls with "Restoration" on them. This got me thinking and I chanced one of the "Restoration" spells on the Mad Man. Sure enough, his level rose to Level 4. I'm guessing he entered Mendor's Library a hale mid-level fighter and got busted down by the specter who guards the entrance. Unfortunately, increasing his level didn't cause him to stop his erratic behavior, and he still surrenders in every battle unless I cast "Bless" first.
    
It's been useful to play the Gold Box combat at the same time as the newer system introduced in Dark Sun. Despite my initial enthusiasm for Sun, I must conclude now that I still favor the Gold Box system. I like the clarity of the tiled tactical map. In Sun, I'm finding it too hard to gauge distances--is my fighter in melee range of the enemy? Will the "Grease" spell affect my party if I cast it here? Can my gladiator maneuver between these two other characters, or does she have to go around? There's never any such confusion when every character and enemy occupy discrete squares. I also don't like that Sun requires you to interpret visual feedback to determine whether a spell was effective, while the Gold Box system tells you quite clearly in the message window. But I also recognize that part of my preference is based on spell familiarity, not just with the Gold Box but with the Forgotten Realms in general, and I may change my opinion after more experience with Sun. Both combat systems are better than 90% of games on the market, in any event.
   
That's three entries comparing Pool of Radiance to Ruins of Adventure. What do you think? Is it worth continuing with these, or should I just do a final wrap-up entry comparing the major story developments?

Monday, October 25, 2021

Game 438: Burntime (1993)

For a game so ecologically woke, you'd think they'd realize that post-apocalyptic desertification wouldn't necessarily mean the copious growth of cacti.
      
Burntime
Austria
Max Design (developer and publisher)
Released in 1993 for DOS and Amiga
Date Started: 17 October 2021
Date Ended: 13 November 2021
Total Hours: 8 (unfinished)
Difficulty: Moderate (3.0/5)
Final Rating: 23
Ranking at Time of Posting: 180/444 (41%)   
          
We've often talked about how when we were kids, our parents would drive us to the computer store, where we'd drop $40 on a new game and excitedly read the manual on the car ride home. I'm glad I was no longer a kid by 1993, or on the way home, I probably would have wrenched the steering wheel out of my mother's hands and steered into oncoming traffic. Burntime is set in a post-apocalyptic society, and the hefty 129-page manual spends literally the first 77 pages educating the player on all the ways such a society could come about in his lifetime. There are section headings like "Computer Causes Nuclear War," "The Chernobyl Catastrophe," "When the Temperature Rises," and "Oil--the Black Death." There are diagrams quantifying the sensitivity of each human organ towards radiation. There are photographs of starving children. I mean, all this stuff is important to know, but damn, I was just looking for a game.
       
I feel like for the second part to be true, the first part has to be false.
       
It would be one thing if the content of the game itself continued the theme and tried to raise awareness of climate change and other environmental issues, but so far it hasn't. While set in a post-apocalyptic wasteland, it isn't even recognizably Earth. The same material would have made the same amount of sense at the beginning of Dark Sun
    
There will still be nice sunsets after Armageddon.
            
Burntime is the fourth game from Max Design, which published strategy and simulation games throughout the 1990s. The company was a partnership between designers Wilfried Reiter, Albert Lasser, and Martin Lasser, all credited here, and Burntime uses an updated version of an interface that the trio wrote for 1869, a sea trading simulator, the previous year.
   
As the game begins, you choose a portrait and difficulty level and then play against either another human player or a computer-controlled player. Each player's turn lasts five minutes. You enlist followers, amass supplies, and capture cities, all with the ultimate goal of taking over the wasteland. You've got to carefully monitor food and water level, scrounge for sundries, and avoid high-radiation areas. A single "experience" statistic, used in combat and improvable during the game, keeps me from rejecting it as an RPG.

This character portrait looks like he's spent too much time in the wasteland already.
      
The available character portraits. Twenty years before the character debuted on television, they managed to come up with an exact likeness of Tormund Giantsbane.
     
The player's initial heroes start outside cities on a map of cities with names like Sherwood, Acid Town, Snake Hills, and One Man's Heaven. The character icons look the same no matter what portrait you chose, only one is green and the other is red. In the CRPG Addict's new glossary entry, this is known as an "FYC" color scheme. All actions in the game are made with the mouse, which is about as welcome to me as the color scheme.
     
Starting out in the wasteland.
   
The character sheet shows experience (I started at 37%), condition, the number of days you can go without food and water, and your inventory. Characters can carry only six items, and mine started with four slots already taken, including the knife, which you equip and unequip with the right mouse button.
   
On the main map, there's not much you can do except travel from place to place, look at your inventory, and check out information for each city. The information screen tells you what sorts of people live in the city, what special items are there, and how much food and water it has available.
    
Information on the starting town.
     
Inside each city, there are a few dynamics. NPCs and enemies scurry about the city map, which so far has scrolled to about four screens per city. NPCs come in four types: doctors, technicians, fighters, and traders. Traders bring up a trading interface. With everyone else, you get some limited dialogue options. Everyone can be asked "What's up?" to hear his basic story. You can also ask NPCs to join you, but most of them want something. In the first town I explored, I met a fighter named Pete who wanted some meat, which I had. In the second town, I met a bunch of NPCs who all wanted snakes.
     
Uh...
    
Occasionally, an NPC gives you part of the recipe for some contraption. For instance, I can apparently make a rat trap (for food) with screws, wood, and some third "ingredient." I found some wire in the same city, and I'm guessing that's it. A hand pump (which I think helps with a city's water) requires a hose as one of its ingredients. You find these items with traders and just lying around cities or in buildings, randomized for each new game. This approach reminds me a bit of Scavengers of the Mutant World (1988).
   
You can travel with NPC companions or assign them to stay put in a particular city. As long as you've killed all the enemies in that city, assigning an NPC there causes you to "take it over." This has logistical implications that I haven't yet really mastered.
   
That leaves combat. I hate it so much. The only enemies that have shown up in the first few cities are wild dogs. To fight them, you have to right-click to change the cursor to a combat cursor (meaning you can no longer talk to anyone) and then click on the enemies when they're in range. The problem is first that the enemies don't stay in range; they wander all over the place while you're trying to fight them. Second, the enemies move too fast to really click "on" them, so you end up clicking furiously near them, hoping that some of your clicks manage to hit them. Meanwhile, they're also hitting you and reducing your "condition." Enemies drop goods when they die; for instance, the dogs drop meat.
     
Trying to click on a dog.
   
After a couple of trial starts, I settled into the game with a female protagonist (Irene) who began on the far west side of the map, near Sherwood. Here's here travelogue so far:

Day 1:
  • Entered Sherwood.
  • Killed the wild dogs.
  • Enlisted Pete (mercenary) in exchange for meat, assigned him to the city (took it over).
  • Enlisted Ken (mercenary)) for meat and kept him with me.
  • Found wire in town.

Day 2:
  • Traveled south to Acid Town (a main city, which you cannot take over).
  • Enlisted Babe (medic) and Chang (technician), both for meat.
  • Talked to a lot of other NPCs, mostly mercenaries, but didn't get any info.

Day 3:
  • Moved south to Dogshit City.
  • Killed all the dogs, collected meat.
  • Searched houses.
  • Found woodpile, dead rat, bones, snake.
  • Left Ken to hold the town.

Combat goes faster with multiple party members, so I guess they're all participating. Enemy hits cause your condition to drop, but it regenerates slowly as long as it doesn't fall below 70%. If it does, you need a doctor in the party to regenerate. If it falls below 50%, you have to pay one of the doctors in a capital city to help.

"Experience" goes up slowly with your victories. Irene, who started at 37%, ended her second day of dog-slaughtering at around 43%. The other characters started at over 50%.
     
Taverns have interesting scenes, but I can't figure out what to do there.
     
Day 4:
  • Moved south to Left End.
  • Killed a couple of mutants.
  • Enlisted warrior named Axle, immediately left him to hold town.
  • Found iron bars, knife.
     
Visiting a "water house."
       
Some of the towns have services in their buildings, but I can't figure out how to interact with some of them, like taverns. They just show a splash screen where any click causes you to leave. Perhaps there is no way to interact with them. Other buildings have traders or restaurants. Particularly prized are houses with water, where you automatically replenish yourself with a few days' worth of water. (I can't seem to figure out how to fill up canteens there, however.) You have to keep a constant eye on your and your companions' food and water values, lest they die or leave you.
    
I'm not entirely sure what it gets me to "take over" cities except that I can somehow call upon their resources at some future event.
   
Day 5:
  • Moved back north to Dogshit City.

You don't actually move across the map; you click on a destination, the screen goes dark, and then the screen comes back on with the party at the new location. At each location, you can see what paths are available to other locations. Left End, as the name suggests, was at the end of its path, so there was nothing to do but to move back to the previous location. Any movement ends the current day and starts the next one.

Day 6:
  • Moved east to a monastery.
  • Visited a water house.
  • Killed a couple of dogs. 
  • Enlisted a mercenary named Jeff in exchange for some rats, left him to hold the location.
   
The monastery had a cut scene with a priest but nothing else I could figure out what to do.
      
It's good to know that Catholicism survived the apocalypse.
     
I hate this interface. I hate it so much that after every couple of paragraphs, I'm checking my word count to see if it's high enough that I can post this entry and get a reprieve from this game for a few days. There is no excuse for an interface that forces you to use the same device (clicking on the screen) for moving as it does for action commands. The mouse should have been required for targeting specific enemies and NPCs only. That's exactly why you'd want a mouse--there's no good way to do that with a keyboard. Everything else--switching to inventory, switching from the local map to the main map, toggling between "talk" and "fight" modes--should have been a simple stroke of a key.
   
Day 7:
   
Moved east to Numea, but the "Info" box warned me that the city was full of toxic gas. Lacking any protection, I moved on.
 
A warning not to enter a town. I probably find a gas mask somewhere.
     
Day 8:
 
  • Southeast to the town of Muarab.
  • Killed three dogs and a mutant.
  • Found an empty water bottle.
  • Enlisted a mercenary named Peter and left him to hold the town.
 
The towns to my south and west are held by another faction, so now I have to decide if I want to attack them an explore that part of the game.

Day 9:
 
Southwest to the town of Sana, occupied by some faction with a blue or purple flag. Only one NPC in town didn't give me the option to say "Do you want to work for me?," so I figured that was the other faction's agent. I killed him, enlisted a doctor to join me, and was able to assign him to the town. That's all it took to take it over. Does that mean that my enemies will have an equally easy time?
         
You should bargain a bit harder.
         
NPCs all have the same message: everything sucks, everyone is on the brink of starvation. A single rat or snake carcass is enough to buy someone's loyalty. The "recipes" I'm getting are for things like rat traps and hand pumps, both of which might marginally increase a town's food and water supply. Fallout isn't a tenth as hopeless.
        
"How many maggots do you have in storage?"--a question not asked by any other game.
      
That's about all I can take, even though it will make for a short entry. It's been a while since I recorded an "N" in the "Won?" column, but I'm thinking I might do it for Burntime. I'm getting nothing from this game. If the authors wanted me to ponder their social message, they should have put it in the context of a more interesting title. 
 
****
 
Later addendum:
    
I kept playing for several more hours, but I found Burntime aggressively unpleasant in a way that goes beyond any of its individual elements. I'm having a hard time describing exactly why. Every time I started the game, I felt the energy drain from my body and mind, and more likely than not, I'd simply dither around for a few minutes and shut it off. I suspect it isn't even that difficult to win, but I can't bring myself to do it. I'm having a tough time forcing myself to even write about it. Given all of this, there was no chance I was going to jump right back into it after an unexpected hiatus of several weeks.
 
I don't even want to go over the GIMLET. I gave it a 23. It does best in its use of NPCs (4) and its tight economy (4), worst in character development (1) and in a horrible mouse-only interface that subtracts from anything good it dos in graphics and sound (1). Maybe I'll try again when I things aren't so busy.