Showing posts sorted by relevance for query Daughter of Serpents. Sort by date Show all posts

Sunday, May 21, 2023

Serpent Isle: Sweet Is the Swamp with Its Secrets

 
The Ultima series has at least been consistent about one thing.
      
Serpent Isle has really put this party through the wringer. Exhausted after the events in Monitor, Moonshade, and Fawn, the group spent a well-deserved month recuperating. Shamino hunted and fished and communed with nature. Dupre spent a lot of time in the pub and talked a lot about women but never seemed to go home with any of them. Iolo asked everyone entering and leaving the city about Gwenno. Boydon became something of a freakish attraction in a city devoted to Beauty. The Avatar enjoyed the view from the balcony as he compiled his notes.
 
As we've learned, the Serpent Isle was once known as the Lands of Danger and Despair when it was part of old Sosaria. After Mondain died, various cataclysms knocked it into another dimension or something, so that a traveler from Britannia has to pass through the Serpent Pillars to reach it. The people remaining on the island became known as Ophidians. They worshiped the Serpents of Order, Chaos, and Balance and created a system of virtues around these principles. When the Great Earth Serpent (representing balance) was abducted by Exodus to guard his castle, the forces of order and chaos destroyed themselves in the ensuing war.
   
After the events of Ultima III, a faction of Britannians disgruntled with Lord British's ascendancy traveled to Serpent Isle and found it depopulated. They built the cities of Monitor, Fawn, and Moonshade near the Ophidians' ruins. (Something is weird about the timeline here, as the people on Serpent Isle refer to the Ophidians as "ancient," when in fact only a few years passed between the demise of their culture and the arrival of the Britannians. Also, why do the current residents think the Ophidians were "daemons"?) One persistent mystery revolves around my companion, Shamino, who was one of the two kings who ruled the Lands of Danger and Despair. He seems to have forgotten this or won't talk about it. If he forgot it, why? If he won't talk about it, why? And how has he lived so long? 
     
Shamino, do you want to chime in here?
     
The party arrived on Serpent Isle and found it in crisis. People are falling victim to strange illnesses and lightning storms have ravaged the land. Lighting bolts are capable of destroying, teleporting, and transmogrifying the things they strike. The Monks of Xenka believe that these are the end days, and they have a prophecy of a hero who will make everything okay.
    
With everything that's happened, it's easy to lose track of the group's original missions, which were to chase Batlin, foil the Guardian's plans, and find Iolo's missing wife. As often happens, new challenges came to light in the process of trying to answer the old ones. Every one of the major cities in the Serpent Isles seems to have been plagued with corruption and abuse. Monitor's leadership decided that party was more important than country, and they allied themselves with their historic enemies, the Goblins, against the other factions within the city. Moonshade was ruled by a lecherous tyrant who banished his political enemies to the Mountains of Freedom. A faction in Fawn had conspired to put words in the mouth of the Oracle to seize power. In solving all of these issues, the party has significantly reduced the populations of these islands. They have also achieved three artifacts: The Helm of Courage, the Mirror of Truth, and the Crystal Rose of Love. 
     
The party ruins another city.
    
The following quests remain open:
    
  • Batlin: He's traveling with a warrior named Brunt, a sailor named Deadeye, and a gargoyle named Palos. He's passed through each of the cities, asking about the Ophidian ruins and stealing a blackrock serpent from Andral in Monitor. Some other Fellowship members came with him, but they seem to be in the dark as to his evil intentions.
  • The Guardian: I have no idea what his plans are. I'm not even entirely sure Batlin is still working for him.
  • Gwenno: She also passed through Monitor and Moonshade on the way to Monk Isle. From Monk Isle, she went north. I encountered her spirit in a seance, so she may be dead, but one of Xenka's prophecies suggested that I have to free her from ice. 
    
Iolo has literally nothing to say about this after the seance. I guess he's in denial.
      
  • Cantra:  The precocious 14-year-old girl, daughter of Harnna of Monitor, has gone missing. I've seen a vision of her with Batlin; she's apparently possessed by some other creature called the Bane of Chaos (is that another way of saying the Champion of Order?). I still have her practice sword and need to find the Hound of Doskar to track her.
  • Missing Equipment: We've gotten most of it back. The only things still outstanding are the blackrock serpent (Batlin probably has it), a glass sword, Rudyom's Wand, the sword Magebane, and five torches.
  • Xenka's Prophecy: According to it, I have to "unite the serpents."
  • Mortegro: The necromancer from Moonshade was struck by lightning and swapped with a stone pillar. He may be in danger somewhere.
  • Filbercio: The tyrant of Moonshade has gone into hiding since my return. He needs to die.
     
I'm not the only one who thinks so.
     
  • Amulet of Balance: Something that the monks found and gave me. I guess it takes me to the Silver Seed expansion.
  • Demon: I freed the demon imprisoned in the Black Sword to get out of the Mountains of Freedom. He's probably plotting trouble somewhere.
    
I'm not looking forward to seeing this guy again.
       
Compiling that list didn't give me any obvious leads, however. The only way forward seems to be visiting places I haven't already visited, and that means making it through Gorlab Swamp. I had attempted this once before, collapsed into a slumber, navigated a vivid dream, and woke up at the entrance. I don't know what will be different this time, but I have to try.
   
We set out one rainy morning from Fawn, heading along the coast. As we get close, we encounter some slimes, which are easy to kill but do their annoying dividing trick. Elsewhere, snakes, insect swarms, and crocodiles attack. I soon learn the dangers of fighting near the swamp, which is that the party members go charging off into the swamp itself, getting themselves poisoned. (Aside: Why are all swamps poisonous in the Ultima series? Haven't any of the developers been in a swamp? Is miasma theory still a thing in Britannia?) You can technically only walk a short way into the swamp; most of it, the game treats as if it were impassable water. We have to navigate through it on a thin bridge of dry land.
      
Rule #1 of swamp safety: Don't fall asleep just as a crocodile starts heading towards you.
  
Before long, the swamp puts us to sleep just as it did before. Gideon wakes up on a ruddy island in the middle of a void. His inventory consists of only the three city artifacts (I think I had only the Helm of Courage last time). "Dream creatures" attack as I explore, and I'm forced to pummel them with my fists.
   
There are buildings in the dream world, some modern and intact, some ruined: A collapsed tower occupied by a few gargoyles I can't reach; a line of pillars with gold snakes wrapped around them leading to two flaming golden cauldrons; a thatched hut, around which a nobleman plays a game of tag with three naked women. Lights and swirls appear in the void. I meet people from the waking world, presumably in their dreams. In a richly-furnished house, Ensorcio is torturing Filbercio. "I am the mage lord now!" he gloats. In a burned structure, I find Cantra (for some reason named D'Cantra) cowering from a "foul beast" that I can't see. I find Lord British in a ruined castle, fires burning in every corner. He's aware that he's dreaming, but he seems to be the real Lord British. He tells me that things are bad in Britannia. They're suffering the same natural disasters as the Serpent Isle. Earthquakes have put cracks in the foundation of Castle Britannia. The lightning storms have ravaged the land, replacing the Royal Mint with a lighthouse. The gargoyles have fallen into a dream state, just like the ones in the dungeon Furnace. The emps have fallen ill, and many have died. Mages are unable to cast the simplest spells. He has faith that I'll somehow fix it.
      
I've had this dream.
     
I should note that to get all this information, the game starts me off with only two keywords: NAME and JOB. To get the other keywords, I have to first listen to Lord British express incredulity that I don't know who he is or what he does. This is the thousandth time that such a thing has happened in this game, and it's growing tiresome. It would have made sense if the game was still using type-in keywords and a player insisted on typing those, but when the game itself is feeding you the keywords, it's a little obnoxious to make the player feel stupid for asking the only words available to him. It's not like they were the only alternatives. When I later meet other NPCs in the dreamworld, none of the keywords I'm given are NAME or JOB; they all jump right into the obvious things that the Avatar would ask about. 
       
I could think of three dozen other things the Avatar would want to ask Lord British right now.
       
A chest behind Lord British's throne has a full set of magical gear, including an Infinity Bow, which shoots endless exploding arrows. There are other weapons and armor scattered throughout the dream realm, including a Juggernaut Hammer, a two-handed weapon that magically returns after it's hurled at a foe. The Avatar gains experience from kills in the dream world, but the dream creatures don't do much damage and take forever to kill, so I end up just walking past most of them. The Avatar also gets hungry.

As I explore a frozen building, an image of a serpent appears and says, "Look into the Moon's Eye." In that same building, I find a "Translation" scroll, a golden serpent statue, and a door leading to what looks like a moongate. As I approach, Thoxa (the Monk of Xenka) appears. She says that the gate I see before me, the Moon's Eye, is my "goal in the waking world." I'll find it in the Temple of the Ancient Ones "in the icy wastes to the north." 

There's a copy of the Sleeping Bull Inn, where I find some food. Byrin, the bard from the inn, is here--and aware that we're in a dream. He tells me of the Forest Master, who rules fauna and flora in the icy wastes, to whom I "should be prepared to return the Orb of Elerion." He also explains how Gorlab Village (in the original Ultima) became Gorlab Swamp: A wizard named Rabindrinath decided to destroy the town for unknown reasons. A healer named Siranush opposed him. (Siranush has been previously mentioned, as the woman that Edrin dreamed about when he was turned into a parrot.) When their spells collided, their magic went wild and trapped the residents of Gorlab in the world of dreams. This includes anyone who wanders into the swamp. The wizard and healer still struggle against each other, but Siranush is weakening. To return to the waking world, I have to die in the dreamworld. If I die in the real world, I'll be trapped here, which doesn't make me feel great about the two crocodiles I saw approaching my body just as I fell asleep.
       
The Avatar applies deductive logic.
         
I'll pause now to say that dream sequences are second only to underwater sequences in a list of tropes that I wish games would get rid of. They always feature the same elements, never really make sense, rob me of control, and leave me impatient to get back to the main plot. I particularly hate it when those dream sequences are hallucinogenic or psychedelic, which nearly made me rage quit the Far Cry series more than once. 
    
I continue exploring and come to a forest of silverleaf trees. In a hut in the middle, surrounded by cats, I find Siranush. She's been expecting me, since Edrin told her about me, and she knows that I'll need the Serpent Necklace to succeed in my quest. She also fills in a bit more of Rabindrinath's backstory: he grew angry at the village when they wouldn't appoint him to the town council immediately after he moved there. His spell had been intended to allow him to invade the dreams of the villagers and persuade them to do what he wanted. The end result makes a bit more sense, and I just love the pettiness of that backstory. Anyway, she'll give me the Serpent Necklace if I can bring her Rabindrinath's Dream Crystal and free the villagers' souls--their bodies are long-since rotted away--from their nightmare. Rabindrinath, she warns, "can only be overpowered by the application of Truth, Love, and Courage." That's convenient.
       
It would be nice for once if literally anyone else was the hero of prophecy. There's no reason that Dupre couldn't have done this.
          
I continue exploring and come to a large stone building with a plaque that, after a "Translation" scroll, reads: "THE DREAMS OF THY ENEMIES." A walkway leads to a pair of chairs overlooking an arena. I sit down and am immediately treated to a view of Batlin blasting fireballs at a simulacrum of me. As the fake Avatar inevitably succumbs, Batlin gloats, "Soon I will have power to rival the Guardian himself!" The figures disappear as he promises to torture me for a long time before letting me die. Nothing appears after that. Good to know that Batlin is my only enemy.
    
Eventually, I come to Rabindrinath's castle, which for some reason has a nightmare prancing around the stone courtyard. As I enter the mage's hall, he approaches and asks a weird question: "Hast thou seen the firebird's death or followed thy dreams to seek power?" I'm about to answer "neither," but he goes on with a bunch of other clearly rhetorical questions that make about as much sense. He tries casting some spell at me, which fizzles. He curses my Helm of Courage and disappears. 
     
I rather hope that my helm can't kiss anything.
   
Further back in his hall, a fire roars. The two leopardskin rugs in front of it turn into actual leopards as I approach, forcing me to kill them. I worry about some stone harpies along the walls, but they remain inert. South of the hall, I pass through a dining room and kitchen before I encounter Rabindrinath again in some kind of jail. A body lies on a table in a central room. Two skeletons are in one cell, a live naga in another. A severed leg squirms on a side table.
      
Do nagas ever appear in this game not in cages? Where do they even come from?
      
Rabindrinath has some more weird questions, casts another spell, this time curses the Rose of Love, and disappears again. The body has a key, which lets me through the north door of the hall. Here, Rabindrinath wants to know if I have the "reflection of Truth to make [my] dreams real?" A third spell, a third fizzle, and a third curse follow, and the mage collapses dead on the floor. A key on his body leads to a void with the Dream Crystal on a pedestal. Just as I turn to leave, a fireball comes out of the wall and nails me, and I'm back at the entrance to the swamp. I re-enter, fall asleep, and find myself back in the dreamworld with none of the stuff I'd gathered, including the crystal. I reload rather than doing all that stuff again, although I am vaguely curious how much of that stuff I would have had to do again.
       
This sounds like a new kind of drug.
        
The second time, I avoid the fireballs by just grabbing the crystal from the doorway, then I head back to Siranush. Before destroying the crystal, she summons Edrin and professes her love. They have a cute conversation. The scene fades, and we awaken again at the entrance to the swamp. 
      
If I remember correctly, Edrin isn't going to have long to wait.
         
Before I can move, the ghostly serpent speaks to me again: "Hero from another world! Know that it is I, the Great Earth Serpent, whom thou liberated from imprisonment in the days of Exodus the Destroyer."
         
You must be confused. That was a party of four people, all of whom were "fuzzies."
         
"If only thou couldst help me now, Avatar," he continues. Or, rather, "ends," because he says no more after that. 
   
After re-equipping all of our stuff (why can't this game leave things where I put them!), we re-enter the swamp, this time able to travel without falling asleep. We follow the thin maze of dry ground as it twists and turns dozens of times. We fight more slimes and crocodiles. Everybody gets poisoned. We pass a burning building with the corpse of a woman on top, but we cannot approach it. Eventually, we find the exit. I cast "Mass Cure" on everyone and distribute some bandages to those injured worst.
      
Note the crucified guy with the cup next to him in the upper-left. Is that supposed to be Jesus?
     
The map shows us on the northern half of the island. A forest lies north and west of us, and large structures or towns to the east and northeast. Not far to the north, the map turns white, indicating cold and ice. We'll have to find some warm clothes somewhere or make a trek back through the swamp to civilization, something I'm not eager to do.
       
My current position. I've explored about 70% of the landmasses. One might be fooled into thinking that I'd completed 70% of the game.
     
I've enjoyed Serpent Isle, mostly, but I've just hit the 46-hour mark. This is where I would be looking for most games of the era to start coming to a conclusion. We've had three large cities with three symmetrical questlines funneling us to this point, and most games would now have me face one final dungeon or test. I honestly don't remember what happens next, but I remember enough to know that, in many ways, Serpent Isle is just getting started.
     
Time so far: 46 hours
     

Wednesday, April 12, 2023

Serpent Isle: Charmed, I'm Sure

She even looks a bit like Irene.
       
The last update ended with the party emerging from Furnace, back on the main island for the first time in a couple dozen hours. My first goal is to head to Monitor, just to the east, and use the training points my characters have accumulated. Alas, I soon run out of money. The pikemen's bodies I return to the crematorium get me some cash, but only enough to train two characters. I put the only money changer in town in jail on my previous visit.
   
Up at the Sleeping Bull, I can't remember who changed my money before, but he's no longer there. So to get enough monetari to train, I'm going to need to return to Moonshade or find whoever changes money in Fawn.
     
"But you still have to pay me, of course."
    
No one in Monitor or the Sleeping Bull has much new to say. Ensorcio is willing to sell me some spells, but I don't have the money to pay him, either (most of my wealth is tied up in gems). There's a gleeman in the inn named Byrin; either I missed him during my previous visit or he didn't show up until recently. He has a bunch of songs to sing and tales to tell, most of which he requests a tip after telling. I learn a few things from him:
   
  • He speaks of the Gwani, the "northern savages," who look like men but are covered in fur. Everyone has described them as fierce and vicious, but a verse in Xenka's prophecy said that I'd doom the world if I attacked them. I should probably stop wearing cloaks made out of their skin before I encounter them.
  • He tells the tale of the three serpents. The fire (chaos) and ice (order) serpents continually warred but were held in check by the serpent of earth (balance). But when something happened to the serpent of earth, the war waged out of control and the land was destroyed. We've had hints of all of this before. My working thesis is that the whole thing started when Exodus somehow yanked the Serpent of Balance from its realm and forced it to guard the entrance to his castle.
  • He speaks of the land having once been ruled by two kings, one old, one young. When the young king abandoned his people, the old king went insane, killed his people, and threw himself from White Dragon Tower.
   
The greater revelation concerns the "young king" who abandoned his people and his lover, who I gather was the White Dragon King's daughter. Shamino is shaken by the story and demands to know the missing king's name. Byrin confirms that it was Lord Shamino. This isn't much of a revelation if you've played Ultima, where Shamino is one of the two rulers of the Lands of Danger and Despair. Shamino's reaction is odd, as if the events are so long ago that he himself doesn't really remember who he was or what he did. The reactions of Dupre and Iolo ("It can't be!"; "There must be some mistake!") suggest that they didn't know this aspect of Shamino's history. I remind you that while the Ultima materials explicitly state that Dupre and Iolo came from Earth originally, Shamino is supposed to be a native Sosarian, and nothing so far has accounted for his unnaturally long life.
      
Did you wear that hat while you were king, Shamino?
    
I'm sure we'll hear more about all of these subjects later. For now, we decide it's time to explore Fawn. Actually, we first figure out the destination of the serpent's tooth that we found in Monitor. It takes us to . . . Monitor. While messing around with the portals, I am reminded that we never found a way to open the locked door between the Furnace teleportal pad and the dungeon itself, so I'll be making another pass through the dungeon after Fawn.
      
My excitement about a new teleport pad lasted a few seconds.
      
As we head towards Fawn, I set a goal to try to find a use for all of the spells in the spellbook. Here's a quick report on Level 1 spells:
    
  • "Create Food": I've used it several times already. It creates about 4 food items on the ground. Useful.
  • "Cure": Also already used a few times, though I favor red potions if I have them. It cures poison delivered by snakes, swamps, and other sources. Important but not vital, since you can wait out poison.
     
Reviewing Level 1 spells.
      
  • "Detect Trap": I used it in the Mountains of Freedom and will probably continue to use it sporadically on chests, but chest traps are survivable and reagents are expensive and rare. Useful.
  • "Great Ignite": I use it for the first time as we enter Fawn. It automatically lights two lamps at the end of the bridge. I could have just double-clicked on them. Honestly, I can't think of a single reason to ever use this spell. I'm going to rate this "Worthless" unless some specific circumstance comes along.
      
Well, that was a waste of good reagents.
    
  • "Light": Saves you from having to carry torches. Vital until you have "Great Light," then worthless.
  • "Locate": I would have thought it would duplicate the sextant, but it's worse than that. It just tells you where you are. Worthless, unless there's some circumstance later where I'll be confused about that.
  • "Telekinesis": Activates switches and such from a distance. Vital for solving at least one puzzle in the Mountains of Freedom; slightly useful in other situations.
   
I should note that I don't have one Level 1 spell--probably something Mortegro sold.
    
As we've previously learned, Fawn is dedicated to the "virtue" of Beauty. Is ruled by Lady Yelinda, said to be the most beautiful woman. Three Great Captains (Garth, Joth, and Voldin) serve as her advisors, and the Priestess of Beauty, Kylista, reports on the "revelations" of the Oracle in the temple. The city's economy is based on fishing--an odd pairing with Beauty--and thus has been suffering from the devastating storms. All of the ships have been destroyed, as has the city's lighthouse.
       
Fawn's palace . . . where no one is ever found, and nothing ever happens.
      
A group of emissaries from the Fellowship arrived shortly before we did, but their teachings grated with the city's dogma, and they were soon blamed for the storms and exiled. As we arrive, a storm is blasting the central square with lightning. People slowly return after it disappears.
  
Geographically, the city is probably meant to evoke Venice. It is built atop the water, with buildings situated on platforms connected by white brick walkways. The building interiors are tidy and richly-furnished. 
       
I'd pay a lot for this view.
     
It takes us two days to make an initial circuit of the city, talking to the various townsfolk. Findings:
   
  • Jorvin, Captain of the Guard, thanks us for liberating Fawn Tower and gives us a lot of background on the city. He carries the Wand of Detainment.
  • Olon, a fisherman, asks Iolo for a song. (We meet him outside, but all his dialogue suggests that he thinks we're in a tavern.) He tells us more about the fate of the King of the White Dragon. Olon says he drove away the other king (Shamino) and was thus left without allies when a goblin horde invaded his lands. Anticipating defeat, his mind broke. He invited all his people to a party and murdered them. Now the castle is haunted and the goblins won't go near it. Iolo sings him a sad ballad about the missing Gwenno.
  • Delin runs the provisions shop. He has been cripplingly absent-minded since he lost his wife, Elissa, and the magister of Moonshade kidnapped his son, Freli. He says that he lost a stack of filari during a teleport storm, and the amount we have is exactly what he lost. But the meat that replaced it is long gone.  
       
I give Delin his filari back, but . . .
      
  • Alyssand is Delin's daughter. We've already met her in the Fellowship outcasts' camp. Her fiancé, a fisherman named Keth, disappeared during a storm. Lacking direction, she has fallen into the clutches of the Fellowship. She reminds us here that she's with a rebel group called the Cause, which seeks to free Fawn from the orthodoxy of Beauty.
  • Delphynia sells reagents and vegetables. I met her previously when she sold me the herbs that cured my poison. She thinks she's responsible for the storms because she fell in love with Ruggs. She won't sell us reagents unless we catch her in her gardens, but she never seems to be there.
  • Zulith is the chancellor. I've apparently met him before, but I don't remember. He assists Lady Yelinda and arranges her schedule. He also exchanges money. I delay on this because I don't know how much I'm actually going to buy in Fawn. He intimates that it might be a while before we can get an audience with Yelinda, but our work at Fawn Tower should speed up the process. He thought the city might be overrun with goblins until we saved the tower.
  • Great Captain Voldin is in charge of city security. He thanks us for dealing with the goblins, who killed the town's healer, Seth. He thinks the storms have been sent by the gods because they allowed the Fellowship emissaries to enter the city. He thinks the solution is to return to Beauty's Truth: "All good people are beautiful." He seems to be a bit of a misogynist; he makes a couple of asides suggesting that he thinks women can't be trusted.
     
That question is a bit difficult to parse, Voldin.
      
  • Great Captain Garth, the youngest of the Great Captains, comes from a family of wealthy traders. He's actually never been to sea. Described by the others as a skirt-chaser, he nonetheless comes across as intelligent and compassionate when we talk to him. Yelinda has tasked him with finding some way for the city to prosper without its ships, a task he worries is hopeless. He says that Joth, Voldin, and Kylista are the real power in town. He thinks that Voldin and Kylista have somehow corrupted the Oracle to say what they want it to say. He's not particularly obsessed with Beauty and thinks that Ruggs is a good man.
  • Great Captain Joth suffered an injury while heroically protecting the town one night after a storm zapped away the lighthouse, replacing it with a "strange haunted building." He ordered his ship to anchor at the mouth of the bay and flash its own lights, but his ship ran aground and injured his back. He was pulled from sea duty and given a place on the great council. I hear about him before the events below but never actually run into him.
  • Jendon runs the Broken Oar, the town's inn and tavern. His business has been suffering since there are no more sailors. Like Harnna in Monitor and Bucia in Moonshade, he has dialogue options on all the people in town and local places, but only a certain number before he won't talk again for a while.
  • Kylista, Priestess of Beauty, I find hanging out in the tavern. She interprets the divine words of the Oracle, which was created by the mages of Old Sosaria. We won't hear one of these revelations, as she's closed the Oracle to outsiders. She agrees that the storms are a punishment from the heavens for hanging out with the Fellowship group, and she advocates wiping them out to return to the gods' favor. She thinks Voldin should be Yelinda's only advisor. I have no options to ask her about the breastplate that appeared in my inventory, but I find a suit of magic armor in a chest of drawers in her house and replace it with the plate that Dupre has been carrying.
     
One of the best recoveries so far.
      
  • Yelinda is the ruler of Fawn. The first time we talk with her, we catch her sleeping in her home at 10:00 in the morning. She doesn't have anything new to say about the city, and she comes across as a bit of an airhead. 
      
"It somehow doesn't bother me that you're in my bedchamber."
     
  • Some guy named Kalen, dressed like a sailor, starts attacking us while we're exploring. We hit him a few times and he dies, but not before indicating that he works for Batlin. 
   
At some point during our explorations, Jorvin approaches and says that Lady Yelinda wishes to hear the songs of the honored bard, Iolo, and we should attend her in the throne room after noon. I'm not really sure what building he means, as there are two buildings labeled PALACE, each with their own thrones. It turns out to be the northern one. We arrive shortly after noon. Yelinda has somehow heard about the ballad that Iolo sang to Olon. She gives Iolo a white diamond necklace to give to Gwenno when he finds her.
      
250 years old, and Dupre still hasn't learned how to "read the room."
    
She then--despite the lack of any obvious source of drinks--calls for a toast to Beauty. We drink. She  toasts to Love and to Queen Fawn, "who founded our fine society." We drink again. Then Dupre has to be an idiot and propose a toast to Lord British. She immediately orders Jorvan to "lock that criminal away and call for a speedy trial" and execution. Before we know it, Jorvan has blasted us with the Wand of Detainment, and we all fall unconscious. 
     
AM I BEING DETAINED?!
     
I awake at the inn, with everyone but Dupre next to me. A scroll on my bedside table reads: "Thou art required at the temple for trial." We hustle up there, and the trial begins as soon as we double-click on the doors. Somehow, we end up in the accused's box along with Dupre. A huge Oracle statue watches the proceedings from the front of the room. Kylista pronounces the charges as "inciting rebellion against Lady Yelinda" and "allegiance to that archfiend, Beast British."
   
Yelinda declines to conduct the questioning herself ("I fear the witnesses might be tempted to spare my sensibilities"), so Voldin agrees to do it. Jorvin announces that for the purposes of the trial, "unsavory characters"--namely, the representatives of the Fellowship--have been allowed to enter the city. I'm sure this will go well.
       
These two are supposed to be the most beautiful women in Fawn? Yikes.
     
Delphynia is the first witness. She relates how we consulted her for a leaf to counteract poison, to which Voldin ties the most tenuous thread to "Beast British" and dismisses her. Leon, the Fellowship leader, is next. He only manages to get out that he met with Dupre in the Fellowship camp before Voldin dismisses him for trying to proselytize. The addled Delin is third, but he doesn't even remember meeting Dupre.
   
Voldin then calls on Yelinda to relate what happened. She lies outright, recalling Dupre as saying: "Curse you all, and Beast British shall drink thy blood." Dupre protests. Yelinda suggests they spare him "further embarrassment" since the conclusion is foregone, and Voldin agrees. Dupre asks what I recommend. I tell him to continue. Next, Ruggs is called, admits to having met Dupre, and is immediately dismissed. He shouts his love for Delphynia on the way out, while she sits still and mutters, "I can't."
     
"And he did pry into everybody's NAME and JOB."
      
Kylista testifies that she found our lack of understanding of Beauty "appalling." She thinks the Fellowship is "an invention of Beast British, by which he means to destroy us!" Jorvin testifies that he's been following us around, and we've been entering buildings where we don't belong and opening drawers and barrels without permission. I wonder if that's just an assumption as to how most players will play or if it really is tailored to our actions. Voldin idiotically interprets this as us searching for our souls, which we sold to "Beast British." Jendon testifies that we asked a bunch of questions about the people in town. Alyssand testifies that we mysteriously had her missing engagement ring. Voldin naturally interprets all these things in the worst possible way.
     
Scots, the cartographer, is called, but he gets no further than defending the beliefs of the Fellowship and the nobility of Lord British than he's expelled. I'm not sure why he's not put on trial, since he said as much in favor of Lord British as Dupre did. This whole island just sucks.
      
As often as Sosaria/Britannia is reconfigured by some calamity, I'm surprised Scots isn't on the Fortune 500 list.
      
Kylista calls a recess until tomorrow before we hear Dupre's defense. Dupre names me as his counsel. A guard takes Dupre away. I'm tempted to let him go to the headsman's block for being such a moron. I suddenly wonder what would have happened if Dupre hadn't been in the party. I reloaded an earlier save, kicked him out, and visited Yelinda without him. All that happens is Shamino has his lines instead. If you kick out Shamino, it's Iolo--and you can't visit Yelinda without Iolo, so there's no way to stop the offense from occurring. 
   
Acquitted of being an idiot? I'm not that good.
       
I decide to start heading around town to see what support I can muster, but I'm no more than a couple blocks away when Alyssand runs up and hands me a key. It's to Dupre's cell, beneath the temple. "One of the temple guards is sympathetic to our Cause," she explains. "If thou dost explore the temple tonight, I can arrange for the guards to be absent." 
   
For fun, I tried to screw up this part of the game, and I don't think it's possible. No matter how many days pass, the trial won't re-commence until you've used the key. 
  
I forget about the "tonight" part and head down during the day, but there are no guards either way. Dupre is in a cell, but the key doesn't open the cell--just the door to the stairs. I can't interact with Dupre. I note with some amusement they've left him a bucket of water and a pile of food, but also a corpse on his bedding.
      
Have you been sleeping with the charred, twisted body or the skull?
     
A switch opens a door leading to a stairway up. Here, we find Voldin meddling with a row of five levers. "The levers have been set," he says, "and the traitor's fate is sealed." Suddenly realizing we're not Kylista, he attacks us. I don't know why so many evil-doers in this game think they'll prevail with one-on-four odds, but Voldin doesn't even come close.
        
Says the man conspiring with the Priestess.
     
I start fiddling with the levers myself. Each one is trapped and damages me when I pull it. When I pull the fifth lever, the Oracle comes to life: "What does thou wish, Master?" I ask for a revelation. The Oracle says that at the end of the trial, she has been told to say that Dupre is guilty of consorting with daemons, that the Avatar is also guilty, and that both need to be executed. "Change revelation," I say, and have three options: "He is innocent"; "The trial is corrupted"; and "Make no change."
   
I go with "The trial is corrupted." The Oracle is thrilled: "I have waited many years for this moment. I thank thee, Master!" Upon further inquiry, she relates that the Great Captains have been controlling her for a long time. "At last, I can speak the Truth."
       
But . . . you're still speaking what I told you to speak.
      
I crash in a random bed--no one actually seems to use their houses in this town--and return to the temple. As the second day commences, Yelinda questions where Voldin and Kylista are. Zuilth says he doesn't know, and that Captain Jorvin is also missing. Yelinda kicks things off in Kylista's place. I'm told I can call anyone in Dupre's defense, but Zulith clarifies that doesn't include the Fellowship members, who haven't been allowed back in the city after their performance yesterday.
   
My options are Delphynia, Joth, Delin, Garth, Jendon, Zulith, Olon, and Yelinda herself. I go through the list. Delphynia testifies that Dupre drinks too much, is a braggart, and fancies himself a ladies' man. "Dupre doth have an evil heart," she concludes. Not a good beginning. Joth testifies that he's never even met Dupre, which is fair. Delin does a pretty good job. He points out that we returned the engagement ring, and the storms are probably why it disappeared in the first place. He also wants Dupre to marry Alyssand, but Dupre remarks that she's not "lively enough," whatever that means.
     
I call Garth, expecting his support, but he testifies that Iolo is the most disagreeable man he ever met. At first, I think the game is glitching, but Olon points out that the trial is about Dupre, not Iolo. Garth nonetheless "stands by his statement." He has worse things to say about Lord British, and he concludes by saying that Kylista is "too beautiful to be wrong." What a hypocrite.
       
Are you sure you're talking about Iolo?
   
Jendon says favorable things about Dupre, including that he can "out-drink any man in this town." Olon, who is drunk, says, "I love that man!" He recites a ribald song that Dupre taught him. I wonder when this all happened. My companions must get up to a lot of stuff while I'm sleeping.
   
Zulith is no help. I call Yelinda last and ask her about Dupre's exact words. She claims she doesn't remember, so Dupre repeats them. Distraught, Yelinda runs off the stage.
      
Facepalm.
    
With all my "witnesses" exhausted, Yelinda proclaims the trial over. She asks for a ruling from the Oracle. "Dupre is innocent!" the Oracle proclaims. "Set him and his companions free!" She goes on to explain that the "true criminals" are Kylista and Voldin.
   
Yelinda, to her credit, apologizes. She gives Dupre the Crystal Rose of Love. Just then, Alyssand arrives with Jorvin. They announce that they've captured and imprisoned Kylista and that Voldin has been found dead. Kylista has already confessed to an evil conspiracy involving the levers. Yelinda praises the outcome and remarks that she has "much to learn about being a ruler." We're free to leave.
     
Yelinda conveniently forgets that she started this whole thing.
      
Thoughts:
   
  • Jorvin must have already been convinced of Kylista's guilt. He clearly arrested her before the Oracle condemned her.
  • Dupre technically isn't innocent. He praised Lord British to Yelinda's face. The whole of Fawn still thinks Lord British is an evil usurper intent on destroying the city. It would have been nice if the Oracle had been clearer.
  • This whole episode seems to have been aimed at putting the Crystal Rose of Love in our hands. Its introduction here is just as clumsy as the Mirror of Truth in Moonshade.
      
I naturally have to know what happens with the other Oracle options. I reload and give it a try. If you "make no change," the Oracle says what Voldin told it to say, but right afterwards, Alyssand bursts in with Jorvin. They announce that they themselves entered the secret room and found Kylista operating the levers. Kylista arrives to dispute their claim, but Alyssand asks Yelinda to call on the Oracle for a new judgment. Yelinda does, and the Oracle says the same thing she says if you chose "The trial is corrupted." Everything else proceeds the same way from there.
   
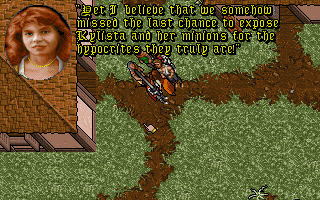
If you choose "He is innocent," the Oracle proclaims: "Dupre is innocent! Gideon and his companions have no wish to destroy Beauty! Free them at once!" Yelinda apologizes and hands over the Rose, but there's no talk about Kylista being arrested. If you go talk to Alyssand in the Fellowship camp, she says that the Cause is doomed. "We somehow missed the last chance to expose Kylista and her minions for the hypocrites they truly are!" 
     
Any consequences for the rest of the game?
     
All in all, Fawn was the silliest of the three cities, but also the shortest. I can't find Zulith after the trial is over, so I sigh, walk back to Monitor, take the teleportal pad to Moonshade, visit Topo, sell my gems, visit Bucia, exchange all my riches for gold coins except for enough monetari to train, take the teleportal pad back to Monitor, sleep until morning, train my characters, walk to the Sleeping Bull, and pay Ensorcio every gold coin I have for his spells. It's not nearly enough, and I still need lots of reagents, so I hope my return trip to Furnace yields some more loot.
   
As I close out this session, Gideon and Dupre are Level 7, Shamino and Iolo are Level 6, and Boydon is Level 5. I've been training in a way that seeks to balance strength and dexterity. 
      
Boydon had a long way to go with dexterity when I found him. Even after 4 training sessions, there's a hefty imbalance.
      
I like NPC dialogue and prize it as a key part of the RPG experience, but I'm also slightly elated that--unless I'm mistaken--most of the talking is over. I'm sure there will be plenty more NPCs, but I doubt there will be entire cities of them. I'm ready for, in the words of Elvis, a little less conversation and a little more action, if you please.
   
Time so far: 44 hours


Wednesday, October 28, 2020

Dark Queen of Krynn: Won!

I think I see Corey Cole off to the left.
          
The final hours of Dark Queen of Krynn began with our arrival at the Tower of Flame, the draconians' secret fortress in the middle of the Lava Sea. We flew there in a gnomish wind-ship; the gnomes were particularly interested in helping us because the Tower was kept aloft by a magic stone called the Grathanich that the gnomes wanted to get their hands on.
    
Dragons attacked as we arrived, and the party had to jump from the wind-ship to an upper-level deck. We were supposed to have the impression that the battle continued to rage outside, and indeed every time we opened a port-hole to look out, we received confirmation of that.
         
They battled for this entire session.
        
We had barely started exploring the level when we were forced to cross a rickety bridge. Crysia, the charmed sister of Captain Daenor, appeared on the other side of the bridge, and he ran to her. She clapped her hands, unleashing some spell that caused the bridge to collapse and dump us down to the bottom level, leaving Daenor behind.

The Tower of Flame ended up consisting of five levels. The bottom was 8 x 12, the next two 16 x 16, and the last two 12 x 12. They were very confusing. There was something to be accomplished on every level, but our progress was hampered by inconsistent ways of moving between levels; a staircase or air shaft available at one point might be closed the next time we arrived. Events conspired to keep dropping us from higher levels to lower ones. A lot of fixed encounters required other encounters to activate, so we'd find them even in areas that we thought we'd cleared. Random encounters never stopped, and resting was difficult. Beholders attacked randomly on all levels and occasioned a lot of reloads.
   
Draconians were everywhere, as both random and fixed encounters. Fire elementals and fire fiends came pouring out of the walls themselves. We also kept encountering troops of gnomes, some of which would join the party and help us out for a few battles until they all died.
       
That seems a little unfair.
        
On the bottom level, we ran into fire giants, salamanders, and other monsters tending "tower engines," and we fought repeated battles with them. We also destroyed a room full of chains and manacles, clearly intended for use during the invasion of Ansalon. Finally, we destroyed the engines that allowed enemies to traverse the tower's shafts at will--elevators, I take it.
   
I can't remember what the key battle was on Level 2, and I didn't take enough screen shots to help. On Level 3, there was a prison, and we freed a woman named Dahmia Sreen Luminar from one of the cells. We could tell at once that she was the mother of Elea, the young woman we met among the Hulderfolk. We got experience for telling her her daughter's name, which was a joke because there was nowhere left in the game to train. She showed us how to get to the next level by jumping on a bed, then disappeared.
      
"Arms that never held me / lips I've never kissed."
        
We found a central room on Level 4, which later turned out to be important, where draconians went through the ritual to change them from regular to "enhanced" versions of their species. The power behind this transformation turned out to be the very Grathanich that the gnomes were seeking. We interrupted the ritual and killed a bunch of draconians.
   
Gnomes helped us to Level 5 by flying a wind-ship up a shaft. We re-met Captain Daenor and Crysia there, and managed to break the draconians' bond on Crysia with "Dispel Magic." Daenor re-joined the party but seemed to have lost all of the equipment that we gave him last time he was with us. He was only with us for one battle before he carried his sister to a wind-ship and accidentally knocked away the anchor. The siblings sailed off into the distance.
        
"Missile" clearly wouldn't have worked. I wonder if the endgame would have changed accordingly.
       
Central to Level 5 was a chamber with a tripod holding the Grathanich. As we approached it, draconians closed in from all sides. This was the first of many battles that I thought might be the "final battle," particularly since Takhisis spoke to us through the mouths of the draconians as the battle began: "I have always intended that my next footsteps upon Krynn would be upon the heads of irksome unbelievers." That was a little inaccurate. Clearly, we believe in Takhisis--she's talking to us, after all--we just don't follow her.
        
"Red carpet" is, I suspect, a metaphor.
     
The ensuing battle pitted us against multiple small groups of beholders, draconians, fire fiends, dark wizards, and fire giant mages. I was able to win only after I fully buffed the party with resistances, bonuses, and "Haste." Practically every enemy was capable of high-level mage spells. Arrows, "Power Word: Kill," and "Monster Summoning" largely saved the day. 
 
Immediately after the first wave, though, we had to fight a second wave of creatures that included more draconians, dragons, skeletal dragons, efreet, and even a lich or two. They were a bit easier, owing to my ability to destroy dragons nearly instantly with the dragonlances, plus my clerics' abilities to turn undead. Still, it was a tough battle, and you can forgive me for thinking it might be the last.
    
As we contemplated the dead bodies around us, a man's voice spoke over rattling chains and invited us to "come." We were somehow sucked into another plane--the Abyss. We landed on a featureless plain, but a little exploration led us to a stone building full of monsters. They parted to let us approach the man they were torturing, a black-robed figure with dark skin and long blond hair, chained to a wall. He demanded that we kill his tormentors. Magic was useless in the room, and the ensuing battle against draconians, white dragons, and purple worms left all but three of my characters unconscious or dead. Fortunately, I was able to rest soon afterwards.
        
At least someone wants us to feel welcome.
       
After the battle, the chained man revealed himself as Raistlin Majere, "the Dark Queen's deadliest enemy." Gasp, some of you are saying, those who have read the Dragonlance books. Other than he was a playable character in Heroes of the Lance and thus one of the titular heroes, I had no idea who he was or why he was here. I tried to read about him on Wikipedia and got the idea that he was an anti-hero ("soon I will be revered on Krynn once again" kind of gave that away), but I couldn't figure out where we currently were in his long bio.
        
I hate this guy.
       
Raistlin told us that Takhisis had somehow managed to open a portal to Krynn, and all she was waiting for was the perfection of a mortal form to inhabit once she made the passage. Raistlin suggested we escape through the portal and destroy it behind us. As he led us to it, he demonstrated his power by dealing with a company of beholders with a wave of his hand.
   
We reached another building where we found Takhisis sprawled on a throne, meditating on the portal. Trying to attack her led to instant death (I thought we were god-level characters!) Instead, we had to creep to the portal, disturb Takhisis's meditation by throwing a rock at a bell, and watch and wait as she and Raistlin fought each other long enough for the mist in the portal to clear. At one point, she wrapped Raistlin's hands in silver chains, and the episode was clearly the inspiration for the game's cover art.
       
"Attack" was the wrong option with Takhisis.
      
The portal finally cleared, and we leapt through, leaving Raistlin to be eaten by ghouls and serpents. We landed on the other side, bruised and battered, to find a bunch of gnomes worshiping the tripod. Without any time to rest and heal, we investigated the tripod and found it to contain an egg--which promptly hatched (somehow) into a full-grown five-headed dragon. This had been intended as the vessel for Takhisis's return.
         
It apparently was not by just a little bit that Firebreath failed to make the grade.
        
Surely this will be the final battle, we thought as it began. I have to admit, it was pretty cool. The dragon had black, blue, red, white, and green heads, each capable of those dragons' respective breath damage. It also had a very high armor class. To kill it, we had to attack and kill each head independently. Fortunately, it was susceptible to the dragonlance damage, and despite taking some damage from breath attacks, we were able to kill it.
          
This was a pretty cool graphic.
     
With the beast dead, the Grathanich came floating out of the cauldron and floated away down the hall, throngs of gnomes in pursuit. We heard Takhisis's voice speaking to someone named Vlaahg, telling him that she wanted the stone found and taken off Taladas. As we neared the exit to the room, we found the source of the voice: a draconian holding a magic mirror that enabled him to communicate with Takhisis.
     
Surely this will be the final battle, we thought as another huge draconian fight ensued. But when it was over, there were no endgame messages. There was also no indication of where to go and what to do. Wandering through the hallways, we kept glimpsing the Grathanich (also called the "Greystone") as it floated through floors and ceilings and otherwise evaded capture.
       
This nonsense lasted for over an hour.
        
I must have spent 90 minutes wandering all around the five levels again before I finally ran into a group of draconians holding the mirror they had used to communicate with Takhisis. They set it down in front of the party and an image of the Dark Queen appeared. "Raistlin sends his fond regards," she said, and we immediately smashed the mirror. (The game gave me the option to Talk, Smash, or Leave. "Smash" seemed the most satisfying, but I have to admire the party that just sighs, turns around, and walks away.) Nonetheless, Takhisis kept talking.
    
You think you have defeated me, but of course you are quite wrong. You are mortals; do not dare to think more than mortal thoughts, lest you join Raistlin. One day you will grow old, and weak, or foolish. Meanwhile my malice goes on and on, growing stronger, deeper, more subtle. Which is why I propose this bargain to you. I enjoy a good opponent, and you are too talented to be sacrificed to old age.
      
We never heard the bargain because we chose "Smash" again, this time grinding the pieces of the mirror to dust. For the record, I never thought we "defeated" Takhisis. I just thought we escaped her.
        
I may try to reload and explore the other options for the final entry.
       
As we turned to leave, a horde of draconians attacked us from behind. Ah, the final battle!, I thought as it began. But the battle was relatively easy, and the draconians were soon dead. The mirror pieces briefly coalesced into an angry whirlwind, but "the queen's rage is impotent against your valor."
     
We had some more wandering around to do before we encountered the real final battle--that is, before the technical one. On Level 3, we stumbled into a room full of draconians staring at the Grathanich with awe. A machine they had constructed was slowly attempting to encircle and seize the magic stone. "Soon, the queen will possess it once again," the draconians said. "Open the shafts! And summon the dragons to bear our prize away!"
        
Here's the game's description of what's happening, in case mine didn't make any sense.
         
I was in bad shape at this point, so I just killed the emulator, restarted from my last save, and re-entered the room, fully buffed this time. Thus commenced four unskippable battles, with no opportunity to rest in between. I think this is a Gold Box record. Sensing this was the case, I took the time to cast healing spells at the end of each combat, even if it meant going into extra rounds.
        
A fully buffed party.
     
Wave 1 had a large batch of draconians. I did the usual: summoned a couple of fire giants to serve as a buffer between us and them, then picked away at the exploding draconians with arrows and other missile weapons. Unfortunately, our arrows were almost out at the end of the battle. We had long exhausted all the magic arrows I purchased in the gnome citadel, and we were even running low on the non-magic arrows I held in reserve.

The second battle involved draconians and several red, green, and blue dragons. It's been a long time since dragons were a real threat: Dutch and Midsummer, both hastened with dragonlances, can kill as many as eight per round by themselves. Dragons are all susceptible to "Delayed Blast Fireball," even (oddly) red ones, not to mention "Magic Missile" and "Lightning Bolt." Even without those spells, my other characters can easily melee one or two dragons to death. 
         
I love that "Leave" is still an option, as if the game's going to let us just turn around and walk out.
         
Making it even easier, however, was a horde of about 20 gnomes who joined the party for the final three fights. They had something that my regular characters didn't: arrows. They were only regular arrows, shot by regular short bows, but the sheer number of them was enough to take care of the exploding Baaz, Aurak, and Sivak draconians.
   
After the second fight, we watched as the draconians' device finished snaring the Grathanich. Dragons prepared to fly the artifact away, so we had no choice but to attack. (At least, we felt we had no choice; I'm curious what happens if we had chosen "Wait" or "Leave" at this moment.) Thus commenced the third battle, which was about the same as the second one, but with the inclusion of skeletal dragons. They die at the tips of dragonlances just as easy as regular ones, and again we had the gnomes as meat shields and to help with the exploding draconians. Piece of cake.
        
A gnome takes aim at an enchanted Bozak.
         
As the third battle wrapped up, the gnome pilot Hrumbishnog showed up in his wind-ship and tried to grapple the device holding the Grathanich. To distract the draconians from him, we had to attack again, this time facing a couple of enchanted Auraks and a large number of black, blue, green, white, and red dragons. We had "Resist Fire" and "Resist Cold" activated, so we prioritized the blues, greens, and blacks, and they went down pretty fast. A couple of "Delayed Blast Fireballs" devastates them, and the knights can mop up the rest.
    
This looks like a perfect place for a fireball.
       
Hrumbishnog couldn't steal the device--it was too heavy--but he did snag it and pull it to the edge of a shaft. As we watched and the draconians howled in horror, he toppled the device into the shaft, down several stories, out the bottom of the Tower, and into the depths of the Lava Sea. He was nearly dragged with it, but we had Squirrel fire off a "Magic Missile" that severed his cord. 
       
"Shoot an arrow" was one of the options, but we were out of them.
         
"You can hear the Queen shriek all the way from the Abyss," the game said. "She vents her fury on the minions that have failed her. It is terrible to behold." We jumped aboard a wind-ship and at last escaped the Tower of Flame. 
        
"Grunschka, stop singing about evisceration!"
           
On the way back, we learned that Daenor and Crysia had been rescued and taken to the gnome fortress, and that Dahmia had flown off on a dragon. The mood among the gnomes as we arrived back in the citadel was triumphant. A band greeted us on the flight deck, and Tasslehoff Burfoot . . . was there. As we strolled the hallways, gnomes shouted, shook our hands, threw confetti, bought us drinks in the bar, and otherwise celebrated. I assumed this was the endgame but still took time to level up, deal with excess equipment, and otherwise make a tidy party. 
        
This is how every game should end.
        
When we were done with logistics, we headed up to the king's throne room. Daenor and Crysia greeted us as we entered the palace. There were messages almost every step. Gnomes feasted at a banquet. Firebreath gave rides to children. The king gave a speech and unveiled a "royal cheese nutball," at which mice immediately started gnawing. We got a wide shot of the hallway with all of the NPCs and celebrants; it looked like it could have been inspired by Quest for Glory.
     
You got the bigger image up above, so here's a close-up of some mice eating the cheese.
       
The celebrations ended abruptly as a fireball hit the palace and dragons swarmed through the windows. These were not minions of Takhisis, but rather Tremor and his allies, deciding to fill the power vacuum our victory had left. Baldric, the silver dragon, scolded Tremor, morphed into his dragon form, and began fighting the red dragon while we turned and faced Tremor's allies.
           
History has not been kind to those who call us "fools."
         
The ensuing battle must have involved about 50 dragons--black, blue, white, red, and green--but as I've already covered, dragons are nothing to this party. I could kill eight at a time with "Delayed Blast Fireball" and at least another five or six with melee attacks. That's without even bothering to buff and "Haste." Plus, we had a bunch of gnome allies during the battle. Not only were we victorious, I'm not sure we even took any damage. The only problem we had was that a bunch of the dragons spawned on behind a section of walls that made them unreachable. I finally ended up setting the computer to auto-combat and letting it make everyone dither while I wrote sections of this entry. The battle eventually timed out and victory was declared in our favor.
         
One of several screens full of dragons.
         
After our victory, the game related that Baldric won his fight with Tremor, ripping the iron dragon scale from his chest and sending Tremor plummeting to the earth. Baldric announced that with the iron scale removed, the evil dragons would cower in their lairs once again. With a promise of a second victory celebration to come, the game ended with a "THE END," but then allowed us to keep playing and return to the overworld map. "Now you can explore places you haven't seen yet," it even offered.
              
"Well, guys. I guess we live here now."
        
I had mixed feelings about this session. I spent far too much time walking around the Tower of Flame than I would have liked, and there were far too many things that felt like the final battle. I really had no interest in the "confrontation" with Takhisis or the appearance of Raistlin Majere. (I suppose one of my major issues with all three of the Dragonlance games is that I've just never cared anything about the setting.) On the other hand, the real final battle--the sequence of four sequential combats--was fun and satisfying. I didn't find it terribly hard, but that's because I had so much experience fighting dragons and draconians by then that I knew precisely how to handle them. Although I beat them in one try, it felt less like the game was soft-serving me and more like it was allowing me to demonstrate my accumulated tactical mastery. I suppose maybe it could have been more challenging with fewer allies.
    
The dragon battle at the gnome citadel occurred after the major victory screens and was clearly intended as a fun coda--something that allowed the party to feel insanely powerful against an enemy that would have been insurmountable back in the early hours of Champions of Krynn.
         
We will? Is Baldric setting up a fourth Krynn game?
        
As for the rest of the victory, I would have liked a little callback to the origin of our quest (General Lauralanthalasa) or some discussion about how we were going to get back to Ansalon. But beyond that, it was fun and satisfying--one of the more elaborate of the Gold Box endings.
   
I'm not aware of any post-game challenge dungeons for this one, but let me know if I'm wrong. Otherwise, we'll have the "Summary and Rating" in a few days, and then we'll finally open up a couple of new RPGs for the first time in over a month.
    
Final time: 36 hours