Tuesday, June 21, 2022

Ultima Underworld II: Won!


By the end of the last entry, I had cut all the Guardian's lines of power to the various gem destinations, and I had used all the blackrock gems on the teleporter in Britannia's basement. I have to say that even this late in the game, I'm still a little unclear about these items; specifically:
 
  • Why did the Guardian's plot to encase the castle in blackrock have to involve a teleporter in the sewers?
  • If the teleporter was simply to enable the later invasion, why delay the invasion?
  • Why do all the various universes have a single blackrock gem?
  • Why does using the blackrock gems on the teleporter weaken it and cause new teleportation facets to open?

I'll review dialogue and see if I better understand any of these things for the final entry.
       
Is blackrock just obsidian?
    
In any event, I start this session in the wreckage of Killorn Keep. I have a save from before I destroyed it, but I decide to play from here. Killorn Keep was a threat. I had active intelligence that the Guardian was planning to mount an invasion from here. The keep was full of enemies and only one ally--who refused to accept my warning and leave. This is war. If you have a chance to destroy an enemy's fortress, you take it. You don't worry about the servants and horses.
   
I thus return to Britannia. Before going anywhere else, I toss one of my moonstones in Britannia's basement, near the teleporter, so I just have to cast "Gate Travel" when I want to return.
      
I feel like I didn't fully explore the possibilities of "Gate Travel."
     
I head back to the Pits of Carnage and make my way to Level 2. I bypass most of the level with the "Fly" spell. I can't remember the right button sequence to get through Zoranthus's Puzzle, so I bypass it by opening the grates with the "Open" spell. That's what it means to be a mage in this game--not to defeat enemies through magic, but to use magic to bypass a bunch of puzzles and navigational obstacles. That isn't a complaint. There aren't many games in which magic serves more as a utility than a weapon. I rather like the novelty of it. 
  
Zoranthus happily takes the scepter and hands over the air daemon, bound in a jar. I run through the ritual steps one more time with him, then "Gate Travel" back to Britannia.
     
I'm not sure a trapped demon is worth a single wand, but I'm not going to complain.
     
Step 1: I have to bathe in filanium-rich mud--the kind found in the ice caverns--mixed with basilisk oil. I have two bottles of basilisk oil. Curious that I've never encountered a basilisk in an Ultima game.
   
I return to the ice caverns, where the slick floor is also obviated by "Fly." I find the mud. I'm not sure how to mix the oil with it, so I drink one bottle and toss the other into the mud; the latter turns out to be the correct answer. I enter the mud myself and get a message about the mud caking me.
   
Apparently careful not to let too much drip off, I go to the next step: "fire" the mud in lava. The closest lava I can think of is in the Arena of Fire in the Pits of Carnage, so I head back there and drop into the lava. "The oily mud bakes on your skin." 
         
Does that mean I'm walking around looking like a stone golem?
    
Third step: seal the deal with a Potion of Iron Flesh. I don't have a potion, but I'm hoping that the spell will accomplish the same thing. It does. This would have been a very different sort of entry otherwise.
   
Now I've got to break the air daemon's current vessel and transfer it to me. Zoranthus warned me only to do this in the Sigil of Binding on the Astral Plane. (Because of course I had to check: Breaking the bottle elsewhere causes the air daemon to kill you. You resurrect in Britannia but are probably "walking dead" at that point.) I head there, drop the bottle in the pentagram, and smash it with my sword. "The air daemon is absorbed into your body."
      
The floating skull approves.
      
When I gate back to Britannia, I'm surprised to find four soldiers wearing Killorn Keep uniforms in the basement. When they see me, one says that "MG" told them to scout, "but I reckon I'm gonna be the first in my squadron to rack up a kill." Both of them are soon dead; my Sword of Stone Strike is extremely overpowered. "MG" is certainly Mors Gotha, the Guardian's champion. Apparently, my act of destruction didn't end the threat posed by Killorn Keep. 
      
With this sword, I could take on an army.
    
Before moving on, I head upstairs and make sure everyone is okay. I try blowing the Horn of Praecor Loth, but the game just says that "somehow the horn's power does not seem to be at its fullest." How did Praecor Loth manage to use it to bring castles crumbling down when I can't use it even with an air daemon in my lungs? 
     
I love how they programmed the ability to play individual notes for no reason.
       
I return to the ruined fortress, and sure enough, a bunch of guards are amassing in the guardroom. I can't reach them because  the regular corridors are collapsed. The guardroom is open to the main chamber now, but there are beds and other pieces of furniture blocking me from walking through. I have to go back to Britannia, get the second moonstone, return, throw it past the furniture into the guardroom, and cast "Gate" on the other one. It later occurs to me that "Portal" would have done it. Why do I keep forgetting about "Portal"?
   
The guards are suspicious of me, but not after I slip on one of the Guardian's signet rings. They at least acknowledge what I've done to the keep ("somethin' horrible happened here--corpses everywhere"). They've been told that they're headed to a place where "the defenders are 100% sealed up" and they'll just be "goin' in and cleanin' up."  
      
I can see these guys, but I'm stuck on some furniture.
     
Mors Gotha is in an office nearby. She asks how I like my "handiwork," gesturing to the keep around us. I say I did what I had to do. "Thou wert e'er as bloodthirsty as I, if not more so," Mors crows. It's a tired argument. Of course I am. I've been through 10 prior Ultima games. My skin is permanently tinted by blood. I can't even begin to count all the people I've killed. I've killed on land, sea, and space, and in past, present, and future. I killed dozens of castle guards just because one of them had a key. I killed most of the gargoyle race. I battled my way through hundreds of giant ants to kill their queen. I killed a megalomaniacal Martian with an M-60. I killed three shadowlords and countless liches, demons, and dragons. I've killed the very creator of my universe. Does Mors Gotha imagine that I am ignorant as to what I am?
   
The subsequent battle is rendered trivial by the Sword of Stone Strike. Guards rush in behind me, but I just have to petrify Mors Gotha, then turn around and petrify the guards. From there, as long as I strike everyone every 10 seconds or so, they remain petrified.
     
This is too easy.
      
Mors completely disappears when I kill her, leaving a spellbook behind. It contains magic formulas and references to the Guardian, so I grab it for Nystul. 
   
Back in Britannia, Nystul says he can use the spell in the book to unravel the Guardian's magic. He just needs to know the time and place of the original casting. It was Nell, Lord British's chambermaid and sometimes lover, who told me that she heard chanting in the throne room at four bells. That's exactly what she said. Nystul accepts "throne room" but rejects "four bells." He just wants "four." I think this is the only place in the game where you type your own keywords. It makes me miss the earlier Ultimas as well as their more complex parsers.
      
The question of "who was it?" remains a mystery. Everyone probably blames Patterson.
    
As I deliver my answer, Julia runs in with the message that soldiers are pouring through the gem and attacking the castle. Before she can finish her account, Mors Gotha steps through the doorway behind her. Julia and Nystul rush off to the throne room while Mors Gotha confronts me again. 
   
I don't know how Mors Gotha survived our first encounter, but keen to defeat her again in a more challenging way, I discard my Sword of Stone Strike and equip the Black Sword of Major Accuracy that I found in Loth's tomb. I chug every potion that I think might be helpful and blast her with a few wand remnants at the outset of combat.
         
That VAS IN MANI spell I have lined up isn't going to work.
      
The combat is long but not hard. I try to use some magic but remember too late that no spells above Level 3 can be cast in Britannia. I can't use "Poison" on my sword, let alone more epic magic like "Paralyze" and "Freeze Time." I mostly just keep myself healed with "Minor Heal" as we swing away. She doesn't last long. As she dies, she calls for the Guardian's help. Nothing happens. "God DAMN it," she says, and dies.
   
I kill a couple of guards in the hallway as I make my way to the throne room. "Avatar," Lord British offers as I arrive, "The time to act is now!" The last act I make on my own is speaking to Nystul; then the game takes over. Nystul reads from the book as I raise the horn. The daemon's strength surges through me.
      
It would be funny if the castle crumbled here but the dome stayed in place.
     
A cinematic shows the blackrock dome crack and crumble. In the final scenes, The Avatar stands next to Lord British on a balcony. Lord British says:
     
Again thou hast bested the Guardian. Thou hast shattered the curse of the obsidian jewel by the power of thy strong hands and quick mind, and it hath passed from us like a feverish dream. We are at peace again, Avatar, and we must return to the task of rebuilding our nation. Come! 'Tis time we breathed once more the sweet air of Britannia.
      
If I'm mad at anything, it's that I never found out if the Guardian's invasion of Britannia that I kept seeing in my dreams was real or a hallucination. Freeing the castle isn't going to matter much if there are enemy troops all over the continent. 
       
I get why the dome is cracking, but where is all the light coming from?
        
I reload and try some obvious ways to screw things up. If you rush to the throne room without killing Mors Gotha, Nystul just says that the ritual can't start while the invasion is still happening. If you drop the horn of Praecor Loth, Nystul just tells you to go and find it. Denizens of the castle remain invincible and are never targeted by the invaders. If you attack them, you just end up in the jail cell as usual.
   
I checked out the official cluebook for anything that I missed. It appears that the official walkthrough suggestion is to do the Ethereal Void before the Tomb of Praecor Loth. The ritual with the air daemon triggers the Killorn scouts and the appearance of Mors Gotha in Killorn, but nothing is much different if you don't destroy the keep. Doing things in the cluebook's order puts some space between the two battles with Gotha. The book says that she "disappears into a moongate" when you first defeat her; I guess the petrification animation kept the moongate animation from appearing. But you can also just steal her spellbook and run.
   
Note how the silhouette of the Avatar could plausibly fit either sex.
       
I missed several spells not found in the spellbook. I was supposed to somehow get "Dispel Hunger" from Zaria in the Pits of Carnage. Merzan, the merchant in Killorn who attacked me, sold "Rune of Stasis." "Summon Demon" was apparently found on the bloodstained pentagram in the Pits of Carnage, but all it does is summon a hostile demon. I suppose it could be useful for grinding.

"Smite Foe" (VAS JUX MANI) is an advanced version of "Bleeding" that kills almost any creature. You have to deduce it by adding VAS to JUX MANI. That's fine, but it feels like some other spells ought to work that way, too, and they don't. VAS ORT JUX doesn't give you an extra powerful "Magic Arrow," for instance.

The mother of all inferable spells--which surprisingly I didn't even think about--is VAS KAL CORP, or "Armageddon." That just means "summon great death," which I would assume was just "Mass Kill" or something. In Ultima VII, the spell is IN CORP HUR TYM ("Cause death [via] the winds of time"), which makes more sense, but you can't use four runes in Underworld. 
       
A storeroom before "Armageddon" . . .
     
Anyway, the cluebook says that casting the spell "kills all creatures, destroys all objects, doors, stairways, and bridges . . . on all realms" (emphasis mine). It also makes the blackrock stop teleporting you and removes all the runes in your rune bag. You have to take its word for the effects "on all realms," because there's no way to leave whatever realm and level you're currently in to go and check. And you can't cast it in Britannia to see Lord British's reaction because you can't cast high-level spells in Britannia.
          
. . . and after.
      
I love how "Armageddon" went from a spell given to you in ignorance by a wisp (Ultima VI) to something available on the open market for a high price (Ultima VII) to a spell that any mage could infer and cast with three common runes. Britannia's fate is sealed if it doesn't try to exert some control over VAS runes.
     
Let me know if you think there's anything else I should try before moving on to the rating. We'll have that in a few days.
    
Final time: 54 hours


Sunday, June 19, 2022

The Return of Werdna: Kaboom

 
This level in summary.
      
The first time through, I called Level 8 "the most hateful [level] I have ever encountered in any CRPG." The passage of twelve years has not dampened that sentiment. Titled "The Death of a Thousand Cuts," it is the ultimate exercise in trial and error: a level in which three-quarters of the squares have mines that kill you (or nearly so), and yet you still have to step in every damned square because one of them might contain some vital item. (And three of them do!) Incidentally, setting off mines does not remove them from the map, so you can't periodically run back to the pentagram to heal and slowly "clear" them. It was an effort of will not to simply use my map from the first experience, which would have turned 5 hours into 15 minutes.
       
My final map of Level 8.
    
This is one level in which your exploration pattern makes a huge difference. Try to map the contours of the level clockwise, and you not only find the summoning pyramid quickly, you're safe from mines until you get there. Go the other direction and you're in for a world of hurt. You'll be reloading a lot as your Level 2 Werdna and whatever allies he has left from the floor below last virtually no time against this level's denizens, let alone its mines.
 
As with the last level, the time I spent here allowed me to get to know everyone intimately, to the point that I was anticipating their actions and yelling things like, "Keep your goddamned hands to yourself, Abduul." I met two adventuring parties here: Arcturus's Avengers and Abduul's Artful Dodgers. The ironic thing about this level is that both parties  are composed of mostly evil enemies. That makes their battle cries ("Murderer, you shall pay!" and "Die, infidel!") all the more mysterious. Both have a melange of characters, including high-level spellcasters and (in the Dodgers' case), a thief capable of stealing your important artifacts. I'll let you puzzle over their names, but I'll say that I'm a bit annoyed the Avengers stole my default name of "Gideon."
      
Perhaps the most annoying message in the game.
       
Unlike the parties on previous levels, neither of these parties drops anything important. 
   
Gideon, you traitor.
        
In between these enemies, as usual, you meet individual foes and occasional pairs and trios: Gytr, a good mage; Tars Tarkas, an evil fighter; Merlin, an evil fighter (?!); Lord Gwydion, a good lord; Xenic, a neutral fighter; Kazrak, an evil fighter; Aspergil, a good bishop; Drip, an evil mage; Bananarama, a neutral fighter; Fank, a good priest; Oger, an evil thief; Thalessa, an evil fighter; Bugnews, a good fighter.
    
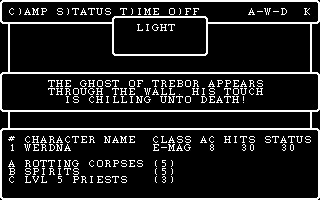
Against these enemies, you have a better selection of allies than on lower floors. I thought the best of the bunch were spirits, which cast Level 3 mage spells, including MAHALITO (a fireball that damages all enemies). Their physical attacks poison. Second are Level 5 priests, who continue to keep the lights on and Werdna healed. There are a lot of allies tied for third, including banshees and shades (both cause level drain, but banshees seem to flee more often), rotting corpses (poison and paralyze), and gaze hounds (paralyze, low AC, high hit points). Dragon flies have a breath attack, but it's mild. Ronins have physical attacks and Level 2 mage spells, not high enough to be much use. The rest--harpies, bugbears, wererats---attack only in melee and often flee. I have no idea what "looters" are supposed to be, but they mostly just run away.
       
That was helpful, thanks.
     
The big news is that Werdna himself gets a lot more effective on this level. The two Level 3 mage spells are MAHALITO and MOLITO, both of which cause mass damage of different sorts. 
 
Of course, the ghost of Trebor keeps stalking you across the level, occasionally showing up out of nowhere and killing you. It's harder to get away from him here because if you panic, you end up running into a minefield. 
         
This is so annoying when it happens after you've made a lot of progress.
       
The real difficulty on the level is surviving the mine damage, which gets worse as you go south and west, until by the time you get to the bottom of the map, you're taking 10 hit points per mine. Around this point, I stopped even trying to survive. I would map three mines, die, and reload. There were a few places where I had to get creative just to verify that a square contained a mine. The mine at 0,2 on the map is probably the most difficult. You either have to wade through three 10-point damage mines from the east or a bunch of lesser ones from the north. Either way, you need to fight at least one random battle mid-way so that your priests have a chance to heal Werdna. Spinning around looking for random combats, you have an equal chance of getting killed by Trebor. It was a lot of effort to verify that the square did, in fact, contain a mine.

As noted above, all the mapping is necessary because there are three fixed treasures amidst the mines: golden pyrite, an amber dragon, and a witching rod. The latter of these is found in a pool of acid that costs you 14 hit points to search. I noted their locations but didn't grab them all because until the end of the level, I didn't have room in my inventory.
      
Finding the "witching rod."
      
A safe path snakes its way through the minefield and to the exit in the southwest. Even after you've mapped it, navigation can be perilous. More than once, I miscounted the steps or held down the forward key too long and had to restart. More than half a dozen times, Trebor got me while I was trying to find my way. With persistence, I finally made my way to the 2 x 2 room in the southwest.
   
As you enter the room, a message helpfully asks if you've forgotten something. One step further and you battle a clay golem. He has nothing useful. But in the opposite corner of the room is an assassin named Glum. He has 220 hit points and is capable of special attacks like decapitation. If you kill him, he carries a "weighty cube" that turns out to be a Box of Holding. You want to have room for it when you find it because it makes room for everything else. Alas, when I finally made it to the room and defeated the assassin, I accidentally had a jammed inventory and had to leave the box. 
     
Glum appears to be a frog.
       
There was no way I was going to try to make my way back to the pentagram from the exit, so I took the stairway up to Level 7 and saved. I had four spirits and five priests, so I was comfortable in my chances of making it to the pentagram. That was a little cocky of me. It took me three reloads to get past the parties on this level, reach the pentagram, and summon some new allies. Guessing, I chose priestesses, giant slugs, and strangler vines. It was not an optimal party, but I did manage to kill Glum again and this time retrieve his box. I put everything that wasn't equipped in it. I recall that if you equip the box, thieves can't steal it from you.
      
This is what I had at the end of this session. I'll take a light hint if I seem to be missing anything.
       
Now I needed to get those marked treasures. I returned to Level 7, summoned priestesses, goblin shamans, and blink dogs (again mostly guessing), and headed back down. I had to fight either the clay golem or the assassin again; I chose the clay golem. My party selections weren't bad: goblin shamans have Level 3 mage spells as well as priest spells, and blink dogs replenish themselves by "calling for help." Priestesses take the place of Level X Priests from previous pentagrams. I can't tell exactly what level they are, but they have Level 4 priest spells. I'm getting ahead of the next entry, but Werdna also has LAHALITO (major fireball), DALTO (blizzard), and MORLIS (fear) since hitting the Level 7 pentagram.
      
One of the important treasures on the level.
    
The monsters still didn't last very long, perhaps because I didn't have very many of each, but I managed to pick up the three treasures on Level 8 with a minimum of difficulty. I made it back to the summoning pentagram and replaced my flagging party with my standard Level 8 combo: Level 5 priests, spirits, and rotting corpses. I'm not sure I've mentioned before, but you get a random number of each monster when you summon them, from 1 to some maximum set for each type of creature. Sometimes you have to try several times before you get an acceptable number.
  
With this combo, I moved back down to Level 9. There were a few places I'd marked for a revisit, including the hellhound room, a couple of the "tower" rooms with different kinds of guards, and a random encounter with Greyhawk's Ghostbusters, who I'd been unable to defeat the first time.
   
One of the "officers' mess" groups of the tower guards had a unique item called a Twilight Cloak, but no one else had anything, including the Ghostbusters. My priests and spirits performed beautifully; I had re-explored over half the level before I lost even one of them. Trebor mostly left me alone, too. I was prepared to save if I got one of the messages indicating he was really close (saving re-stocks the level and sends Trebor off to a new random position), but never got to that point.
        
The officer's "mess" is about to earn its name.
      
I was primarily interested in trying to get into the unmapped squares in the level's central room, which is 2 x 5. When you first enter, a message reads "Dante was here." Just north of that, a second message says, "Bring your marshmallows?" North of that, I had mapped the encounter with the hellhound. I guess I screwed it up because this time, I just got an encounter with a random party. I was able to continue north to a new message: "The heat is getting quite unbearable. The glow ahead is intense. What can be causing it? A monstrous statue rises up from the sullenly glowing ground and bars your path. Flee while there is still time!"
    
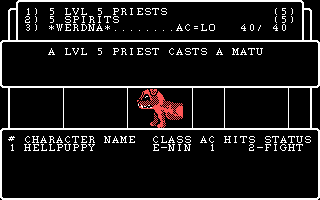
The game let me search here and then warned me, "You are about to battle something cute!" The enemy that appeared was a "hellpuppy," an evil ninja with 166 hit points. My allies made short work of him. I continued north. 
       
It is kind of cute.
      
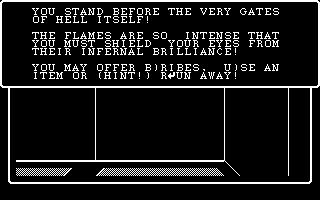
"It's the Abyss!" the next square screamed. "May Kadorto have mercy on your soul! Go back! Go back!" That was the furthest north I could get in the room, so I moved west. There, the game told me that I stood before the very gates of hell. I could offer a bribe, use an item, or run away. I ran away the first time, made a save, and then tried the various options. Trying to bribe just wasted gold; it melted and vaporized. I went through each of my items and tried to "use" it. The only thing that did anything were the Demonic Chimes that I'd gotten from the hellhound in this very room. "A hideous wail of many tormented souls screams forth from the chimes, shaking the very foundations of the gates!" the game reported. But after that, the game just returned me to the options screen, and nothing else I used accomplished anything.
        
This is either an homage to Ultima IV or Zork or both.
      
Having participated in several hell-related rituals in games before, including another (Ultima IV) at the entrance of something called the "Abyss," my suspicion is that the Demonic Chimes serve as a "bell," and that I need a "book" to follow before finally using my Black Candle.
 
On the subject of mysteries, I caught the Oracle a few times during this session. Here are all the Oracle hints I have so far [Ed. I later created a special entry just to record and analyze Oracle hints.]:
   
  • "The egress will set you free!" I think I've made fun of that enough.
  • "Your future is black; you feel boxed in!" Probably a reference to the assassin's black box, necessary to hold all the items you need to carry.
       
Tumbuk 3 before they discovered Zoloft.
       
  • "Read The Iliad lately?" No idea. The Iliad deals with the consequences of the meddling of the gods in the realm of men, which might have some ties to the game's backstory. It better not have anything to do with the Trojan Horse. The Trojan Horse doesn't appear in The Iliad, although people often think it does. That's from The Aeneid.
        
Is there an audio version? I'm sitting on half a dozen Audible credits.
     
  • "Chomp, chomp . . . eh, what's east, Doc?" A silly Bugs Bunny reference. Since Bugs's actual line is "what's up, Doc?," this suggests there's some place where I'll have to equate east with "up." Or maybe I'm munching the wrong carrot.
  • "Secrets abound all around you! Psst! Have you met Glum yet?" Yes, Glum was the assassin I killed to get the black box. As for secrets all around me, that seems manifest.
  • "Live the Qabalah!" I think I'd have to take an entire 15-week course to learn how to do that.
  • "The answer is carved in stone! It is right before your nose!" I'll look for something carved in stone, I guess.
     
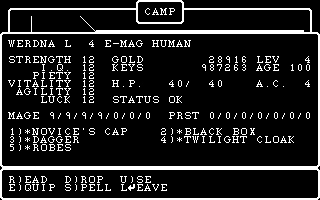
My character at the end of this session.
               
With everything I could do on previous levels done (for now), I returned to Level 8, stopped and saved on the pentagram, and slowly made my way through the minefield for the umpteenth time, killing Abduul's Artful Dodgers and Arcturus's Avengers for the umpteenth time along the way. By the time I got to the room in the southwest, I was down to two spirits and one priest, not ideal to take on either the assassin or the golem, so I took a save. Aside from the fact that the game offers multiple save slots, this is a dangerous place to save. You could get into a situation in which you can neither move forward nor make it back to the level's summoning pentagram. In this case, though, I needn't have worried. We defeated the golem with the loss of one spirit. It still took me a couple of reloads to get to the summoning pentagram from there, but I made it and am well set for the next session.
     
Time so far: 15 hours

Thursday, June 16, 2022

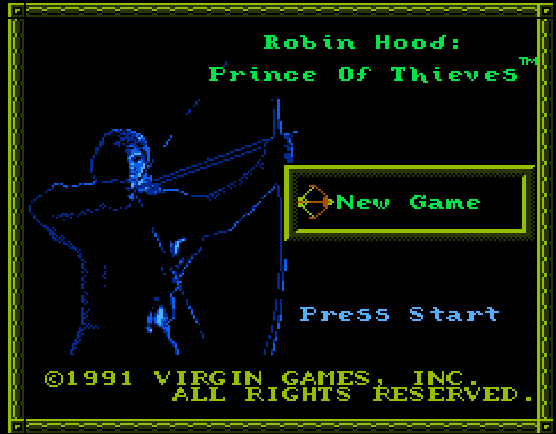
Game 459: Robin Hood: Prince of Thieves (1991)

    
Robin Hood: Prince of Thieves
United States
Sculptured Software, Inc. and B.I.T.S., Ltd. (developers); Virgin Games (publisher)
Released 1991 for NES, 1993 for Game Boy
Date Started: 1 June 2022
Date Ended: 5 June 2022
Total Hours: 5
Difficulty: Moderate -Hard (3.5/5)
Final Rating: 23
Ranking at Time of Posting: 194/460 (42%)
    
Robin Hood: Prince of Thieves (1991), starring Kevin Costner (who, unlike some other Robin Hoods, does not speak with an English accent), may be one of the dumbest adaptations of the legend, but it will always have a special place in my heart. In the summer of 1991, I was attending AIT training for the Army Reserves in Fort Gordon, Georgia. As someone who bristles at even minor constraints, I found Army training difficult--hopefully the closest I will ever come to being in jail. AIT was easier than basic, partly because we had weekends free, and as soon as the drill sergeant announced "Dismissed!" on Friday evening, I jumped in a cab and headed for the local movie theater in Augusta. I spent weekend after weekend that summer watching mostly the same movies over and over again: Terminator 2, The Naked Gun 2½, Backdraft, The Rocketeer, Doc Hollywood, Regarding Henry, The Doctor, and Robin Hood. I probably haven't seen it since then, but I think I could still rewrite the screenplay from memory.
 
This video game tie-in is a rare (for the era) NES title created by a U.S. developer: Sculptured Software, based in Salt Lake City. Founded in 1984, the company specialized in action, sports, and racing games for 1980s microcomputers. At the end of the decade, they pivoted to console development and never looked back. They had no experience with RPGs except for handling the Commodore 64 port of Microillusions' Faery Tale Adventure in 1988, but they smartly hired Mike Breault (Pool of Radiance) to help design the game. Originally titled The Legend of Robin Hood, it was slated for a 1990 release through Mastertronic's Acadia Software label. (This prototype version can be found online and on YouTube.) Publication was held up by Mastertronic's merger with Virgin Games, by which point the forthcoming film had been announced. Virgin licensed the new name from Morgan Creek Productions and mandated changes to the game's plot and graphics to better fit the film. The result is an odd half-adaptation that both needs the film to explain some of its plot developments but diverges from the film in numerous places.
    
As you may know if you've read much about Robin Hood, the reality of any historical character of that name is hotly debated. Most of the historical references date from the reigns of Edward I (1272-1307) and Edward II (1307-1327), although there are some that go back to the 1260s. The earliest fictional ballads have him active during the reign of an unnumbered "Edward," which could be as late as 1377. (Edward IV reigned from 1461-1470, but by then historical ballads of Robin Hood had already appeared.) Ballads and stories start to appear in complete form in the late fifteenth century. From the earliest, the Sheriff of Nottingham is the primary antagonist. Other characters, like Friar Tuck and Maid Marian, are added to the legend as the years pass.
       
That time is called "pretty much all of human history up to the Enlightenment."
    
In 1598, playwright Anthony Munday, a contemporary of Shakespeare, wrote two plays that rolled the dates of Robin Hood's life back to the reign of Richard the Lionheart (1189-1199), and specifically his 1190-1194 absence on the Third Crusade and subsequent captivity. It is Munday who makes Robin a dispossessed nobleman, specifically the Earl of Huntingdon. In 1795, an English historian named Joseph Ritson assembled a volume of all the Robin Hood stories and ballads he could find. In a preface, without much evidence, he argued that Robin Hood was born Robert Fitzooth in the village of Locksley in Nottinghamshire and that he had "some sort of pretension" to the earldom of Huntingdon. Based on Ritson's account, the character appeared in Sir Walter Scott's Ivanhoe (1818) as "Robin of Locksley."
      
An axe doesn't seem like the right torture instrument for this situation.
      
The game follows the movie's curious choice to accept the Third Crusade setting (specifically, 1194) but to eliminate the character of King John. We are made to believe that the Sheriff of Nottingham himself has his eyes on the English throne, as if such a thing were remotely possible. The fractured development of the game is evident in the backstory, in which you, as Robin Hood, "were fighting in the Crusades when your friend Peter Dubois was captured and imprisoned for stealing bread." You try to free him by taking the blame yourself only to find yourself in prison beside him. This is a silly misinterpretation of the opening scenes of the film, in which Robin and Peter are prisoners of war, and Peter is accused of stealing bread from another prisoner. Anyway, the game begins in the "Arab prisons," in a cell where Robin watches his friend being tortured by a man with an axe. A sword lies temptingly on a nearby hearth, and your first task of the game is to snatch it and whack the guard, who dies in one hit. Peter, looking like a fuzzy Rod Stewart, proclaims that he is "free at last!" and joins the party. Searching the guard reveals the key to the cell.
      
Thank God Almighty.
            
The game uses an axonometric perspective with (aside from the portraits) acceptable graphics. It transcends its hydlike roots by offering a fairly complex set of commands accessible with the START button, including "Talk," "Look," "Take," "Search," and "Player." The latter brings up a character and inventory screen with an Ultima VI-esque paper doll for equipping weapons, helmets, armor, leggings, and boots. (Regrettably, only some of these are ever used.) Maneuvering around this screen, pretending the pad is a mouse and the "A" button is a mouse button, is a little annoying, but as good as could be accomplished with a controller. Robin starts at Level 1 with no experience, 100 hit points, and no gold. Everything you carry adds to your encumbrance and decreases agility.
      
The game's menu.
      
Azeem is chained in the next cell. You have your first role-playing choice when you choose to free him, but you can't win if you don't. (Azeem was created for the film, although perhaps based on a character from the Robin of Sherwood TV series named Nasir. In an original draft, Azeem was "Aslan.") He tells you of a secret exit beyond another door, and a hidden key to that door.
      
This doesn't look much like Morgan Freeman.
      
Opening the door puts you face-to-face with another guard, which instigates the game's dueling system. Many enemies are fought on the main screen with a simple slash of a sword, but some boss fights take place on a side-view screen in which you can move back and forth, attack, duck, and jump. Obstacles like tables and bridges offer both advantages and disadvantages. While I appreciate the complexities of the system, I found that if I just faced the enemy and kept pressing "attack," he'd walk into my sword often enough for me to win.
    
The "duel" screen.
       
I played long enough to note that the sound effects were adequate, then turned the sound off. Like most Nintendo games of the era, it features constant music that you can neither mute (independently of the sound) or diminish. If I had been a father during this era, I would have banned the console for this alone. 
    
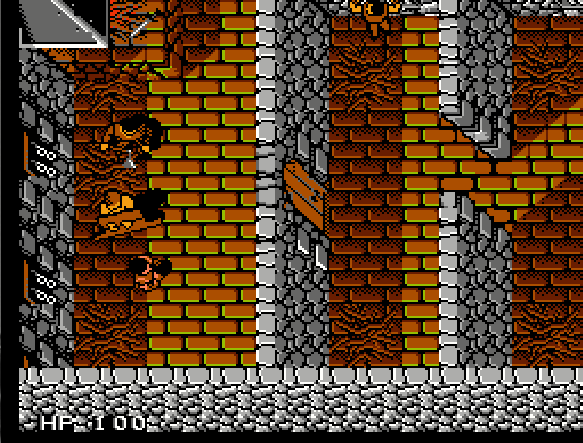
Escaping the dungeons puts you in a maze of catacombs. Most of the game takes place in mazes like this. Monsters (here, Saracen guards) spawn continually, but never more than three or four on the screen at a time. (The game's use of relentless spawning recalls the developer's previous experiences with Faery Tale Adventure.) If you're aligned appropriately, attack with the right timing, and don't let any creep up behind you, you can inevitably kill them before they can get to you, although sometimes it takes several hits. When they die, enemies explode in a satisfying (if slightly unrealistic) display of blood and bones. They occasionally leave corpses on the screen, which is always a sign that you can search them for some item or another.

Two enemies approach from the north as a third one finishes exploding from my blade. Nearby, someone has dropped an apple.
      
When your dexterity fails, enemies strike their blows, and you lose hit points. These are easily replenished with food, bandages (which comically look like Band-Aids), and potions frequently dropped by enemies or found in the corners of the mazes. I mostly found I was so overloaded with these items that I could use them as soon as I found them.
 
Occasionally, at scripted moments, the game takes you into a mass combat in which all characters in the party appear on the screen at the same time, fighting larger masses of foes. You control one character while the others roam around, attacking on their own. It's the only time where allies fight and lose hit points, but they can't permanently die.
 
Mass combat at the exit. The white, red, and green(?) figures are allies; the blue(?) ones are enemies.
     
No matter what type of combat you're fighting--regular, dueling, or mass--combat is relatively easy. The difficulty with this game comes from the accumulation of small mistakes. There's no way to save your progress. After you die, you can hit "continue" to start over again at the beginning of the level, but only twice. For a game that doesn't allow saving, its overall length is a bit unsupportable. I suppose I occasionally had five free hours as a kid, but it's pretty rare today. Thank the gods for emulators with save states.
       
When your third life is lost.
     
After you kill about 20 enemies in the mass combat, Peter dies a scripted death. Title cards relate how Robin and Azeem spent 10 months finding their way back to England. Action picks up again in a forest "near Hadrian's Wall," which I am obliged to note is nowhere near Locksley or Nottingham. An old man relates the situation.
 
Apparently, in this game, the enemy's name is "Sheriff Nottingham."
    
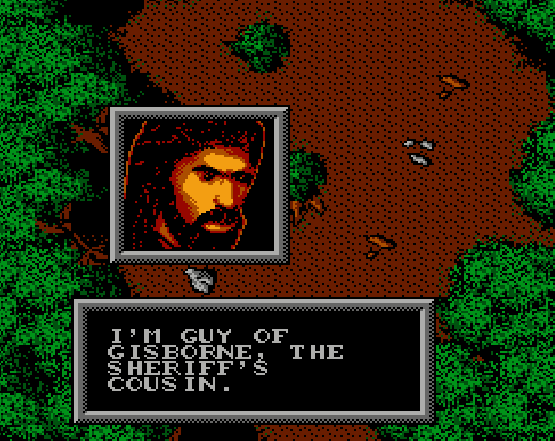
The game from here is extremely linear, with almost painfully small areas to explore and quests that resolve in minutes. At Hadrian's Wall, which has maybe six screens, you find a few items, including your first bow, and rescue Little John's son from Sir Guy of Gisbourne in a mass combat (Guy escapes at the end). The portrait of Guy looks more like the Sheriff from the film (Alan Rickman), and later the portrait of the Sheriff looks like the film's Guy (Michael Wincott).
 
You look more like the Sheriff.
      
A quick transition forest leads to Castle Locksley. Robin promises Azeem hospitality but is dismayed to find that the castle has been sacked and ruined, his father crucified above the entry door. The castle is swarming with, I don't know, wild dogs or wolves or something. Bats and rats are also a problem. In a side-chamber, you find Duncan, Robin's old servant, who has been blinded. He joins the party (you can equip him, and he will actually fight) and gives Robin his father's medallion. A title card relates that the trio bury Robin's father.
    
Well, this is gruesome.
    
Moving west, you reach Maid Marian's Castle. I had to look up a hint to find that wearing the Locksley medallion is the only way to convince the guard to let you in. You can find chainmail and some potions in the castle, but no combats. Eventually, you meet Marian and give her Peter's ring. (She doesn't attack Robin in armor as in the film.) She suggests that you go hide in Sherwood forest. The Sheriff's men raid the castle after the conversation, and you must fight your way free. Some of the men have crossbows for the first time, which adds a challenge to combat. You get a saddle from Marian and have to "use" it next to a horse to make your getaway.
      
How is this remotely possible? Where is John? Where is the Great Council? How were the chancery and exchequer persuaded to go along with this?
     
There is now one of two horse riding sequences in which you flee through the forest ahead of the Sheriff's men. You have to jump at vital moments to avoid obstacles, not unlike the similar minigame in Hillsfar (1989). The problem here is that mistiming a jump results in a death. I can imagine that back in the day, many players who skillfully avoided death in combat met their demise on the other side of a rock. It must have been infuriating.
       
I know I'm colorblind, but are these rocks blue?
     
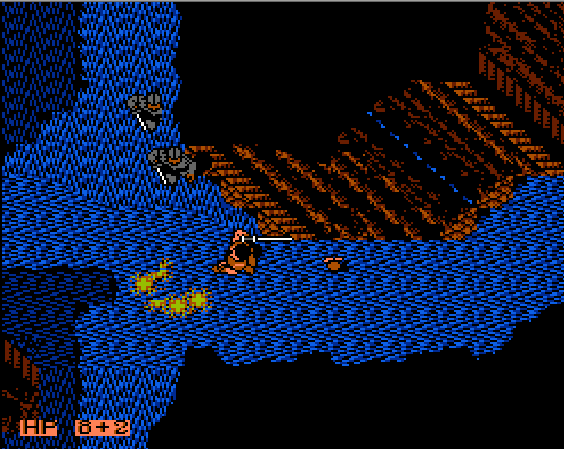
I have no idea what kind of animal was attacking me as I explored Sherwood Forest. Giant rats, maybe. The forest maze brings you to a bridge, where you're challenged by Little John. This brings you to the second duel screen of the game. There's a similar scene in the movie, of course, but both combatants fight with staves in the film, while here, Robin has whatever you've equipped him with. Robin's sword has a much longer reach than Little John's staff, so the battle is fairly easy. Upon your victory, Little John joins the party, bringing a staff that spins continuously when you hold down the "A" button, which makes you effectively immune to any enemy that relies on a melee attack.
      
Isn't that just like a commoner? Brings a stick to a sword fight.
      
You're automatically taken to Sherwood forest, where several Merry Men are busy chopping down trees and planning a camp. From this point, every time you leave Sherwood, you end up going directly to your next quest. This means you can't backtrack to any previous areas, which has some unfortunate consequences if you fail to pick up a crucial item. 
    
Time with your new friends is interrupted by the arrival of a man who begs you to rescue his fiancée from the evil baron who has kidnapped her. This is the part where the game starts to diverge from the film a bit. There's a small forest area that you have to conquer before you get to the castle.
    
This is what Robin Hood looks like, by the way.
      
The baron's castle is the most colorful and detailed map of the game, and it features more of the crossbow enemies. There were lots of bits of furniture that I would have liked to search, but the constant spawning of enemies ruins the fun of exploration. The baron is getting married in a chapel on the first floor, but you have to fight your way up to the second floor to find a letter from the baron to the Sheriff of Nottingham, admitting that the bride has been kidnapped. There's a mass combat on the second floor rendered almost too simple with the bow. The baron capitulates after a duel.
       
Finding a crucial piece of evidence.
      
Returning to Sherwood, Robin finds a new quest: wild boars destroying the fields of nearby villagers. You fight through a small forest map with a few wild boars before encountering the chief boar in a small hut with a skeleton. The staff makes the boar fight trivial; he just keeps advancing into the spinning staff and getting knocked back. Searching the skeleton--which looks just like those in Ultima VII--produces Locksley Armor, a Locksley Bow, and a bag of gold. Who was this guy? The Locksley Bow fires a burst of three arrows at a time, which is a marginal improvement over hitting the "A" button three times rapidly.
    
Just like in the movie.
    
You return to Sherwood and find that the Merry Men have been hard at work building tree huts. One of them tells you that a fellow has gone missing in the woods. In a forest map bisected by a river, you find him dead by a well. A letter from Mortianna, the Sheriff's witch (unnamed in the film, I think) says "Let this be a warning." To the east, you find a length of rope that lets you down the well. 
       
Why are you chopping down a tree that has a hut in it?
      
The well takes you to a series of caverns where you fight rats, snakes, and bats. The caverns lead to a dungeon where Little John claims he can smell druids. Among a few chambers, you find notes with a credit list for the game and a warning that the Sheriff is targeting villagers who help Robin Hood (who hasn't really done any banditry yet!). Mortianna confronts you at the end of the small dungeon and says that she protects the Sheriff and a giant skeleton, which you cannot beat, protects her. The skeleton is indeed immune to normal weapons, leaving you no choice but to return to the well, the outer forest, and ultimately Sherwood.
     
This must have been a deleted scene.
      
Back home, you hear that Marian wants to meet with you and is at a chapel to the south. You fight through animals and guards in a small forest area. Once you arrive at the chapel, Marian gives you a special Druid's Dagger and warns that the Sheriff is raising an army.
    
In Sherwood, an ally informs you that the Sheriff's tax carts will soon be rolling through. It turns out to be a trap set by Guy of Gisbourne, who taunts you with the fact that he killed your father. You defeat him in a duel and recover the Locksley Sword. Friar Tuck, accompanying the wagons, joins the party. The Merry Men loot the wagons and their taxes.  
   
Guy lies dead next to the Locksley Sword.
         
Sherwood now has wooden walkways connecting the tree huts. Marian meets you there but only coldly announces she's taking Duncan back with her to her castle. Meanwhile, an ally tells you that the Merry Men need a weapons master, and a nearby hermit fits the bill. 
       
Another forest segment, curiously bereft of enemies, follows. At the end, you meet a hermit who agrees to join you if you defeat him in combat. Another duel follows. The weapons master jumps and somersaults around a lot, but he's otherwise no harder than the typical enemy. He agrees to go back to the camp for 200 gold. You do accumulate gold in this game--I had 550 at this point--and there are only a couple of places to spend it. This is the only necessary one. Coming so quickly on the heels of the wagon robbery, there's no way you wouldn't have enough gold.
     
Next crisis: A flu has spread through the camp. Friar Tuck knows of a pond with magical healing waters. Strange creatures live in the pond. The "strange creatures" turn out to be giant frogs that hurl some kind of magic bolt at you. To get the water, you need to have picked up a flask in the weapons master's hut. I thought I had, but it wasn't there when I got to the pond. I had to look up how to hex edit one into my inventory.
 
Maybe "giant frogs" is the wrong call.
      
Bringing a flask of the water back to camp heals the people. The next objective is to stop an evil baron, looting his way through the countryside. You fight through a forest map to reach the village, where a mass combat ensues. Victory allows you to confront the baron, who turns out to be the same evil baron from the interrupted wedding. He challenges Robin to a duel, which goes predictably.
      
Duncan is waiting when you return to Sherwood, reporting that Marian has been kidnapped by the Sheriff, who intends to marry her. At the same time, a bunch of Celts invade the camp. Another mass combat takes place, and even if you "win," the Celts overrun the camp and force you to regroup in the forest, learning there that some Merry Men were taken captive. If you return to camp, you find it on fire, with an ally bearing news that the Sheriff plans to hang the captured outlaws. One of the huts has a "disguise" in it.
       
There's another forest, followed by another horse segment, before the party reaches the Sheriff's castle. NPCs in the area talk about the upcoming marriage and hanging. You have to don the disguise to avoid a bunch of needless mass battles.
        
Except you don't.
      
It took me a while to figure out what to do in this area. There's no way to get up on the gallows platform to rescue the hostages, and guards just turn you away from the castle gates. You have to attack the guard, it turns out, which prompts a mass battle. Afterwards, you can enter the castle.
You explore the castle, fight a bunch of guards, fight a couple of mass battles, and eventually meet Mortianna and her skeleton again. This time, you can kill it with the Druid's Dagger. Mortianna just explodes with a "nooo!" once her skeleton dies. 
     
Beyond her is the Sheriff, who quotes a little dialogue from the film before attacking in a duel. As usual, the strategy of standing still and swinging away carries the day.
       
The final battle.
      
Once the Sheriff dies, a final cinematic shows Robin and Marian getting married.
     
"Marry Robin of Locksley to Marian Dubois" would make things less ambiguous.
      
King Richard shows up to give away the bride but otherwise doesn't thank Robin for keeping his throne secure. There's a final, hilarious animation that shows Robin leaning in for a kiss, which clearly disgusts Marian.
       
"I can't bear to look at that mullet."
     
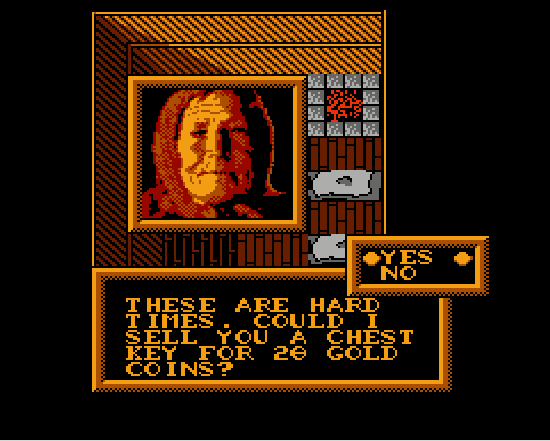
Overall, the game is pretty bad. Everywhere, there are signs of cut content. There are never any helms or boots to put on those portions of the character portraits, for instance. The manual mentions shields, which never appear. You find more chest keys than chests, and there are only two places to spend the gold you accumulate--one on a scripted event, and one on a useless chest key. It hardly makes sense to give party members experience levels and hit points, since they only act in mass combats and can't actually die even there. Individual combats are too easy, but expecting the player to last over five hours with no saves and only three lives is a bit too much.
  
The only place you can voluntarily spend money.
    
It doesn't even work very well as a movie companion. There's no character to any of the characters. Each of the party members--Azeem, Duncan, Friar Tuck, and Little John--has only a few lines after they join the party. Neither the Sheriff of Nottingham nor Maid Marian are present enough in the game to feel that they're the protagonist's great love and great nemesis, respectively. Will Scarlett is absent entirely.

But where it fails most is as a Robin Hood game. To me, Robin Hood has two defining qualities: he's a master archer, and he gives to the poor. Any Robin Hood game ought to have an archery minigame or otherwise a complex archery mechanic (and indeed the prototype seems to have one) and a method of distributing gold to peasants, perhaps for information, perhaps for other character boosts.
        
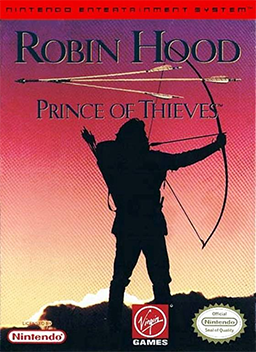
For a game that doesn't have much to do with archery, it features prominently on the box.
      
The worst of it is that if MobyGames is to be believed, there isn't a single Robin Hood RPG after this one. I'd love to see an open world game using these characters. It would be just like a medieval Far Cry. Robin comes home from the Crusades (or escapes from prison) to find Prince John oppressing the populace. Nottinghamshire is divided into several zones, each ruled by a lieutenant, including Guy of Gisbourne and the Sheriff. Robin completes a variety of missions to rob from the rich and give to the poor, with mechanics favoring stealth. Giving gold to the poor rewards the player with information about wagons to rob and castles to loot. Once John's position has been weakened enough by the Merry Men, the showdown commences. The whole thing writes itself.
        
A mid-game character sheet.
      
There are a couple of things that I like about the game and wouldn't mind seeing in more NES titles. First, while Robin doesn't have any attributes, he does get stronger and faster (as well as hardier) as he levels up. Too many NES RPGs and quasi-RPGs offer only increases to maximum health as a reward for leveling. Second, the more complex commands and character sheet work well mechanically. They just aren't used very well by the content of this particular game. I give it a 23 on the GIMLET, with the best score (4) in "Graphics, Sound, and Interface" and the worst (1) in "Economy" and "Gameplay." It's far too linear, too long for a game that doesn't allow saves, and not replayable.
   
****
   
Sorry for the week off, everyone. I had a personal emergency. I played this very early in the month but only had time to write it up now. I'll get back on track this week and get started on the next Werdna entry.