Friday, October 6, 2017

Might and Magic III: Missed Dates and Money

Things are looking good for the party as this session ends.
    
I went too far since my last entry and consequently have too much to recount. I hate it when I do that.

As you may recall, I was working my way up Column E from the bottom, having already explored E4 and E3. I was trying to keep an eye on the calendar because I needed to return to Castle Greywind at Day 50, Castle Blackwind at Day 60, and Rainbow Isle at Day 99. If you don't remember why, I recount that below. It was like Day 20 when I got started.

E2 was the northwest quadrant of the swampy island that held the city of Swamp Town. The map was full of rogues and death locusts but had no dungeons.
     
After the last session, outdoor enemies became so trivial that I barely bothered to take notice of them.
     
I ran into an NPC named Ziltar the Wise in his hut. He told me of the vampire king, who rules an army of undead in the Tomb of Terror. All game, I've been hearing about the Tomb of Terror from messages scrawled on walls.

Another NPC hut held Princess Trueberry, who at some point is supposed to give me an alicorn horn that I need to return to a hut all the way back in Column A. But she wanted me to give something to her first: an "abundance of love." No idea where to get that. I tried giving her a Precious Pearl of Youth and Beauty, but I guess that wasn't the same thing.
      
Have you tried Match.com?
     
Map E1 was the western half of another snowy island in the frozen north. It held a series of statues that permanently increased my attributes when given money--trivial amounts of money based on what I was carrying. Again, I have to wonder what path through the game that the developers intended, and what path I would take if I replayed with full knowledge of the geography. Certainly, it would be helpful to explore the entirety of Row 1 early, finding the +100 attribute fountain in D1, all these statutes in E1, and perhaps even the evil castle (below) early in the game.
       
This is less than pocket change by this point in the game.
     
E1 also had Castle Dragontooth, the "evil castle," where I at last got rid of all the Ancient Artifacts of Evil that had been weighing me down. Unlike the good and neutral castles, this one was swarming with guards who attacked as soon as I entered. Otherwise, it had the same features of the others: a king who wants Ultimate Power Orbs, a seneschal who takes the ancient artifacts, a jester telling idiot jokes, a dungeon that requires a puzzle to gain entry, and a bunch of chests that summon more guards when looted.

Unique to this castle were pools of acid that did tremendous damage to anyone entering, but which delivered about 8 "quatloo coins" that I later redeemed for attribute upgrades back in Slithercult Stronghold.
    
Bathe? No. Search? Yes.
    
I didn't expect "Malefactor, King Malicious" to be the best choice of the three kings. True to his name, he ranted about subjugating the islands under his rule and driving his enemies mad. Even though neither the good or neutral kings seem like great alternatives, I won't be favoring Malefactor in the endgame.
      
At least he's up-front about it.
     
I did give him a couple of Ultimate Power Orbs, though. Each one confers 1 million experience points on each character. The way I understand it--and if I'm wrong, boy have I screwed up my game--is that you solve a major quest by giving any of the three kings a certain number of Ultimate Power Orbs. I want to say it's 10, but maybe it's 12. Anyway, there are enough orbs in the game to give all of the kings this total, or almost this total, so if you solve the quest too soon by giving them all to one king, you miss out on millions of experience points. Thus, I've been spreading them out. At this point, I had given two orbs to each king, but by the end of this session, I'd given another two to each king.

The dungeon entrance puzzle involved following a story presented on statues scattered about the castle. The messages concern a war fought by the castle's guard against the werewolves in Serpent Wood. You have to follow the narrative to figure out how many legions were still alive by the end of the campaign. Then, you had to know how many soldiers are in a "legion." This last bit of information was imparted by a message in a hidden room; you have to teleport to reach it. Later in this session, I found such hidden rooms in several other dungeons, making me wonder how many I missed in the early dungeons.
     
This explains how the werewolves from two entries ago came to reside in the mountains.
     
The dungeon was full of witches guarding bubbling cauldrons. Some provided attribute upgrades, but others (somehow) had messages that said things like "in the hands of time, 11+ 3 = 2," referring to adding hours on a 12-hour clock, an abomination that civilization should have abandoned centuries ago, but whatever. I don't expect to convert you. I can't even get Irene to figure it out. When she asks what time we're meeting for dinner, and I text "18:00," she responds, "What is that in REAL time?"
     
I provide the counter-intuitive answer.
      
The messages helped with some of the chests upstairs, which required doing clock "math" to open. The chests in the castle delivered absurd amounts of gold. By the end of this session, I had also gone back and looted the two other castles, as my party was now strong enough to blast through their guards. Castle gold contributed significantly to my bottom line.
      
I know it will eventually run out; it's just hard at this point to see how.
     
Map F1 had the eastern end of the same island, one more statue, a couple avalanches, a few treasure chests, a third pyramid that I left for later, and another dungeon: Dragon Cavern. I anxiously checked the calendar as I entered the latter, noting that I was at 42 days. I knew that I was due several level increases by now, but I suspected if I returned to town and trained, I'd miss Day 50. Thus, I did the best I could buffing at fountains.
     
Talking skulls lend atmosphere to the caverns.
    
The caves were full of warriors called "draconi" as well as, predictably, dragons. They were much easier than they should have been. Buffed as I was, protected with anti-elemental spells, they hardly did any damage to me and I killed them in just a couple of attacks. I took far more damage from pools of acid that delivered 50 gems apiece.
     
The dragon's cold attack barely damages my buffed characters.
     
Treasure piles, some delivering millions of gold, gleamed all over the dungeon floor. There were several hidden areas (clued by wall messages) with even more treasure. I found two or four Ultimate Power Orbs.
     
A pile of treasure and an Ultimate Power Orb await.
     
By this point in the game, I'm having to return to town several times in the middle of each dungeon to offload equipment, since I only have about 10 available equipment slots. (This process was more annoying in the Dragon Cavern because you can't teleport in and out.) The problem these days is not quest items but actual usable equipment. I'm not sure if there's a limit to the number of rings, brooches, and medals that the game lets you wear; if there is, it's greater than 5. Thus, some of my characters have several each of these "wearable" items, and it's tough to deliberately discard them, lowering my armor class or sacrificing an attribute boost, just to make more room.
     
Tom is beginning to look a bit like a South American dictator.
    
The map culminated in a fight with the Dragon Lord, who had 10,000 hit points. Despite that, he wasn't very hard. He had an attack that damaged every character every round, but not for that much damage. He had no special attacks. It took a number of rounds, but I slowly wore him down with buffed melee attacks and high-level spells like "Dancing Sword" and "Mass Distortion." He alone had 5 million gold on him when he died.
      
Fortunately, the graphics in this game don't allow him to attack with 12 other dragons, which is what would have happened in Might & Magic II.
     
I had to interrupt my explorations of the cavern because Day 50 rolled around and I needed to head back to Castle Greywind in Map C4. You may recall that two adjacent islands hold two castles, Greywind and Blackwind, previously ruled by sorcerers of those names. They both were seduced by the mermaid Athea, both married her, and were both somehow magically imprisoned in their castles. On their wedding days--50 and 60 respectively--their thrones hold particular powers.
     
Given his condition, his nickname is a bit ironic.
     
As you enter each castle, both sorcerers beg you to free them from their curses. When you figure out how to do that, you talk to them on their thrones. In the middle of this session, I realized I had been interpreting the situation all wrong. I thought that the sorcerers could only be freed on their wedding days, so I delayed exploring either castle until then. That's not the case at all. I could have freed them and completed 99% of the maps at any time. The "wedding day" business refers to three additional thrones within each castle, each of which confers a boon (attribute increases, gold, etc.) when you sit in it. You have to do that on the wedding day. Moreover, sitting in one throne causes you to fall unconscious for a day, so you can only use one throne per year.
    
This is the type of situation for which the word "bogus" was coined.
    
I didn't discover this until late in this session, by which time I'd spend so much time exploring Castle Greywind and its dungeon that the day had rolled over to Day 51 and I missed the opportunity to sit in any of its thrones this year. Argh.
     
It's tough to keep to a calendar when so many things cause the days to advance outside your control.
     
Each castle had a wall message about how to solve the puzzle in the other. Greywind's was the toughest. First, I had to figure out the password to get into the dungeon: the name of his daughter. This is offered nowhere in the castle. Instead, you have to figure it out from two clues on two statues of Athea:
    
  • Greywind the Illusionist fathered two sons and a daughter. The first born he named Regran. The second son, a deadly archer, killed Regran to gain the throne.
  • Reharc killed his ranger brother to gain the throne, but later killed himself in a fit of remorse. Only our daughter, a beautiful cleric, was left to inherit the throne.
     
Can you figure it out? Between the two, you know that "Regran" is a ranger and "Reharc" is an archer. Following the same pattern--last three letters backwards followed by first three letters forwards--the cleric's name must be "Circle."
     
That's a pretty dumb name, but at least she wasn't a knight named Thgkni.
    
The dungeon was filled with piles of treasure, some real, some illusory. The difficult part was that if you try to take the illusory treasure, all your gold disappears. I'm not reloading for character deaths, but I did reload for that. I tried just ignoring the piles, but it turns out you have to take them to solve the puzzle, so I "Lloyd's Beaconed" back to Fountain Head to deposit all my gold before continuing.
       
Yeah, I don't think so.
      
To solve the puzzle, I had to turn a series of hourglasses, ring a gong, fight a bunch of hydras, pick up all the treasure, turn the hourglasses again, and ring the gong again. I think I have that sequence right. There was a lot of trial-and-error.

The hydras were the worst part. I'd faced them before, on the Isle of Fire, more than 10 levels ago, so I knew I could defeat them. But I was only half-buffed, and I was desperately trying at this point to avoid rolling over the date, not only because of the throne issue, but because I had deposited all my gold in Fountain Head, and without gold, my two NPCs would take off as soon as the next day hit. This meant that I had to kill all five of them with my existing hit point and spell point pool. I got oddly stubborn about it and wasted three reloads towards the end, making sure I killed them with no party deaths.
    
"You are a Dancing Sword! / Sharp and scored / Called by my keyboard. / Dancing Sword! / Rushing for'ard / Slice my foe's life cord! (yeah)...
     
Back up in the castle, Greywind thanked me for freeing his spirit and gave me half of a six-digit combination (645) that I'll apparently need later.
      
      
I made it to Blackwind's castle in enough time to use one of his thrones. The castle was swarming with flying piranas [sic] and had a bunch of whirlpools on the floor, some of which had treasure, some of which teleported us to the Arena. A statue in his castle offered every spell in the caster's spellbook for 2 million gold, but I think I've already purchased them all at the individual guilds.
     
I'm up to my fourth battle now.
    
The puzzles were much easier here. Getting into the dungeon required realizing that a sequence of letters--OTTFFSSEN--represented the first letters of the numbers 1 through 9. Freeing Blackwind was a matter of visiting three statues in the dungeons and giving them a sacrifice: 100,000 gold, 1,000 gems, and the life of one character who we immediately resurrected. The dungeon was full of annoying teleporters, but once I realized the statues were all in the corners, I just bypassed the teleporters with the "Teleport" spell. In reward, Blackwind gave me the other three numbers of the combination (231).
     
NPCs, you're up!
     
By this point, the session was getting pretty long, but I pressed forward into F2--the northeast corner of the large swamp island--and almost immediately found the Tomb of Terror.
       
Note how a lawnmowing player doesn't really appreciate the spiral path in the mountains that leads you here.
       
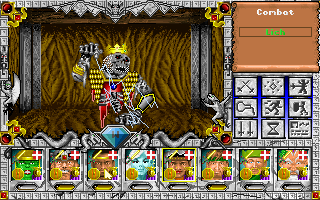
The Tomb was a fairly linear dungeon, featuring large, open rooms full of undead. The rooms start with skeletons, zombies, and ghouls, and progress to mummies, liches, and vampires, culminating in a battle with the vampire lord.
    
A lich flanked by two mummies. My characters look scared, but they're really just cursed.
     
Most of the rooms have coffins with treasures inside, but these are all cursed when you open them. The doorway to each room also has a trap that causes damage and destroys a trivial number of gems from your inventory. 

The damage was enough that I found myself casting "Lloyd's Beacon" in the dungeon and teleporting to town for healing several times during the expedition. I was trying to save my cleric's spell points for anti-undead spells like "Holy Word." What I didn't realize is that when you visit the temple and heal a character, each heal takes a full day per character. So does each "uncurse." Since I was typically doing both while I was there, I was burning 16 days in a single visit.

The vampires of the Tomb of Terror weren't so tough. They have a special attack that wipes your spell points, but they usually miss. I have to say that I like their animation, which has them switching from bat to humanoid form. The head vampire, VanEmosh ("homes"?) was just a tougher version of a regular one, and despite all the build-up, he only lasted a few rounds.
     
On the other hand, this vampire is wasting a lot of energy on something he doesn't need to do this often.
     
VanEmosh's chambers held four thrones. I tried to sit in one and found my character eradicated because he was not an "Ultimate Adventurer." I guess I'll need to return once I have that designation.
     
This sounds like the beginning of a reality show.
     
I got out of the dungeon thinking I had plenty of time before Day 99 to hit the Rainbow Isle and found out that the calendar had rolled around and it was Day 23 again. (Five full years have passed since I began.) Bah!

On the plus side, I'm earning a lot of bank interest. As I wrapped up this session, I had a total of 35 million gold pieces, most of it in the bank, earning about 1 million per month.

But I'm seeing signs as to how this situation could turn around. Training now costs more than 50,000 per level. With characters often able to train multiple levels, I need to take a few million to each training session. Moreover, my two NPCs are commanding 80,000 gold pieces per day each. (Fortunately, I only have to pay when the day rolls around naturally, not when it passes magically or during training or healing.) And with only three more maps to explore, the influx of gold is going to stop at some point. I figure I'll boot the NPCs if I dip below 10 million, saving the rest for training my primary party.
       
My NPC druid thinks he's all that.
     
Still, I could see how someone unwarned by his commenters and memories could start dumping millions into Fountain Head's experience-for-gold fountain. 

In other wealth news, I also have over 110,000 gems. I'm just not casting enough spells that make heavy use of them. I think I'll go spend a bunch of them on attribute-boosting sessions in the Arachnid Caverns before moving on.

It occurs to me that I haven't talked much about combat or spells, so I'll try to focus on that next time, as I explore the last three maps. This far into the game, I still don't really know what the "main quest" is. I suspect that it will resolve itself in the pyramids, but I don't remember if I have to finish the power orbs first. By next time, I ought to have some idea.

Time so far: 53 hours
Reload count: 19

Tuesday, October 3, 2017

Chaos in Andromeda, and in Gameplay

The one time in the game that there's "no doubt" about something.
     
Well, I'm in an uncomfortable position with Chaos in Andromeda. I haven't won it, don't know if I can win it, don't know how much longer it will take even if I can, don't know if I care beyond a vague desire to be the only one online to fully document the thing.

There's a nucleus of a decent adventure/RPG hybrid in Andromeda. The adventure game puzzles are based more on inventory than logic, but the RPG side is better developed than the typical hybrid. Attributes and leveling truly do matter, and there are a lot of in-game ways to develop the character.
      
My statistics at Level 9.
     
Since I began, all gameplay has been on the same map, or structures accessible from it, which makes the game world rather small. But you do so much backtracking that it seems bigger. In some ways, it reminds me of the two Legends of Murder titles, where you criss-cross small areas, hunting down items and clues, unlocking new sub-areas as the plot progresses.

Unfortunately, there are too many problems with the game. These include:

1. Inventory woes. You have limited inventory space; there's no way to tell which items are going to turn out to be vital; and once you drop an item, it's gone forever. By the third or fourth hour, every time you find a new item, you're agonizing over what to keep and what to discard. Discard the wrong thing and you're in a "walking dead" situation.

These aren't the only inventory problems. Items that you read are one-use items. Their text shows up on the screen and then the item disappears. It's easy enough in the modern era to take a screenshot, if you know to do that, but back when the game was new, players must have had to take a lot of handwritten notes.
     
I'm glad I captured this, because the list disappeared after I read it.
     
Generally speaking, I found that if you can "use" an item and it disappears after you use it, there's no point hanging onto it. These include a lot of attribute-boosting items, such as spinach that increases strength, combs and lotions that increase charisma, and books that increase intelligence. Some of these items are at fixed locations but others you acquire randomly in successful combats (if you have a free slot). I'm not sure this is universally true, though. In particular, there was one scroll and one potion that are probably supposed to be used at specific locations. I got sick of carrying them around and said "screw it."
       
Some of my equipment. I've been carrying the scalpel, tree plank, needle, energy saw, linder device, and "rose of reunion" for hours. There's no clear use for any of it.
         
Perhaps the worst issue is the inability to see items on the map. You have to walk into the right pixel and see a message that "there is something here." It's extremely easy, even when you're being thorough, to miss those specific pixels.

Finally, to make things worse, NPCs routinely steal from you, forcing you to chase them down and kill them to get your vital equipment back. If you miss the theft message, you're out of luck permanently.

2. Combat difficulty. As we discussed last time, you can either let the game duke it out on the main screen, or you can go to the combat screen and target specific parts of your enemy's body while shielding particular parts of yours. I did the latter for most of the game before I realized that autocombat on the main screen was both faster and more successful.
     
Killing an enemy on the combat screen. This turned out to be inefficient.
     
Although you level rapidly and get an extra attribute point per level, the game seems to scale enemy difficulty with you. Now that I'm Level 12, I keep running into enemy tanks who kill me in single combat even when I'm starting at max hit points.
       
This confusing message comes up a lot during auto-combat.
       
On a related note, it's virtually impossible to distinguish NPCs from enemies until they get next to you. They use the same icons (which are barely distinguishable anyway) and color. I have no idea why some attack and some don't. It's not uncommon to enter a room in which 3 icons rush to attack and 3 wander around randomly. There's actually an entire class of NPC who rushes up to you and won't leave you alone, but refuses to attack unless you force the issue by changing your "mood."

3. A nonsensical story. I really don't know what's happening in the plot. NPCs offer brief, cryptic statements that make it hard to tell what their motivations are or what side they're on. Every other word is some bit of futuristic jargon that you have to turn to the manual to translate. Most of the time, when an enemy is attacking me, I have no idea why he's attacking me. Am I supposed to be following my original mission or sympathizing with the rebels? Who knows. Both sides try to kill me regardless.
       
A typical sentence from an NPC. "Twacka" means "hideout." To get there, I have to go through the "beckes," meaning "caves."
       
The screen shot of Koranis 12 that I offered in the last entry turned out to be what I think is the entirety of the game world. I explored everything but the bit to the southwest, on the other side of the mountain. Everything that I accomplished was in service of getting to a series of caves where (I think) the rebellion is hiding.

The adventure side of the game progressed in the usual manner where Item A is necessary to get Item B to get Item C, and so on. Thus, the password that I retrieved from the weather computer allowed me to access a compound in the southeast. I had to find some tweezers in one of the buildings in the compound, then use them to fish a "guest pass" out of a mail slot, then use the pass to enter the basement of the compound, where I found a bunch of futuristic technology, but never fully understood who ran it or what it was for. For some reason I destroyed a CPU center by throwing ashes into an air vent.
     
This feels like a major quest solved, but I have no idea what it actually did for me.
     
I used a fishing rod to catch a fish, which I gave to a hapless fisherman in exchange for some pincers, which I used along with some copper wire to repair a broken control panel. A blanket thrown over a camera shielded me from capture, allowing me to access a room where I bribed an NPC for a keycard to access the rest of the rooms on the level. (This NPC, by the way, attacks you if you get one square away from him. If you kill him, you don't find the keycard on his body, so you're in a walking dead situation and don't even know it. You have to offer him money from two squares away for it to work.)
      
Bribing an NPC from one square away. I would have never thought to do this. I got the hint from Alex.
     
One of the other rooms had a safe with a pair of mountain boots, allowing me to walk over the rubble on a mountain path and enter the lair of . . . I guess one of the rebel leaders? There were some documents about the rebellion, including the names of some rebel agents.
     
Of course it is.
     
My helpful commenter Alex was invaluable through this process, helping me with puzzles that I misinterpreted or items that I missed. But even he could only take me so far.

Enemies attacked more-or-less randomly, often respawning the moment I was out of sight of their original locations. My character leveled rapidly and got some inventory upgrades, including a "torc-helmet" and some leather gloves. At maybe Level 5, he got the psi power of "Illusion," and at 10 he got "Retunation," which creates a kind of mind shield. Neither proved to be the solution to any puzzle or obstacle that I found.
     
The Danish developer taught me some English. I didn't know that "illude" was a word. It means "trick." I still don't think it's used right here.
     
One particular inventory item is worthy of recollection. In the northern part of the map is a circle of stones around a stone slab. Walking up to the slab takes you to an underground tomb, guarded by two warriors. The moment you try to enter the tomb, about 8 red drones launch at you out of nowhere. If they get next to you, they self-destruct and kill you. You have to dive into the caves quickly before they reach you.

In the caves, I had to kill one of the guards to get past him, then use a lever to pry open the sarcophagus within and steal the Sword of Freedom. I guess it's probably the best weapon in the game, although I didn't notice a huge improvement over the spear I had been wielding earlier.
      
"Thornblower" is apparently a famous rebel slain in an earlier era.
    
Meanwhile, the 8 drones don't disappear. They wander the map until they acquire you, then zoom up to you and explode. I had to buy a series of my own droids and send them one-by-one to engage the red balls and take the hits.
    
Another droid sacrifices his life for mine.
     
The culmination of my explorations was to learn about the hidden entrance to the rebels' caves in the mountains. I followed the directions and entered.
     
Navigating a hidden mountain path.
     
I had been led to believe that by wearing something called a "Star-Ribbon," the rebels wouldn't attack me, but that wasn't true at all. I've spent a couple hours trying to make any progress in the caverns, but the enemies are so hard that I have to wait and heal after every battle (if I win), and new enemies respawn constantly. The caves have a bunch more of those red droids that kill you in one hit. Fortunately, there's a guy in the caverns who sells droids that you can send against them, but the whole process is annoying and slow-going.
     
A red droid kills me for the billionth time.
      
Limping through the area, I found a set of blueprints with symbols too small to see, "some kind of control room" where I couldn't do anything, and a couple of chemical vats. An NPC near the vats says that they're full of "eufaeum," an effective chemical weapon, but that CAMASC (my employers) are producing 10 times the volume that the rebels are. I remember seeing those vats in the compound. Maybe I'm supposed to destroy them? If so, I don't know with what.

I went back and forth about quitting the game (making this my final entry) several times. I got closest when, trying to pick up yet another inventory item, I finally got rid of the "weather report" I'd obtained near the close of my previous session, 10 hours ago. It wasn't but 15 minutes later that some rebel intelligence officer asked me for it.

I'll give it a little while longer, but this is not going to be a four-entry game.

Time so far: 14 hours

Sunday, October 1, 2017

Might and Magic III: Materials and Momentum

Stomping hydra eggs gave me the largest experience reward in the game so far.
      
Things really picked up this session. I explored all of Column D and half of Column E, for a total of six maps, leaving me only six to go. Among them, there were five dungeons, although I left three of the five for later, for reasons I will recount anon.
     
Almost done!
      
Column D was mostly a mirror of Column C, generally continuing the same island or groups of islands. It started in the frozen north, where the east side of an island that started in C1 offered a fountain that raises all attributes by 100 points. I can't imagine there's a more powerful buffing fountain in the game. I wish I'd found it before fighting all those crabs last time.

The fountain changed the nature of buffing. I outlined the path I used early in the game, but now the optimal buffing path hits only four locations: the 100-point fountain, the level increasing fountain, the hit point fountain, and the spell point fountain. It's important to go in that order because the hit point and spell point fountains will increase your values to around 100 points higher than what should be possible given your current attributes and levels. Thus, you want to buff the attributes and levels first.
       
If this is the "mount" of Athea, she's a cruel mistress.
      
The 100-point fountain alone is enough to create pretty ultra-powerful characters, so I set my archer's "Lloyd's Beacon" for the location. I only did the full buffing trail when I encountered particularly difficult foes. In some ways, it seems like cheating, or at least kind of playing like a wuss. On the other hand, that's what the fountains are for, right?

Corak's notes for D1 focused on the other island, which also had a fountain called the "Fountain of Katera," but I'm not sure I understand what it does. There were a few treasure squares, plus a couple of "trap" squares where avalanches damaged my party.

Most important was a dungeon called "Cursed Cold Cavern," where a coven of witches guarded pots of magic brew that increased my attributes. The witches were drawn like the Wicked Witch of the West in The Wizard of Oz, and for the umpteenth time I wished the game had taken a less goofy approach. They were capable of cursing my entire inventory, but luckily a single "Uncurse" back at the temples took care of that problem. Messages in the caverns, some obtained by answering Pegasus riddles, told me that Princess Trueberry has the Golden Alicorn, that a Vampire King guards some Ultimate Power Orbs, that the password to a sunken island is YOUTH, that the "pirates' treasure" is "real" on Onesday, and finally that if I take a pearl to the Pirate Queen, she won't steal my gold.
      
All we own, we owe her.
       
The boss foe of the caverns was a "Black Knight" who looked almost futuristically armored.
     
This looks like something out of DOOM.
     
If you want to test yourself on the riddles, here they are. I got all but the first one on the first try.

  • What is always coming but never arrives? (TOMORROW). I tried FUTURE first. 
  • What cannot be seen but only heard, and will not speak unless it is spoken to? (SIRI)
  • What is nothing but holes tied to holes, yet is strong as iron? (CHAIN). I was going to type MAIL first, but I switched in time.
  • What lives in the winter, dies in the summer, and grows with its roots upward? (ICICLE)

Map D2 made up the northeast sector of the Isle of Fire. I left the interior for later, so I just mapped the water around the edges on my first visit. A whirlpool in the western section teleported me to the Arena, where I won my second combat for 2,000 experience points. I guess I should have been visiting in regular increments if I wanted the Arena to help me. At this point, I'll have to win dozens of combats for the experience point rewards to be remotely valuable.

The eastern side of the map had four encounter points at which the Pirate Queen abducted my party. True to the message in the caverns, upon each encounter she took one of my Precious Pearls of Youth and Beauty, rewarded me with 25,000 gold and 100,000 experience points, and set me loose. I still have a few pearls left. I don't know if they're useful anywhere else; if not, I should just visit her until they're all gone, I guess. After that, based on the message in the caverns, I assume she steals my gold.
       
      
D3 occupied the southeast quadrant of the Isle of Fire and the surrounding waters. Whirlpools once again held treasure chests, and opening those chests once again summoned monsters--in this case, "Octobeasts." They have 3,000 hit points and 8 attacks per round and cause weakness when they hit. I would say that they're quite a bit harder than the crabs, but my party was several levels higher and now had access to that attribute-boosting fountain. I was able to kill them in mostly melee attacks. I think there were about 9 of them.
       
Between this and the "spider" last time, someone really needs to tell New World how many "eight" is.
       
D4 offered another desert island scattered with pirate chests. C4 had contained a lot of chests, too, but they just disappeared when I tried to open them. The message in the Cold Cavern had explained why: the chests are illusions except on Onesday. The game offers a 10-day week, so I just had to wait for Onesday to roll around again and I could loot the chests.

Castle Blackwind was on the island, but as with Castle Greywind in C4, I arrived a few weeks late to complete the castle, so I didn't bother to enter. I'll note carefully when Day 50 and 60 approach next year and make sure I'm at the right places.

Speaking of days, I had learned from the Greek Brothers that magic seashells would wash ashore on Rainbow Island on Day 99. I'm not 100% sure which island is Rainbow Island, but I think it's probably the one-square island in D4. Unfortunately, owing to training, I missed Day 99, too. So that will also have to be saved for next year. The year only has 100 days, so it won't take that long. Three years have passed since I began the game.
      
I suspect that on Day 99, this will leave more than just a hole.
     
I moved over to the bottom of Column E and worked my way up. E4 occupied the western half of a large desert island swarming with "plasmoids," which cause your weapons to break when you strike them. I had to deal with them with spells.

The map was studded with oases which made a point of saying that it was safe to rest in them, but most outdoor areas are generally safe to rest if you've cleared the enemies, so I'm not sure if there was something special I was supposed to do there. There was also a wishing well that wanted me to type in the keyword of what I wished for. I tried some obvious things--GOLD, EXPERIENCE, POWER--but got nothing.
    
This feels like a trap.
    
Buried treasure on this island released Vulture Rocs, which I'm convinced were harder than even the Octobeasts. I had to do a full buffing sweep to take them out.

In the midst of some mountains was the Magic Cavern, a huge sprawling dungeon full of sorcerers and floating heads called "guardians." Vapors rising from the floor canceled active spells. Coffins, when opened, released liches, but my party was still buffed from the Vulture Rocs and thus were able to kill the liches in one hit. Wading in fountains increased intelligence and speed. A number of altars had powerful magic spells, but I had already bought everything for my spellcasters, so they were mostly wasted.
     
Lich? Or Disco-Lich?
    
On to E3, which outlined the southwest area of a swampy island. At least three squares held "quicksand!" which immediately killed my two lead characters every time I stepped into it. 
      
Sinking me deeper in love with you.
        
Beyond that, there wasn't much here except for battles with "tree golems" and random treasures in the water. 
      
These guys are going to be really annoying in 4 more games.
     
When I was done, rather than continue on to E2, I decided to head back to Blistering Heights and explore the Isle of Fire. The island consists of a number of interconnected pathways crisscrossing maps C2 to D3 (four maps total). The pathways are bordered by mountains that I don't think there's any way to step on or cross.

Unless you have high fire resistance, you take damage with every move--and even if you do have high fire resistance, you have to wait for the damned fire animation to hit every character every time you do anything. This is a bit annoying.

Monsters were tough here. Fire lizards are the easiest. Fire stalkers are a bit harder because they only take magic damage. Major demons and devils are quite hard if they attack in groups, as they did in the northwest.
      
Individually, they're not so tough.
     
But hardest of all were the "great hydras" in the southwest. I can't imagine there are many harder creatures in the game. They have 5,000 hit points, do 12 attacks per round, and cause poison. There were maybe 12 or 15 roaming the map, and I had to "Lloyd's Beacon" out of the area and restore my spell points after every couple of battles, even with my characters fountain-buffed. The experience and item rewards were worth the effort, however.
       
The toughest foe in the game so far. I know I keep saying that.
      
The main purpose of the Isle of Fire, other than destroying monster spawn points for experience and treasure, is a pyramid--the second I've found--in the center. I avoided the first pyramid and I avoided this one, too, thinking that I should save them for the endgame. I must have a vague memory of playing this before.

As I close this session, my party is extremely obsidian-heavy. Almost everyone has obsidian weapons and armor, plus brooches, belts, cameos, and boots. Obsidian seems to be the most powerful material in the game. The material hierarchy seems to go leather < wood < glass < coral < crystal < iron < bronze < lapis < pearl < silver < brass < amber < steel < gold < ebony < platinum < ruby < emerald < sapphire < diamond < obsidian.
      
My cleric's inventory. It must be exhausting just to move.
    
Obviously, the idea of weapons and armor made out of some of these substances is silly, but Might and Magic is far from the only series to offer equipment of silly material. I've never understood why in the Elder Scrolls series, "glass" is something that you mine, nor why it makes armor and weapons that don't shatter the first time you use them. (At least the Ultima series has that right.) Someone also needs to tell both Might and Magic and The Elder Scrolls that "ebony" is wood, not metal, and not particularly suited to swords. I guess I can buy obsidian as a material for weapons--even The Game of Thrones has gotten in on that racket--but can you imagine how heavy a suit of armor made out of the material would be?

Throughout most of the game, I've relied on the item's value to help guide how it compares against other items, but obsidian seems oddly undervalued. An obsidian dagger, for instance, does 52-54 damage with a +10 bonus and sells for only 800 gold pieces, less than other daggers above steel that do less damage. Obsidian and platinum platemail both sell for 100,000 gold despite platinum offering +18 protection and obsidian offering +28.

Aside from my concerns about the realism of the material, though, I love the quantity and variety of items that characters can equip. With 8 characters and so many items, the equipment upgrades offered by the game are more-or-less constant.

I've only been training every few hours, and I usually go up 5 or so levels at once when I do. All my characters are around Level 40 now.

Still no problems with money. Training is costing about 15,000 per level and the two NPCs cost about 35,000 EACH per day, but I'm walking around with almost 2.5 million and have another 4 million in the bank, earning interest. I know I'll eventually run out but it seems a long way off.
    
The fact that the average dungeon delivers hauls like this keeps me flush with cash.
    
Miscellaneous notes:
         
  • Three of my characters are now magically aged, one by 50 years (!) thanks to one of the cauldrons in the Cold Caverns. I think there's a way to reverse magic aging--probably having something to do with the hidden island and the YOUTH password--and I hope I find it before anyone dies.
       
This wasn't cool at all.
       
  • Another Ancient Fizbin of Misfortune was to be found in the witches' caverns, and again I declined to take it until I know what it's for.
  • The game attaches textual qualifiers to attributes, such as "very low" (8 or below), "low" (9-10), "average" (11-12), "good" (13-14), "very good" (14-16). After that, the words just seem like synonyms, including "super," "amazing," "fantastic," "astounding," and "astonishing."
  • I still haven't found the "evil castle," where I can turn in all these Artifacts of Evil and a couple Ultimate Power Orbs. The game almost ensures that you side with the good or neutral king just to free up inventory slots.
    
By the next post, I expect to have finished the overworld map, unless I get to Day 50 and have to take a break for the Greywind/Blackwind quests. (It's Day 19 as I write this.) I'm not regretting my approach, but remind me when I get to Might and Magic IV that I want to explore more randomly or organically rather than in predictable columns.

Time so far: 41 hours
Reload count: 14