 |
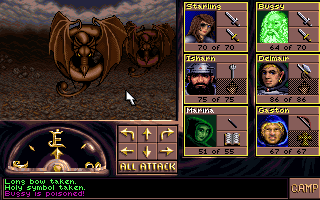
| My new favorite allies. |
Well, that was an experience.
The three top levels of the dungeon are an interconnected maze of chutes and ladders, most of them one-way, where one wrong step can completely undo your progress. Perhaps more than any place in the game, you have to map thoroughly and carefully. Missing a single square with a vital chute can have significant consequences. You don't want to lose your place or forget what you're doing. Accordingly, once I saw what was happening with the area, I waited until I had a two-day period with not much else to do (thank the gods for summer vacations) and devoted almost all of it to these levels. When I tallied up my time at the end, I couldn't believe it, but I had spent about 22 hours with the game in two very long sessions, getting very little sleep in between. It's possible that in my entire life, I've never worked so hard at something, which might disturb you if you knew about my actual job.
I can't say that it was always a fun experience, but there were times that it was fun--mostly in the first half. Settling down with three blank maps and various note pages is what being a CRPG Addict is all about. I was careful. As I explored each square, I annotated not only the wall pattern, but I made a mark to indicate that I had been in that square, lest I forget to hit every square when mapping a large area. I kept a sheet for enemies, making sure to note which ones I had defeated so that I could be sure I'd seen everyone's inventories. I carefully tracked the special attacks and defenses of my allies. I exhaustively went through all my inventory items and equipped, invoked, and used them to see what would happen (and which were worth keeping). I alternated between three save states, taking careful note of which was where. It was a joy to fill in each new bit of information and watch the three levels take shape.
 |
| My map of Level 3. |
And then, after about a dozen hours, it was no longer fun. It seemed like every step just looped me back to a place I'd already been. I had to trace mazes through multiple teleporters, chutes, and stairways just to return to an area to pick up one or two unmapped squares. But I pushed through, and when I was done, I was rewarded by a message that I had at last reached the surface.
There are several things that make these levels particularly difficult:
- The usual spinners, traps, and darkness squares--usually large fields of them where it's easy to get lost.
- There are pentagrams everywhere, but some of them only allow you to summon monsters from Level 10, 9, or 8, all of which are worthless. Of course, when you step on a pentagram, you have no choice--you immediately lose any allies you had, and you have to summon new ones. There are places in which pentagrams are in the middle of hallways and can't be avoided.
 |
| Level 10 creeping coins doing 1 damage. Hell, yeah! |
- Lots of enemies have TILTOWAIT and LAKANITO. Werdna never seems to resist either, and he can't survive more than one TILTOWAIT. A few hours into this session, I was checking inventory items, and I realized that my Oxygen Mask protects against LAKANITO, but nothing protects against TILTOWAIT.
 |
| That makes a difference. |
- Every staircase, chute, and teleporter is one-way, and there's no logic to whether they go up or down. "Chutes" on Level 3 routinely take you to Level 1, and "stairways" on Level 1 will take you to Level 2 or 3.
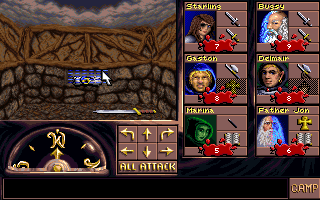
- Chutes are invisible until you step in their squares. You can't wait to try them until you've finished mapping the area. You can't avoid them with Winged Boots.
 |
| One step away from the egress, I fall down a chute. |
- In a unique, impressive, and completely infuriating development, squares with teleporters show you the wall pattern of the destination square rather than the origin square. So you could be facing a corner that looks like an open hallway because that's what's on the other side. Cool programming. Nightmare to navigate. [Ed. I guess Wizardry has always done this. It doesn't come up all that often because most teleporters a) are behind doors or b) have the same origin square wall pattern as their destination squares.]
- Although the levels are all interconnected, making them one big "cube," the game still loads (and reloads) them individually, and they all have their own sets of enemies. Since you're constantly moving up and down, the levels are constantly reloading, and you never really get close to "clearing" a level. On the plus side, this removes any angst about saving the game.
- There are a lot more enemies than on the previous levels. In addition to two "parties" per level, there are around 50 individuals. Previous levels capped at about 20. Moreover, these individuals are more likely to form groups of three or sometimes four than on previous levels.
- Signs saying "THIS WAY TO THE EGRESS" are everywhere. They're mostly useless. Some of them are outright lying, and others are generally correct except that the arrows on the signs never change direction, and yet you can approach some of the squares from multiple directions.
 |
| Quit your B.S. |
When I was done, I spent some time tracing what I think is the optimal path through the levels, which ensures that you not only reach the end but also hit key encounters along the way. I welcome any comments if you think I've missed anything or if there's a better way. Keep in mind that as complex as this narrative seems, it's the product of dozens of false starts and dead ends.
Level 1: The Riddle
You arrive from Level 4 on Level 1. You want to get out of here as quickly as possible because Level 1 is the hardest of the levels, and you still have Level 4 allies. I had a couple of wights, I think. You're presented with the riddle of the Lady or the Tigers, which I recounted last time, but it turns out to be a bunch of nonsense. The center door is the correct answer, and you get a message acknowledging this when you enter, but neither alternate door leads to a dead end. In fact, I'd argue that it's better to take the left door because it only takes a little longer and it routes you through a useful pentagram. I'm going to relate it that way. Of course, you ultimately have to take all doors, as success on these levels depends upon mapping everything.
 |
| I think the first step is the "most important" part, not the "longest." |
The left door goes to an "up" staircase (14,13). Any thought that it's going to be that easy is dispelled when you confusingly arrive at (19,19) on the same level.
The arrival area is a rectangular corridor running around the perimeter of an empty 3 x 2 room. You arrive in the northeast corner. The northwest and southeast corners both have an "egress" message, but moving past them dumps you down different chutes--your first sign that the "egress" signs aren't really reliable. Beyond the chutes you can see the real stairway up to the surface, but there's no way to avoid the chutes, and you won't get to the other side of them for a long time.
The optimal path takes the southern chute at (17,16).
Level 3: First Pentagram
You arrive in a relatively open area. Making your way north, you find another "egress" sign, but it's particularly useless since you can enter it from any direction, and the arrows always point backwards. The first pentagram is here, and it's a proper Level 3 pentagram.
 |
| All of these would be good rock band names. |
I have to say, I didn't fully analyze the allies that you get at the Level 3 and Level 2 pentagrams because it's not long before you find a Level 1 pentagram, and the allies there are so amazing that you really don't want to waste time with anything else. Here, I found that brass dragons and fiends were particularly good. Fiends have both high-level mage and priest spells and summon additional fiends. Brass dragons have a breath attack and cast high-level mage spells. Almost all the others just had physical attacks. I found that bleebs served as useful "shields," as just about nothing damages them (they seem to resist every spell) and they summon additional bleebs.
Enemy parties on Level 3 are Blackthorn's Blackguards ("Take no prisoners!"), consisting of two ninjas, a samurai, a fighter, a priest, and a thief. It's probably the easiest party on these levels. The other is The Company ("Mordor or bust!"), which true to its motto has a Lord of the Rings theme. "The Company" is a clear riff on The Fellowship, and the names of the characters are all groanworthy takes on Tolkien's heroes, except for perhaps Pepe la Phew, a riff on a Looney Tunes character. I assume "Dry Gimli" is supposed to remind you of a dry gimlet, which I heartily approve of.
Grandoaf casts TILTOWAIT, so dealing with him is a priority. Elkrand often casts LAKANITO. I died several times at the hands of this party before figuring out the Oxygen Mask.
 |
| My map of Level 2. Note the large fields of traps and spinners. |
Random enemies on the level continued with the theme. "Frodough" and "Bilbous Baggins" are both thieves who carry magic rings (Healing, Dispelling, Death). There's also an "Illuvatar" and an "Eowyn"--no improvisation there. There's a good bishop named Teut Weidemann, the real name of a German gaming executive with experience at Ubisoft; his LinkedIn profile indicates he was a "consultant" around the time Werdna was written.
Enemies drop a lot more potentially useful items than on previous levels. A lot of them have Rods of Flame, Rings of Healing, Rings of Dispelling, Diadems of MALOR (which I threw away, thinking that MALOR was useless). Rings of Death, a cursed item that solves your gold woes in the first Wizardry, are as common as pennies. I would have tried to get more use out of them but inventory space is so precious and limited. I did occasionally grab a Jewelled Amulet, as DUMAPIC ("Locate") spells go quickly on these levels.
The best exit to this area is through a one-way wall to the north, at which point you join a corridor that you would have entered via the "correct" door from the Level 1 riddle. At the west end of this corridor, a teleporter whisks you away.
Level 1: The Disorienting Checkerboard
You arrive in the middle square of a diamond shaped area, 7 x 7 at its outer squares. The area alternates dark squares with spinners. Spinners are insidious in this game because they don't just spin you once; they spin you every time you do anything. If you enter your inventory to cast DUMAPIC and check what direction you're facing, you get spun in a random direction when you exit. The only way to find your way through spinners is by luck or by casting DUMAPIC after you arrive. This area isn't as bad as the other spinner zone (see below) because you can just bumble around until you find one of the walls, then make your way along the wall.
There's a pentagram in the area, but it's a sneaky one that only lets you summon monsters from Level 8. I wouldn't step on it unless I was out of spells--or unless I was trying to investigate everything, as I was the first time I entered the area.
 |
| My map of Level 1. |
The best exit is via another teleporter at the north square of the diamond.
Level 2: Shards and Traps
The teleporter dumps you at (1,4), at the southwestern end of the northernmost of two jagged "shards" jutting from the southwest corner and into the map. Navigation here is a nightmare because a lot of squares teleport you to the same destination in the southern shard. Again, teleporters show their destinations, so you might be looking into what is really a northwest corner, but it looks like it's an open wall because the destination square is open to the north and west.
You have to thread your way carefully through this area to reach one of the two chutes at (5,7) or (7,9).
The "chutes" deposit you on the same level at (3,11), a huge open area with pit traps in every square. They only do a few hit points' damage, but there are so many of them, they can kill you or your allies, especially if you insist on stepping on every one of them.
The Winged Boots save you from the pits, but to equip them, you have to unequip the Black Box, making it vulnerable to theft from the level's many thieves.
Two steps north of the arrival point, a merchant sells vanishing cream for 50,000 gold pieces. This shows up in your inventory as Cleansing Oil.
 |
| I thought this was going to have something to do with going invisible. In retrospect, I should have paid attention to the "curse" line. |
A few steps east of this is the first Level 2 pentagram. I didn't get a lot of experience with these allies, but it seemed like dragon zombies, succubi, and firedrakes were all pretty good. The one lich you can summon casts LAKANITO, but he also keeps running away. Almost everyone else has physical attacks. The inclusion of Murphy's Ghosts, the famous "grinding" enemy from Wizardry, must have been a joke.
Enemy parties on this level are Elindul's Evil Elites ("Chuckle Chuckle!") and Joachim's Jihad ("For the love of Allah!"), the latter of which briefly raised my eyebrows, but I suppose there's nothing disrespectful about Islamic heroes trying to stop the return of an evil wizard, especially since they're all explicitly good. In the world of Wizardry, the Islamic world has acquired TILTOWAIT and doesn't hesitate to use it; I died several times at their hands.
Random enemies include a quartet of thieves named Scios, Shads, Shadow, and Silk and some amusingly-named spellcasters, including La Spells (evil bishop), Magister (good bishop), Master Caster (evil bishop and perhaps Mad Max reference), and Spells=Wishes (evil bishop). I wonder how he pronounces the equals sign.
Unless you reach down in the levels for weak ones, priest allies are rare on these levels, and I found I was dying more to an accumulation of combats than from individual ones. At some point, I tested all of my unique items, and I discovered that my Cape of Hide cast a low-level healing spell and never seemed to run out. Low-level or not, it wasn't hard to fully recover between combats, and I no longer had to scrimp for every DIOS or DIAL potion that an enemy dropped. This improved my survival rate significantly.
The only exit from this area is a stairway at (10,8).
Level 3: The Arenas
You arrive at (10,9) in a fairly open area with a group of 2 x 2 rooms in a diagonal line. There's a pentagram in one with Level 3 allies. One of the squares is closed off until you find a hidden door on its northwest wall--the only such secret door in the three levels, I think, although I admit I didn't bump into every wall if I could find my way to the other side a different way. There are also two 3 x 3 squares with no means of entry from this side.
The northeast corner of the secret room has a teleporter that takes you to (2,17) on the same level, in the middle of one of the 3 x 3 rooms. You almost always encounter one of the level's two enemy parties on the landing square. Three of the corners in this room have teleporters, making it look like they're "open" from the inside, but if you explored around on the outside, you know better.
The southwest teleporter in the first 3 x 3 room takes you to the middle of the second, where you'll probably face the level's second enemy party. From here, you want the northwest corner (the other three take you back to the first arena), which teleports you to a little maze in the northeast corner of the level, starting at (12, 16). You have to dodge three "up" stairways that take you to places you've already been before you hit a pentagram in the middle of a hallway. You can't avoid it, and it forces you to take useless Level 10 allies.
Beyond this pentagram lies another "egress" sign, which turns out to be a great joke because there are four different "up" stairways in the corridor it points to. You waste a lot of time looping back to earlier areas before you discover that the third one (19,17) is the one you want.
Level 1: Unstoppable
The stairway deposits you on a proper Level 1 pentagram, where you can discard your Level 10 allies for some Level 1s, and there really is no way to go wrong here. The Level 1 allies are awesome. Hardly any of them take a whit of damage from spells; their biggest vulnerability is getting decapitated by ninjas.
 |
| The surface isn't going to know what hit it. |
My favorites were greater demons. They cast high-level mage spells, poison and paralyze with their physical attacks, and summon additional greater demons. I'm not sure that I ever had the full party of them killed after summoning them. Gold dragons also have high-level mage spells plus breath attacks. Vampire lords (spells) and poison giants (breath attacks) are like more specialized versions of the dragons. There were some mysteries. I have no idea what "Fleck" is, and he somehow becomes "Flack" once he's in the party.
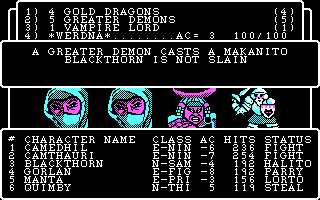
By far, the best ally is the Demon Lord, who is named "Entelechy Fuff" once he joins the party. I thought the name was nonsense until I looked it up, and it turns out it means something along the lines of "realizing the potential of rage." This bastard has multiple heavy attacks that drain 5 levels and turn enemies to stone, plus the ability to cast TILTOWAIT. That spell is also available with the Maelific, meaning if you get lucky, you can blast enemies with three of those spells in a single round, plus all the LAHALITOs and MADALTOs coming from a party of up to nine greater demons.
 |
| Hell, yeah! |
All this firepower is vital for the level's enemies. By far, the hardest party in the game is Applet's Angels ("Ring the bell, read the book, light the candle!"), which has two lords, a fighter, a priest, and a bishop, many of them with hit points above 300. The bishop and priest reliably cast TILTOWAIT every round, so you've got to take them out as quickly as possible. (Your Level 1 allies shake off TILTOWAIT like sweat on the brow, but their survival means nothing if you die.) This won't be the first time you've encountered them, of course, since you've already been wandering parts of Level 1 for a while. I lost 100% of my battles with the Angels before I found a Level 1 pentagram and about 50% thereafter.
 |
| The dragon zombie may have resisted the spell, but I sure won't. |
The other enemy party on this level is Loktar's Lucy Laddies ("Erin go braugh [sic]!"), which is much easier. There are a lot of individual enemies named after gods (Crom, Isis, Loki, Odin, Rah, Thor II). A neutral samurai named Kane has the highest hit point total (625) in the game so far. It's for tough individual enemies like this that I'm grateful for my West Wind Sword and its ability to just decapitate them.
The pentagram is in the middle of an entire quarter level of dark squares, with walls in the middle to confound navigation. Amusingly, a pentagram that only summons Level 7 allies is a few steps to the east. A few steps to the west is an encounter with a merchant who sells St. Trebor's Rump for 100 gold pieces. I don't know why it's called that or why it works, but if you equip and invoke it, the ghost of Trebor is "put to rest" and no longer a threat. Awesome. Also, from now on, I'm going to think of a certain last name as an abbreviation for "Trebor's Rump."
 |
| I'm afraid to ask. |
The exit from this area is in the midst of darkness at (8,2). You have to feel your way there.
Level 2: Phone Booths
You arrive at (16,19) on Level 2. The entire east quarter of this level is made up of 23 single-square rooms with doors in the north wall. Two of them have pentagrams--one for Level 10 allies and one for Level 2. Because they're on the other sides of doors, they both trick you into losing your awesome allies from Level 1, unless of course you saved when you arrived. Five of the squares have teleporters that all take you to a waste of time on Level 3. There are four squares that dump you back in the room full of traps.
You want to exit here at the staircase at (18,2). It brings you to a maze area on the west side of Level 1. You have to avoid various chutes to find your way to a down staircase at (9,9); right next to it is the second Level 1 pentagram. The third is right next to the exit, so you'll be getting your allies from this one or the dark area as above.
Level 3: Last Resistance
You arrive (11,5) at the beginning of a long corridor that spirals in itself until it finally forks. The north passage takes you back to the "Arenas" area. The east takes you to a teleporter (10,2). It brings you to Level 1 at (3,0), where you can go left or right. Left has an "egress" sign, but it's lying; the staircase there just brings you to a redundant area of Level 3. Going to the right brings you to a down staircase (8,5) at the end of a jagged corridor.
On the other side of the teleporter, you're back on Level 3 (3, 8), next to a Level 3 teleporter, but you'd be crazy to give up your allies from Level 1 if you still have them. A linear series of 12 single-square rooms follows, and the encounter rate in them is very high. You're almost sure to encounter both of the level's parties here, plus four or five combats with smaller groups or individuals.
When you finally emerge, you have to avoid both a redundant "up" staircase and a teleporter back to the arenas to find the "true" teleporter at (1,2).
Level 2: Navigational Hell
The teleporter deposits you at (12,7), on the northeast side of a huge room full of spinners. There are, specifically, 63 of them. Many of them are within sight of a wall, which helps keep you oriented, but you need to find your way to one from which no wall can be seen. There's a Level 2 pentagram in the southwest corner if you want to refresh your DUMAPICs.
When you first arrive in this area, of course you don't know that there's a key teleporter in the middle of it, surrounded by other teleporters. The only thing that saves you is a commitment to putting yourself in every single square just in case. Doing that in this area means casting DUMAPIC after just about every move, noting if you walked into an unmapped square (or at least got closer to one), and trying a different direction (or reloading) if not.
I had that commitment, but it was weakened. There are three teleporters that whisk you to an unnecessary area of Level 3 and two chutes that dump you back in the room full of traps, and you have to thread your way through these precisely to find the one teleporter that takes you to the end. I got confused and turned around, and at some point, I just assumed I had hit every square when it wasn't true.
Eventually, I got to the point that I had mapped all of the levels except some inaccessible areas (more on that in a bit) and a very small area of Level 1 just south of that staircase that I could see but not reach because of the chutes. I knew this was the area, just not how to get there. I wasted a lot of time pounding on the walls of what turned out to be solid rock. But my sloppiness in the spinner room had been nagging at me, and at last I knew I needed to go back and re-verify every square. Amidst a lot of DUMAPICs, Jewelled Amulets, and reloads, I finally made it to the square at (8,2) and was teleported to the final area.
Level 1: What a Blast
The final area is a short corridor with a Level 1 pentagram, a stairway back to the entrance of the level, and a sign at the west end of the corridor saying "Egress" (all the other signs say "This way to the egress") and pointing right--to a blank wall. But I knew the sign was right because I had seen a staircase on the other side of that wall.
 |
| I feel like that's a fire code violation. |
After pounding at it in vain and lighting the Black Candle to confirm there was no secret door, I began pondering how I could get through the wall. I went through the Oracle's clues and landed on #22 ("To soar the heights, you must first plunge the fiery depths"). I knew this didn't have anything to do with flying, since I'd done that before going to the Gates of Hell, so "soar the heights" must be talking about exiting the dungeon, which means the Holy Hand Grenade that I got in Hell must be the key to getting through. We'll leave aside the problem of hand grenades not being dynamite; this one is holy, after all.
I equipped the hand grenade. Immediately, I was told that it was cursed. I could "invoke" it to pull the pin, but nothing happened. I couldn't use or invoke it without holding it, and I couldn't unequip or drop it once I'd equipped it. I went through my other items, trying to invoke and use them. Examples of my thinking: "If the grenade is cursed, maybe something belonging to a saint will un-curse it"; "Maybe I need to wrap the grenade in one of my capes"; "I don't even know what a 'pennonceux' is, so let's try that."
Ultimately, the answer was to use the Cleansing Oil. The oil unequipped the grenade but didn't uncurse it. If I tried to "use" it, nothing happened, and if I equipped it again, it just stuck to my hand, cursed, again. Eventually, I realized that I wanted to drop it; you may say "duh," but in every other part of this game, "drop" means to throw away forever.
 |
| Just what a grenade needs. |
The game gave me a countdown that riffed on the "then shalt thou count to three" bit as I ran down the hallway. With a "Kabloom!," the way to the staircase was open. I was a little annoyed by the illogic of the puzzle, but I can't say it was unfair. Again, mapping is of primary importance here. Without it, I wouldn't have realized that the "egress" sign was telling the truth.
 |
| I'm sorry; with a "KABALAAMMMMOOOO!" |
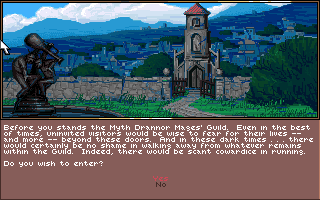
I took the staircase beyond and emerged into the daylight. The game congratulated me with an image of Trebor's old castle, which I guess I can now explore. I don't know what I expected when I finally reached the top of the dungeon. I thought maybe the game would be over. I knew there were multiple potential endings, but I thought maybe that was just based on what I had done in the dungeon. But clearly there's more.
 |
| Bill Posters is innocent! |
Unfortunately, I knew my job wasn't done. I had a long list of enemies whose names I'd noted, but not their inventories. This game relies so much on finding a handful of unique items that it was vital to make sure I didn't miss any. I thus sighed and returned to the dungeon (noting with pleasure that the demolished wall remained open), healed up and summoned new allies at the Level 1 pentagram, and spun in place for about an hour until I'd met and killed every potential foe on the level. The only artifact that I found for all my effort was something called Holy Limp Wrist, which I can equip as a miscellaneous item but not invoke. Using says "done!" but nothing seems to happen.
So many of the enemies had Diadems of MALOR that I figured I must be missing something about the spell. Instead of walking back to the previous levels, I tried MALORing there, and I was surprised to find that it worked. Apparently, exiting the dungeon "unlocks" it. Thus, after I spent a couple of hours killing every foe on Levels 2 and 3, I spent more time trying to teleport to every part of the dungeon that had given me a closed-off region. I didn't find anything interesting in any of them, and most of them turned out to be solid rock, which instantly killed my party and required a reload.
 |
| I'd say I'm more in jazz. |
Once I got finished filling in the solid rock, I noticed a pattern. Each of the levels from 1 to 4 has a single letter written in the walls. Together, they spell DINK. I would think this was a bit of juvenile humor except that there's a Level 10 ally called a Dink. He seemed useless to me when I tried him out early in the game, but apparently he's important somewhere else. I'm guessing this is what the Oracle hints about "written in stone" mean, maybe even "multilayered rocks."
Speaking of Oracle hints, I only got three more on these levels:
- The cenotaph hides the secret way.
- Traveling through the nothing, seek the Nyin.
- Have you forgotten something?
I added these to my Oracle hints page for analysis.
Finally, since it just took me a second to MALOR there, I tried descending into Hell with the Dreampainter's Ka but not the Winged Boots. What I didn't quite get before is that the boots prevent you from falling into the lower levels of hell and the Ka prevents you from being roasted. Before, I had tried it the other way, and I was able to fly, but I still got torched. This time, the fire didn't touch me, but I was helpless to avoid descending into the lower regions, "witnessing sights which make [my] own evil atrocities look like minor peccadilloes." Eventually, it became too much and "with demented care, the gods dismember [my] mind."
 |
| I don't know: I've spent the last 15 years on Reddit. |
Reloading, I visited the witch on Level 4. Apparently, I now have Spanish Unguent (the Cleansing Oil?), but I'm missing the Blade Cuisinart and Rabbit's Fur. Damn. I threw away the Magician's Hat when I got a Wizard's Cap (I figured "wizard" > "magician"). I'll have to go find that again. Maybe I'll find whatever the Cuisinart is on the castle level.
Whew. That has to be close to the longest entry I've ever written. I'm not sure how I would have broken it up, though. I hope that's as hard as it gets. If it turns out the castle is another 10 levels up, you're going to hear some words.
Time so far: 59 hours