Wednesday, February 26, 2025

Game 540: Walls of Illusion (1993)


Walls of Illusion
Germany
Motelsoft (developer and publisher)
Released as shareware in 1993 for Atari ST
Date Started: 16 February 2025
         
Almost four years ago now, I covered Arcan (1993), Motelsoft's version of Dungeon Master. (For some reason, Motelsoft called themselves Softwave for that game.) Walls of Illusion is Arcan with a new set of maps. I don't think there has been a single mechanical or graphical change. The game notes promise that Walls is harder than Arcan, which is borne out by my experience.
     
If any backstory came with the game, it's been lost, but an early message suggests that the goal is to reach some sort of enemy named Bragis. As with Dungeon Master, the game is much more about mechanics than plot. There is no character creation; every player starts with four characters named Malcolm, The Turk, Harry, and Laura. They have different values in strength, condition, health, and magic power. Although any character can level in any class, it's clear that Malcolm and The Turk are meant to be the front-line warriors and Harry and Laura are meant to be the primary spellcasters. The game starts them in an appropriate arrangement.
     
The game begins.
      
Each character has a (textual) level in five classes: warrior, gladiator, sorcerer, wizard, and healer. All characters start as "green beaks" and from there move to "beginner," "adventurer," and so forth up to "master" or something like it. You level by actually using the associated skills. I think the gladiator class is associated with missile weapons, warriors with melee weapons, and the rest with various spells.
      
The characters start on the main level of a dungeon of at least four large levels, interconnected by stairways, pits, and (probably) teleporters. As a Dungeon Master clone, Walls is primarily about two things: mechanical puzzles and real-time combat. In neither area does the game live up to Dungeon Master or even Eye of the Beholder, but as an inexpensive shareware title, it has some charm.
     
A character sheet.
    
I've mapped maybe 600 squares so far on four levels, and it has been very linear. The game begins in the middle of a four-way junction with starting treasures in all directions (a bronze sword, an apple, a knife, and something I didn't write down). Two squares in any direction, however, there's no choice but to fall down a pit. The level below has four doors, all locked, so there's no choice but to fall down yet another pit. The level below has only a small area to explore before you reach a set of interconnected stairways that take you a level above the original level. There's more to explore here, but inevitably you have to return to the main level by—you guessed it—another pit. (You don't take damage by falling down pits, but you do by testing walls for secret doors.) The bottom line is that at any given moment, at least so far, there's only one way to go.
        
Character inventory.
    
The mechanical puzzles include buttons on the wall (some quite small), doors that need keys, doors that need coins, pressure plates on the floor, levers (some of which have to be pulled twice), illusory walls (it's right there in the name!), walls-on-wheels that you have to drag out of the way, teleporters, and invisible barriers. None of them are as creative as some of the puzzles in Dungeon Master, but they do require careful mapping so you can determine what effect a button, lever, or pressure plate has on the wall configuration.  
     
A roomful of pressure plates.
      
Like Arcan, the game has a limited number of enemy types. There have only been three so far, all variants of the same sprite: melee attackers in red robes wielding staves; melee attackers in blue robes carrying swords and shields; and spellcasters in green robes carrying staves. (As always, when I talk about color, you must mentally insert the words "what I perceive as" before the color.) They're hard enough that there really is no choice but to resort to tricks like the "combat waltz," although the game anticipates this by having enemies move in irregular patterns. Enemy spellcasters can kill the starting party instantly, and in my case they were responsible for a lot of reloads.
      
Spellcasters in the middle of killing us.
       
As I explored, I slowly amassed bits of equipment: bronze swords, leather pants, leather jerkins, daggers for throwing (and, annoyingly, picking up again afterwards), food, and arrows (but no bows yet). I found my first spell, "Power Spell," which improves combat damage for a time. A missile spell called "Thunderball" followed, finally giving my rear characters something to do.
        
One of three enemy types so far.
       
Unfortunately, just a couple of hours into the game, I'm completely stuck. I can't find any way forward. I have four doors for which I haven't found keys, two doors that just won't open, and four doors leading to a central chamber on Main +1 that seem to open with something inserted in a slot (the previous game used coins), but I haven't found any coins. I believe I've tried bumping into and dragging every wall, and I've looked at them all twice for tiny buttons. I've fallen down every pit and fiddled with every button and lever (there are none that have no obvious effect). I've considered the possibility that keyholes or slots might want some equipment other than keys or coins, but nothing has worked. Unless another player finds the way forward or finds hints (I've searched, but perhaps there's an obscure German site I'm missing), I may have to put this game in limbo.
      
Oh, and my characters are starving. You find food and water in the dungeon, but not enough. There's one place that I'm sure is supposed to be a refillable fountain, but I can't get anything to happen there with my canteens or water flasks.
     
I'm sure this is supposed to work.
      
I'll be so annoyed if the way forward is something obvious. Irene is always accusing me of "man-searching," in which I ask something like "Where are the Triscuits?" while they're right in front of me. I sometimes get the same kind of blindness in RPGs.
    
In case no help arrives and I can't figure it out, I should note that Motelsoft says on its web site that Walls is its last game for the Atari ST. It is credited to Harald Breitmaier and Heinz Munter, the founders of the company. We'll continue to see their work well into the 2000s.
      
Time so far: 4 hours

Maps so far are below. Yellow squares are where I can't proceed, either because of a keyhole or slot ("K") or a stuck button ("B"). Numbers indicate origins and destinations for pits, stairs, and teleporters.
   
Main level + 1

Main level.

Main level - 1

Main level - 2

Monday, February 24, 2025

Unlimited Adventures: The Restoration of Gundahab

    
A custom title screen seems like a good sign.
      
After "Skull Crag," I played "The Restoration of Gundahab" (the game is sometimes listed with the master title "Paladin 1," but it doesn't appear on the main screen) from 1993. It took me about 8 hours. You might have noticed from my dates that I've been ahead in my blogging lately, so I had time to slow down and enjoy this one over several days.
    
"Gundahab," by Rhys Hess, is a superb module that evokes Pool of Radiance in its basic setup: A city overrun by monsters must be reclaimed by decent folk. It is a bit linear, but otherwise a fantastic use of the engine for Level 1 characters. Its combats are tough but fair, and it's the first game since Pool of Radiance to provide that delicious Level 1 challenge where every "Sleep" and "Bless" spell matter, you run victory laps when you replace your long sword with a long sword +1, and you feel like Hercules when you acquire the "Sweep" ability. I enjoyed it equally as much as "The Heirs to Skull Crag," possibly more.
    
To avoid any issues with level caps, I created an all-human party, and I just went with the predictable but balanced choice of choosing one paladin, one fighter, one ranger, one cleric, one thief, and one magic user. If you try to play without a paladin, the game warns you that while you can continue, it was designed with the assumption that a paladin is part of the party, as there are some unique encounters for that character. 
     
Thanks for the warning!
    
The setup is that your party is a motley group of friends who decided to cast off their humdrum lives and seek adventure together. After a few gigs as caravan guards and other odd jobs, they've begun to "wish for something with more purpose." Enter Namor, a cleric of the god Dalthus (invented for this module, I think). Namor had served in a temple in the city of Gundahab, a member of the prosperous Merchant League. Fifteen years ago, the other cities of the League banded together and, with no public explanation, sacked Gundahab. Since then, monsters have come to inhabit its former buildings and shops. Namor wants to reclaim the city.
  
This actually looks plausibly like the city.
   
(None of the geographic references and none of the characters are canonical to the Forgotten Realms, as far as I can tell. In addition to Dalthus and Gundahab, the author made up the River Lynde, the Cloudfang Mountains, and Bluerock Mountain. I know there's a Merchant's League around Baldur's Gate, but I don't think it's supposed to be the same thing.)
     
I've spent a lot of time in the Forgotten Realms, and I've never heard of you.
     
The Level 1 party is naturally concerned about their ability to do this on their own, but Namor assures they will have help. The game begins with the party in the forest approaching the city.
   
The city is divided into four quadrants. The party starts in the southeast quadrant, inhabited largely by kobolds, then proceeds the southwest (hobgoblins), northwest (orcs), and northeast (more orcs). A mysterious woodsman meets the party as they enter the city and gives them the basic layout. After they've explored a bit, and right about where I started to get antsy about how I'd level up and identify my equipment, the woodsman returns and invites the party to a hidden village in the woods nearby. It is inhabited by some of Gundahab's former residents and their descendants, and they provide the types of services (training, shops, a pub, a safe place to rest) as the "town level" of many RPGs. Namor ends up taking residence there and providing training services to clerics.
    
The party meets a key ally.
      
As I mentioned, the game excels in both random and fixed combats that test a low-level party with appropriate monsters. There are several battles equivalent to the one at Sokal Keep in Pool of Radiance, where your small group has to establish a choke point and take down a swarm of enemy fighters (with maybe the occasional shaman) by pulling every trick in the book: missile weapons, "Sleep," "Hold Person," "Stinking Cloud," and so forth. My idea of a good Gold Box fight is one in which my cleric has to keep busy casting "Cure Light Wounds" during the battle and not just afterwards. "Gundahab" brings that in spades, all the way through the end.
   
An early battle against six hobgoblins is legitimately hard.
     
Equally important, the game excels at atmospheric messages and contextual encounters, some of them delivered by consulting paragraphs in an accompanying text file (evoking the adventurers' journals of the SSI titles). We know that the Gold Box games don't offer much graphically, especially in a kit where every graphic is just an asset reused from somewhere else. "Gundahab" compensates by offering detailed textual descriptions of the areas and by preceding all but purely random encounters with some contextual information. It also excels at little side-areas, like stairs that go down to a small underground lair, or passages into caves, that make the maps more interesting than just 16 x 16 squares. Some examples:
   
  • The party stumbles into a lair of two mountain lions, who attack. The party has no choice but to kill them. Afterwards, they find and adopt two young cubs. An animal trainer in the woodsmen's village later adopts the cubs.
  • As the party explores the city, there are numerous remnants and reminders of what the city used to be. 
    
What the Gold Box is incapable of showing, the author at least tells.
     
  • A kobold approaches the party and offers to sell out his chief by showing them the entrance to his lair, in exchange for a share of the loot. (I said no.)
  • An underground passage to the kobold chief requires the party to fight a basically impossible battle against eight huge snakes. But an astute player notes an alternate path through a small crevice that can be widened with some nearby tools.
    
Avoiding an impossible battle.
    
  • The party comes upon a conference between various monster leaders (hobgoblins, gnolls, orcs) and can listen to their negotiations from the other side of a door, then burst in on them at just the right time. 
  • The party meets a woman who manages a vault in the city. It becomes clear that she's a ghost. The party buries her bones and finds the keys to the vault. Later, as they roam the wilderness, she possesses one of the party members and marches the party to the house of her father, still alive, who apparently fled the city and left her there to be killed by the invaders. Father and daughter are able to reconcile, for which the father later thanks me.
     
This is legitimately sad.
     
The paladin's role shines in several places that would be "boss fights," only the paladin has the option to negotiate a settlement. Because of this system, both the kobold and hobgoblin leaders packed up and left without a fight. Realistically, they saw what we had done to their guards and decided that they didn't stand a chance. How often have you seen that in an RPG? 
     
This guy speaks like he's making a LOLHOBGOBLIN meme.
    
As for the plot, it's linear but at least unpredictable. The southeast quadrant is indeed predominantly kobolds, though there are also battles with snakes, rates, mobats, and one otyugh living in the kobolds' trash heap. Various holes in the floor go down into small caverns with kobold encounters. One leads to a larger area with multiple large battles and a final encounter with the kobold chief, who in my game handed over his treasure for his life and left the city.
     
This is going to be satisfying.
     
Namor and a mage named Holkus arrived in the woodsmen's village just as we wrapped up this area, which was good because there's no other place to train clerics and mages. Namor mentioned the possibility of getting some help from the dwarves of Bluerock Mountain, who didn't help the city when it was sacked but still must wish they could ship their goods down the river like they used to. Holkus had some interest in the dwarf leader, Valn. Holkus also serves as perhaps the most useful money sink in any Gold Box game, with plenty of Potions of Speed, Potions of Giants Strength, Potions of Extra Healing, Wands of Magic Missile, and Wands of Paralyzation in inventory. I never really made enough money for that last item, which has to be a Gold Box first.
   
The southwest quadrant contains a lot of gnolls, hobgoblins, and bugbears. There's an old vault in this section of the city, locked by three keys, and guarded by what is suggested to be the ghost of one of the former guardians. We slowly looted the keys from the monster factions and buried the bones of the guardian and her child, and she rewarded us with a collection of powerful magic items that had been abandoned in the vault.
      
The southwest quadrant of the city.
     
The area also has a former Temple of Sune, which has been taken over by the apprentice of someone called the Necromancer. He sensed the paladin in our group and fled into the basement after raising a bunch of undead to fight us. We defeated his minions and followed him there. During our confrontation, someone (presumably the god Dalthus) spoke through the paladin's lips: "Did you think this defilement would go unpunished? You are called to judgement, as will your master when this champion is forged." A bolt of lightning incinerated the apprentice. Upstairs, we were able to overturn the altar to the god of death and restore the altar to Sune.
     
The guy's not wrong. It was late in the game before I remembered how to use "Lay on Hands."
     
The hobgoblin leader had a human thief for an advisor, and while he tried to persuade the king to kill us, my paladin passed his charisma check and the leader unconditionally surrendered.
   
As we wrapped up this area, the game had a little detour for us: a child from the woodsmen's village had been kidnapped by trolls. We followed a scout named Kinth Sureshot deep into the forest to a cave, where we defeated three trolls and saved the child. 
       
We're not Level 1 like those losers in Phlan.
     
Getting to the northern half of the city was tough. Orcs had fortified the northern half of the city, and the party couldn't even approach the gate without being pelted with arrows. Kinth had a plan, though: North of the city, the orcs had built a group of warehouses to store weapons and food. If we burned those warehouses, we might draw their attention from the south gate long enough to sneak in. The small map had a few challenging orc battles, but we accomplished the mission.
   
Back in the city, we were able to sneak into the northwestern quadrant, but we couldn't explore it at our leisure. Messages emphasized that we need to make it to the gates of the citadel in the northeast quadrant before the orcs regrouped. We fought a massive battle with different types of orcs and ogres (the party was mostly Level 3-4 at this point; still no "Fireball" but many other resources). Alas, we were too late, and the orcs managed to raise the drawbridge to the citadel.
     
I guess "Knock" doesn't work on drawbridges.
     
Back in the village, the chief, Balinus, suggested that we journey to Lord Valn of the dwarves and ask him for help. We took a long, linear road along an aqueduct leading to the city from the Cloudfang Mountains. Balinus had suggested we convince the dwarves to get the aqueduct operating again, so that the (eventually) restored population would have access to water. Along the way, we made the mistake of telling some villagers about the plan; they had been used to having exclusive access to the water and worried that the city would take it all and leave them with nothing for their crops. We negotiated a settlement on the condition that we ask the dwarves to kill a griffon that had been raiding the villagers' livestock. We ended up doing this ourselves.
   
Someone is going to be sorry.
       
The only other major encounter on the way to the dwarves was a lowland dwarf village where some kind of curse had clearly befallen the people. As we explored, we kept getting shoved and stabbed by invisible entities, and an old crone told us that everyone had died of the plague. When we explored a marble pedestal at the center of the town, it generated a hydra for us to fight, of all things.
 
We got to the dwarven fortress, but Lord Valn wouldn't even talk to us. His son, Valni, caught us on the way out. He told us that 15 years ago, a lowland dwarf had come to serve as Valn's advisor. This advisor lied to Valn and said that the dwarves had been cheated by Gundahab, which is why the dwarves didn't rise to the city's defense when it was sacked. The advisor then stole Valn's axe, Skullcleaver, a holy symbol to the dwarves, and ran off, leaving the dwarves on the brink of civil war. He asked us to retrieve the axe.
  
"Hold on. Before you say anything, let me get a pen . . ."
      
On the way out of the mountains, we found a cave with a holy pool of water. Gideon, my paladin, was asked explicitly to become a Paladin of Dalthus, which he accepted for about a level's worth of experience. 
     
As your paladin, can I make fun of your name?
    
Back in the village, Holkus told us that the lowland dwarf village was protected by an illusion placed by Jhaezel the Illusionist. If we could destroy the artifact generating the illusion, we could find the axe. He gave us a vial of magic powder to sprinkle on the artifact to reveal it in exchange for giving him a chance to study the axe before we returned it to Valn. The artifact turned out to be on that marble pedestal, and once we destroyed it, the dilapidated wreck of a village revealed itself as a normal village teeming with dwarves. We had to carve our way through dozens of them to kill the leader and reclaim the axe.
  
Holkus caused an explosion and nearly killed himself experimenting with the axe, then grudgingly told us to take it back to Valn, which we did. He changed his tune, and Valni joined the party temporarily. Valn recommended two ways to sneak into the citadel occupied by orcs: ride the aqueduct in or climb a secret path up the cliff. I chose to ride the aqueduct, and there was a fun animation to accompany this (not a cinematic, of course, just several static screens strung together). 
      
Taking a raft ride.
       
We spent a good hour clearing the citadel of orcs and ogres. We freed a representative from the Merchant League who they had imprisoned, destroyed the mechanism holding up the drawbridge, and partly explored a basement full of ghouls and ghasts. There was a huge and exhilarating battle in a grand feast hall where we had to keep several orc shamans from casting "Hold Person" on us, and another one with the orc chieftain and his guards. Multiple characters barely survived these battles. This is my idea of a good time. 
    
Before he died, the orc chieftain said something about throwing the "lead man's ring" down an old well. The meaning of this became clear when we spoke to Balinus, the leader of the woodsmen: "The ring . . . is the symbol of the ruler of the city."
    
Paladin!
    
If we wanted to fully restore the city, he said, we'd have to find it in the catacombs below. We didn't mind. Our mage had just acquired "Fireball."
      
I tried to resist, but I couldn't.
      
The catacombs were authentically hard, at least if we messed around. When we searched sarcophaguses, they disgorged mummies. When we searched an altar, statues in the room turned into margoyles. A basilisk roamed the hallways. An efreeti was hiding in a closet. These were non-trivial challenges for a Level 5 party, but they were also unnecessary. I could just keep walking past them to a network of caves.
   
The caves were occupied by trolls, ettins, and lizard men. We found the place where the well emptied (which makes it not really a "well," but we'll let it go), but before we could search, we were attacked by 20 lizard men and lizard men kings. I lost the first battle but buffed with potions and spells and won on the second attempt. It was followed by an equally-hard battle with about 10 lizard men and 4 ogres. When they were defeated, we negotiated a truce with the rest of the lizard men and were able to search the area and find the ring.
     
No mage forgets her first "Fireball."
   
When we got back the village, Balinus warned us of a massive orc army approaching the city from the mountains. We had to decide whether to fight in the city or the wilderness. Since I hate wilderness battles, I chose the city. We had to fight an enormous battle against well over three dozen orcs, orc archers, or shamans, and hill giants, though we had Balinus, Kinth, and four archers as allies. I managed to do it in one take, unbuffed, only losing one character to unconsciousness.
     
About a third of the enemies in this battle.
       
Afterwards, we were thanked by multiple villagers who would soon be moving back into the city. We gave Balinus the ring of leadership at a ceremony. The game told us that we'd reached the end of the main quest, but that we could still explore, fight, and pick up any side quests we might have missed.
       
I do know you! You're Kallithrea Starbrow!
     
Some miscellaneous notes:
 
  • Resting is more realistic in this module than in most Gold Box games. There are a few safe rest points per map. Anywhere else, you're taking your chances. There are several sequences during which you cannot rest at all, mostly because the party is supposed to be pressed for time, and it would be unrealistic if they slept for multiple hours.   
 
A rare message indicating a safe resting space.
      
  • The adventure has no mage scrolls. You're stuck with what you choose. In my case, that was "Enlarge," "Magic Missile," "Stinking Cloud," and "Fireball." The mage came with "Sleep" and a few other Level 1 spells. 
  • Both this module and "The Heirs to Skull Crag" decided to simplify the economies by allowing only platinum pieces. The manual doesn't suggest that anything else is possible. I realize that it makes the most efficient use of space, but "gold pieces" are so imbued in my mind as the standard D&D currency that I'm glad that future games would just use them exclusively. Incidentally, one table in the back of the FRUA manual mentions weight allowances "in steel pieces"; this must have been copied from the Krynn games with no one noticing.
  • All my characters ended "Gundahab" at Level 6.
    
My paladin at the end of the game. He took a Potion of Giant Strength about six days ago and is still feeling it. Perhaps I should call a doctor.
    
  • The module was not overly generous with equipment. We had mostly +1 stuff (primary weapons, bows, armor, helms, shields) by the end, with only one +2 item, a long sword that I gave to the paladin.
   
The ranger's inventory is typical.
   
  • I had always thought that "Gold Box" was a colloquial term used by fans, but the manual for Unlimited Adventures uses it repeatedly. Searching other documentation, it looks like SSI used it in advertisements for some games, but the FRUA manual seems to be the first time that they really embraced it.
               
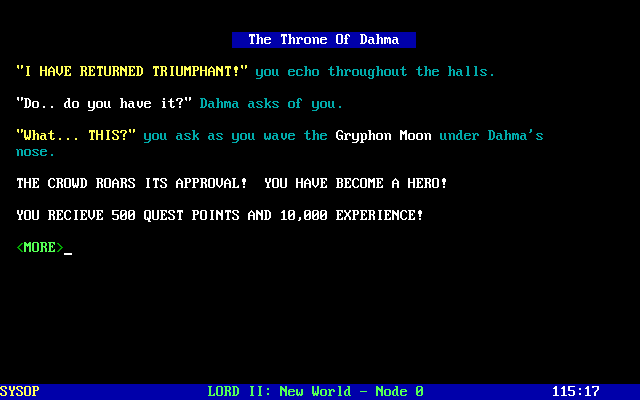
One of the victory screens.
       
In the final screen, Namor hinted at a sequel to come. This would be "The Merchant League" from 1994. I almost want to play it immediately, as the mystery of why the league sacked Gundahab remains open. These two modules are the only ones catalogued on the Rose Dragon site that were written by Rhys Hess of Pennsylvania. In 1999, Hess wrote an unofficial novelization of Planescape: Torment (1999) that many people seem to like and praise as truer to the game than the official novelization. I look forward to seeing his work again in the sequel.
     
Namor promises at least a second adventure, if not unlimited ones.
     
For now, I'm not quite sick of it yet, so let's try one or two more 1993 adventures while I figure out how to give the kit a rating.
 

Friday, February 21, 2025

Legend of the Red Dragon II: Won! (with Summary and Rating)

 
The "good" ending to the game.
    
Legend of the Red Dragon II: New World
United States
Robinson Technologies (developer and original publisher); Metropolis Gameport (later publisher)
Released in 1992 for DOS
Date Started: 1 February 2025
Date Ended: 11 February 2025
Total Hours: 15
Difficulty: Moderate (3.0/5), but offline, with no other players
Final Rating: (to come later)
Ranking at time of posting: (to come later)  
     
Summary:
 
An old BBS door game that loses something without interaction with other players, Dragon still offers a solo campaign similar in complexity to an early Ultima. Your little character leaves his village of Stonebrook to explore a 300-screen ANSI world with towns, castles, and caves. He solves a handful of fixed and recurring text encounters and fights hundreds of battles to earn experience, gold, quest points, and alignment points. Eventually, he can take on one of two endings (good and bad) in the ongoing struggle between the angelic Koshi and the evil Dragon Tooth Cult.
    
Combat, inventory, and character development are all present, but as simple as an early 1980s game. Much of the allure comes from interacting with (including fighting) other players for status, wealth, and experience, none of which the offline player experiences. Quest and dialogue options sound like they were written by a teenager (in fairness, they were), and "role-playing" is only of the most simplistic sort.
     
****
        
Winning the game took about another 8 hours, in two consecutive sessions. I won on Day 50, so it would have taken me almost 2 months if I had been playing by the 3,000-turn-per-day rules instead of using the maintenance switch to advance the day whenever I wanted. Of course, in its intended mode of operation, I would have also been playing with other players, which would have introduced an x factor that may have lengthened or shortened the experience. Probably lengthened, vastly lengthened, because one thing I never had to worry about was finding a safe place to sleep when my turns ran low. I could collapse anywhere and not have to worry about death at the hands of another player.

The game world is indeed about 300 screens. It comprises two major east-west sections, one to the north, one to the south, connected by a thin strip of land on the east side. There's also a large island off the west coast, which I didn't map, and a smaller island where the final quest takes place.
      
The game world, minus a couple of islands. Click to enlarge.
     
Some of these screens are well-composed using ANSI graphics, but only a few of them have anything interesting to explore. The author spent a lot of time laying out trees, mountains, and sand dunes on dozens upon dozens of generic screens in which the only thing that ever happens are random encounters. Still, they do build a relatively coherent game world. You have the BigWood Forest on the northwest tombolo, connected to the rest of the world by the slim North Beach. The RockHolm Mountains bulge out in the northeast. Stone Beach Pass connects this area to the area immediately around Greentree and PortTown, which offers a mix of terrain. A large desert stretches west to the West Forest and the city of FlagCity. An alternate route, south of the desert, goes through Snowy Pass.
      
Unlike the first game, in which enemies scaled to the character level every time he explored the generic (and all-text) "forest," in this sequel, enemy difficulty is defined by the geographic area. Stone Beach Pass has a "pirate" theme, with beached pirates, thieves, and vagabond cutthroats along with sandworms, giant crabs, and beached men o' war. BigWood Forest has triceratops, hairy yaks, and Kung-Fu warriors who call you "grasshopper." The West Forest, on the other hand, offers enemies like lost monkeys, giant snakes, rabid tigers, and—because this game is what it is—"Sir Beavis." Overall, I found that by Level 10, I could defeat the enemies around Greentree without losing a hit point, but enemies in the rest of the world remained challenging through the entire game.
     
One of the deadlier parts of the game.
      
Most of the world is wasted. To win the game, you really only need to reach the cities, including the starting city of Greentree, PortTown to its north, Sosen Village to the far northwest, FlagCity and BoneTown to the far southwest, and ArrisVille on the island. You eventually have enough money to take ships between these cities. Walking between them is perilous and best done only once.
     
I mapped the world while grinding my character, eventually reaching Level 25. Curiously, I think you could win the game without ever leveling once, as a) you can run away from most battles; and b) there are no fixed battles in the game. You do need some money, but I think you could accomplish that by fishing and delivering messages between the cities. It would be an interesting challenge.
       
My last level-up.
     
Anyway, some discoveries along the way:
     
  • Greentree is the only city that offers training services, so you have to return to it frequently throughout the game to level up.
  • FlagCity has a bounty office, where you can place a bounty, view the current bounty list, and pay off your own bounty. This is all multiplayer stuff that did nothing for me, but it's a cute idea. There were some players' characters in the first Legend of the Red Dragon who I would have happily paid other players to kill.
      
I wonder if the author had any connection to Findlay, Ohio.
       
  • All cities have a person who both gives and receives message-delivery missions. 
  • There are three recurring encounters in the wilderness: an injured man who needs help getting back to the nearest village; a lost girl; a woman being raped. All of these encounters give you a good and evil option that affects your alignment. In the case of choosing the good option, they raise your alignment 1 point. I didn't try the evil options.
  • BoneTown, near FlagCity, is the "Buccaneer's Den" of the world. It offers gambling, prostitution, and other lawlessness. There are a couple of repeating encounters unique to BoneTown, including a drunk man being mugged (you can either defend him or help the thief) and a brewing gang fight (you can help either side, take them both on, or try to talk them down).
   
This recurring encounter in BoneTown is key to getting your alignment up.
    
  • You can play slots or craps in BoneTown at several casinos. The odds seemed fair, but I did poorly and didn't spend much time with it. 
      
Viva BoneTown!
      
  • Sosen Village has the only major weapon and armor upgrades between PortTown and the endgame. I bought twin swords and a spiked shirt there. 
  • Many cities sell blue, green, or white potions which heal you 10, 50, and 200 hit points, in that order.
  • There's a wandering encounter with a priest who sells a black potion that teleports you to a random part of the world.
  • There's also a wandering encounter with a dark figure who offers you a different piece of the Skystaff each time. More on that in a bit. Suffice to say for now that buying multiple pieces of the same type is a waste of money. 
  • Wandering into a particular tree in BigWood Forest takes you into a "Weird World" with all kinds of graffiti. If you bump a table in this area, you find a Moonstone, which raises the number of turns you get per day to 3,500.
   
It's definitely weird.
      
  • There are four places for sale: Runion Keep (3,000 gold), the inn in Sosen (20,000 gold), Castle Coldrake (20,000 gold), and a Wizard's Keep (40,000 gold). I bought Runion Keep and Castle Coldrake. All fortresses allow you a safe place to rest (not an issue in my game). Castle Coldrake also has free healing and free coach passage to PortTown and Sosen Village, which would have been handier if it wasn't so far out of the way. My understanding from a walkthrough is that Wizard's Keep offers teleportation portals to the major cities and a powerful magic wand.
     
My new castle!
    
  • A man high in the RockHolm mountains offers a different hint every time you bump into him. 
  • Snowy Pass warps you from the east to west sides of the game world in far fewer screens than it takes if you go by the northern desert. And there's a way to shorten it by entering a cave and showing an amulet (found in Stone Pass Lodge) to a giant there. But it's also some of the deadliest territory in the game, so I only did it once. There's an abyss halfway through the pass that you can fall down for an instant death. 
      
I did, despite the warning, fall in there.
      
  • A ferry near Sosen Village offers transport across the sea to Arris Island and ArrisVille. ArrisVille is run by a Prince Corin, who is opposing the Dragon Tooth Clan; more in a minute.
    
Approaching the island city.
    
  • The inn in ArrisVille has a ghost who says he quested for the Red Dragon (in the first game) but was betrayed by a companion and killed in its cave. It asks me to return his ring to his body. I found the cave in the RockHolm Mountains and returned the ring, getting +5 strength and 5 quest points. I honestly don't know what quest points do for you.
      
Exploring the location of the climactic battle in the first game.
     
  • West of ArrisVille is a music shop where you can take lessons so you can play the flute found in a cavern early in the game. You learn two songs: "Remembering the Past" and "Remembering the Present." These allow you to set a teleportation point and return there whenever you want, much like "Mark" and "Recall" spells of other games. I set it outside the trainer in Greentree, which is a short walk to PortTown and its ferries to any other city.
        
Approaching the music shop.
     
That was about it. There are more side quests in the first few hours of the game than in the second dozen. I never found any quests that gave me any serious boosts to my alignment (except for the one where I freed the parrot, completed early on), just incremental +1 improvements from random encounters. 
   
Eventually, after wandering a bit, I thought to try to use the pieces of the Skystaff to assemble them. I had bought the fourth piece by hour 8 or 9, but it didn't occur to me to use them from the inventory. I figured I'd run into someone who would help me assemble them. When I fit them together, I was teleported to a "strange and wondrous place" called Cloudy City.
    
Less of a city, more of just a cloud.
     
The city had only two things. First, I found a Cloud Sword on a table. It wasn't a very good weapon, but it was key to a later encounter. Second, there was a single NPC: a nude angelic woman with wings protruding from her back. She introduced herself as one of the Koshi. The character had some appropriately juvenile things to say to her. There had been a couple of references to the Koshi people in other parts of the game.
    
I wish I hadn't named him after myself.
    
She told me to use the Cloud Sword somewhere west of ArrisVille. I had found the place while exploring the island, so I knew how to get back there. It was a cave with a passage guarded by another Koshi who asked for the "key." I showed him the Cloud Sword, but he said I needed an alignment of 100 to pass.
  
The Koshi, one of the few full-screen character portraits in the game.
     
My alignment at this point was only 41, and 20 of those points were from the parrot quest. It would have taken me dozens of hours to encounter enough injured men and rapists to get to 100 in the outdoor map, but I figured I could rack it up a lot more quickly in BoneTown. Sure enough, after about an hour there, I had saved enough mugging victims to get me to about 65. After that, I gave myself the freedom to hex edit the character to 100. There really wasn't anything to be gained by doing the same thing for another three hours.
   
I returned to the cave and the guardian let me pass into a hidden Koshi village. It had only three locations. In the first, I found a second Moonstone, raising the number of turns per day to 4,000. The second had a store that sold two sets of weapon and armor upgrades. The first, blessed armor and a fireball weapon, I could afford. The second, Koshi armor and a Koshi sword, I not only couldn't afford but probably never would have been able to afford. They were spectacularly unnecessary anyway. The blessed armor and fireball were enough to make me essentially immune to every enemy in the game, which was a bit of a joke because I think I only fought half a dozen more random battles after this point.
    
The best weapons and armor are well out of my reach.
     
The third location in the Koshi village was a cavern with a gathering of Koshi NPCs. Their leader, Dahma, told me that the Dragon Tooth Clan (referenced throughout the game) has been spreading rumors of the Red Dragon's return to make people afraid enough to pay them tributes for "protection." Before he'd tell me more, he said I needed to go home and speak to my mother.
   
It feels like I'm about to join the Manson family.
     
I played the flute to get back to Greentree, then walked the few screens home. My mother confessed that my father was a Koshi named Ransom. He hid his wings and visited my mother only at night. He was killed by a mob when he went to a marketplace during the day, and someone saw his wings (it's stated several times that normal people hate and fear Koshi). The character has some obnoxious comments during this dialogue but ends up comforting his mother. There is no player input here.
  
The character really runs hot and cold here.
     
I returned to Dahma, who asked me to stop the Dragon Tooth Clan from exterminating the Koshi by retrieving a stolen artifact called the Gryphon Moon from their fortress. I asked where their fortress was. "It is on a small island. Getting there is your problem. Bye."
    
The "butterbean" thing was kind of funny.
    
Fortunately, Prince Corin could help. He feted me for a night, gave me a disguise to get past the Dragon Tooth guards, and had a ship drop me off on their island. I expected that I would have to fight multiple battles on the way to the artifact, so I had prepared with multiple full-healing potions.
  
My understanding is that if I were playing evil, I could buy weapons equal to the Koshi weapons in that little hut.
     
Instead, I simply waltzed into the fortress, walked past the guards, and grabbed the Gryphon Moon, which was just sitting on a table. I used the flute to warp out of there. I can only imagine that in live play, other players who decided to side with the Dragon Tooth Clan would have tried to stop me somehow? 
     
The sign nearly stopped me. They asked so nicely.
      
I returned to the Koshi with the stone, which got me 500 quest points and 10,000 experience points. We had a celebration. Dahma asked me to keep the stone and protect it. And that was the end of the quest, although I could keep playing. The Gryphon Moon allows the player to play indefinitely, as every time you rub it, it adds 500 to your available turns. Completing the quest got me a "K" next to my name in the player list.
   
What is that question mark all about?
     
Now, I am aware from a walkthrough that I could at this point explore the evil quest. By getting my karma to -100, I could join the Dragon Tooth Clan, kill a Koshi slave to pass the initiation ritual, and get a quest to steal the "Smackrod" from the Koshi. The device lets you warp to any coordinates on a screen, including places you could usually not access without passing some kind of encounter check. Completing this quest gets you a "D" next to your name. I decided that completing the one quest was enough to call it a win.
  
I have the highest rank!
     
In a GIMLET, the game earns:
    
  • 3 points for the game world. It's a fairly standard high fantasy setting, but the limited graphics do a decent job making it feel like a somewhat real place, and there are some original bits of lore, even if I wish they had been more fleshed out.
  • 2 points for character creation and development. The game alas lacks the creation options of its predecessor, so every character is essentially the same (except for sex) and gets the same small rewards for leveling.
     
My endgame character.
   
  • 5 points for NPC interaction. As with the first game, I'm allowing some extra points here for the interactions (which I didn't get to experience) with other players. Some non-player NPCs give clues, lore, and dialogue.
  • 3 points for encounters and foes. Foes are really just names. The meat of the game comes from the textual encounters with role-playing options, many of which are random. It would score higher here except the text and options are so juvenile that it detracts from the quality of the game. And whether to defend a woman from rapists or help the rapists isn't my idea of a solid role-playing choice.
  • 1 point for magic and combat. You just get one option in combat. With the first game, you had mystical skills and special attacks.
     
Combat towards the end of the game, with peak weapons and armor.
     
  • 3 points for equipment. You still just have one weapon slot and one armor slot, and not many options for these, but a greater variety of usable items improves things here.
  • 7 points for the economy. It's quite well done, as with the first game. There are many things to buy and several ways to make money to buy them. Even through the end of the game, there are items out of your reach. Potions serve as a useful money sink, and you can buy castles and speed up your travel by paying for transportation.
  • 4 points for quests. I'll repeat what I said for the first game: "There's a main quest and a lot of side quests that build the character, though they're mostly too silly to be considered actual role-playing." I like side quests, and I like side quests with creativity, but I don't like being forced to participate in a back-alley abortion. 
     
There are a small number of sensible side quests with rewarding outcomes.
     
  • 3 points for graphics, sound, and interface. The graphics are as good as ANSI graphics could be, I think, and the keyboard controls work fine.
  • 5 points for gameplay. It gets points for nonlinearity and modest difficulty. I can't complain about the overall number of hours, but portions of the game dragged and would have been worse if I hadn't hex-edited my alignment. I wouldn't call it replayable.
  
That gives us a final score of 36, one point higher than its predecessor. The game world is better here, but the first Red Dragon had better encounter and combat depth and more interesting character options. It was also a much brisker game, good for online play with a limited number of turns. I suspect it's because of that, as well as the fact that the sequel was released on the cusp of the Internet era, that makes the original still popular today while the sequel has been mostly forgotten. I can't believe I'm about to quote a YouTube comment, but I think that user "thefonzkiss" says it well in the comments section to this video:
   
This game was just too clever and complicated for its own good. The reason [the original] worked was because of its simplicity. People didn't want to spend hours navigating a graphical interface like this on modems of the time. They could just play Quest for Glory or King's Quest.
    
The MobyGames trivia section for the game claims that it started as a science-fiction title, the "new world" intended to be a literal new world to which the player has journeyed after the destruction of Earth. Author Seth Robinson got bored working on it and abandoned it, but he picked it up years later and turned it into a fantasy game.
     
There were some sci-fi elements anyway.
     
Robinson sold his games to Metropolis Gameport in 1997 and washed his hands of them. (I covered more of Robinson's fate in the "Summary and Rating" entry for the first Red Dragon.) Metropolis did nothing with the titles for a couple of years. Fan Mike Preslar wrote to the company and pleaded with them not to let the games die; they responded by giving him the responsibility for maintaining them (information from this GameBanshee article). He did so through the early 2010s, after which he reportedly lost the source code in a hard drive crash, and Metropolis (for unrelated reasons) started to falter. Its web site still exists, but I haven't been able to get it to load all month. A review of the site on the Internet Archive shows they were still offering Legend of the Red Dragon II to BBS services for $15 through the end of 2024. I found a couple of BBSes that were running it, but there was no player base, so I would have had the same experience that I had, only limited by how much I could play in a day.