Wednesday, January 24, 2018

Deathlord: Mizu no Sekai

The party nears the solution of the first major quest.
     
After my negatively-toned entry about Deathlord last time, I decided this time to slow down and try to re-create how I would have felt about the game if it was 1987 and the only game that I'd purchased that year.

In that sense, it performs better. Yes, the game map is indecently large, but it's worth noting that an enormous amount of content is optional (including, I think, all the dungeons on the main continent except the one under the castle), so you could explore and discover without feeling too bad about missing things. Yes, the permadeath still makes it crazy difficult, but that makes every new level feel like a major victory. And in fairness, I should note that the spell system gives you more tactical opportunities in combat than the typical Ultima clone, including some spells that allow you to retreat from hopeless combats. I should also note that the game is not stingy on gold. It knows that you're going to need to resurrect, cure poison, and cure paralysis a lot, and it gives intrepid players enough money to do that.

Still, I can't force myself to play with permadeath rules intact. I just can't. I've tried to limit my saving to once every 30 minutes, which is hard enough given the difficulty of some foes. Repeatedly during this session, I thought I was doing fine, felt that I was finally over the hump, enjoying some dungeon level or another, and then suddenly encountered an enemy capable of mass-damage spells or critical hits that wiped out half my party in the first round. Back in the day, I would have suffered two or three such incidents and then spent 200 hours grinding before even trying to explore the rest of the game.

As it happened, I did start this session with a fair amount of grinding, trying to recover from last session's level drains. When I was up to Level 4, and starting to get two attacks for some of my fighters, I took on the "diamyo" of Kawa, allowing myself to save before the battle. Battles within cities are particularly hard because you have to give the enemy the first attack. If you pre-emptively attack, no matter how hostile the enemy is, the entire town turns against you.
        
A daimyƍ was a feudal lord. I'm not sure what this is.
          
It took about five reloads to get a favorable outcome. The diamyo's death rewarded me with a Rod of Death, which I guess is a pretty good weapon.

Kawa also had another surprise. In an area hidden by secret doors, I found the "Yakuza Guild." Upon entry, I was swarmed with parties of yakuza. These thieves aren't trivially easy, but neither are they particularly hard, and they served as good test objects for my spells. They both delivered a reasonable amount of gold and were guarding piles of treasure chests.
      
Fortunately, the exit is just one step away.
      
The guild had a lower level with even more groups of enemies, some of them a little tougher. These included ninjas capable of critical hits. But smart use of spells and occasional retreats to safe ground allowed me to clear them enough to get their treasure. Because the parties kept respawning, the guild was a great place for grinding, and I got to Level 6 in short order, which opened up a new level of spells for my spellcasters.

Feeling stronger, I decided to chase rumors about someone named "Kawahara" lurking in the dungeons beneath the emperor's palace. I wasn't expecting the size and length of the complex, which consisted of six large levels with multiple secret doors, illusory doors, teleporters, and pit traps. I'm sure I didn't find close to everything. Some highlights:
      
In fact, both doors descended to different areas and neither led to my doom.

A secret door leads to a single square surrounded by water. Guess what's to my right?
A long time ago, an NPC had told me to "step east on the second drop."
Whatever's over there, I guess I don't want it that badly.
A teleporter in the corridor kicks you back one step without warning, so it seems like you move "south" forever. You have to find the secret doors on the side to get around.
         
In general, the dungeons in this game are well-designed. There's only so much you can accomplish with tiles and 1987 technology, but the developers pushed that envelope, and I think the results are superior to both Ultima (at least through V) and Wizardry. Secret doors mostly mask optional locations (e.g., treasure rooms) rather than mandatory ones, so you only have to exhaustively search the walls if you care about every last gold piece. The number of combats is challenging but not overwhelming. The walls make interesting patterns and encircle underground lakes, forests, pools of lava, and other fun environmental features. Treasure is plentiful, although I wish there were more equipment upgrades amidst all the gold.

Eventually, I found my way to Kawahara. Of course, he proved about 20 times more difficult than any other enemy in the dungeon, launching a spell that killed three characters in the first round of combat. Playing honestly would have meant escaping from combat, returning to the surface (without getting killed by other monsters), and resurrecting the three characters. If I wasn't going to do that, I should have at least fled after reloading and forced myself to grind some more. But instead I kept reloading and trying different buffing spells until either that or luck kept us alive for enough rounds to kill the wizard. I felt a little pathetic after the battle and decided that will be the last time that I abuse saves in such a way.
             
My first attempt didn't go so well.
       
Kawahara had a note on his corpse that read as follows:
         
To his most noble countenance, the Emperor of Demons and Lord of Death!

Greetings, master! I have done your bidding and sent forth the initial wave of creatures that were readied for the invasion of the kingdom. I have also ordered a contingent of skeletons to loot and pillage the surrounding area. 
         
Part of the incriminating document.
         
It is my duty to inform you that your legions have met with stiffer resistance than was anticipated and although they managed to raze the town of Gold Rock, the wizard somehow escaped, destroying fully half of the army in an explosion the like of which I had not known was possible.

I am currently in the process of restoring the bulk of the army sufficiently to allow me to crush the Emperor and send his soul to your domain, that he may suffer for the inconvenience that his treason has cost.

Your servant, Kawahara.
            
Interesting stuff there. "Gold Rock" would seem to be a proper name that was overlooked in the conversion to Japanese. I think it probably refers to the town called Yokohama elsewhere, though it doesn't seem to be a translation of the original.

I took the letter to the Emperor. I was hoping that he'd give me a reward, but he just told me to go to "Oceanspray," take a boat, find the Deathlord, and "don't return until he is no more!"
      
This may be a good time for everyone to recall that I'm doing you a favor.
       
"Oceanspray" is another English name that was missed in translation, and it took me a while to realize that it referred to the town of Tokushima. (If I'm not mistaken, this translates as something like "profit island," which would have been a better replacement for "Gold Rock." Even more confusingly, the map that came with the game labels the boat city as Tokugawa and an eastern city as Tokushima, but from in-game text, I'm 99% sure the names are supposed to be reversed.) Boats normally cost 10,000 gold there, but after the Emperor's decree, I was able to board one without paying.
      
Or maybe I just stole it.
    
Before I spent any time on the high seas, I wanted to finish exploring the mainland. I spent a lot of time in the ruins called Wakiza, which supposedly hid pirate treasure. I found a secret passage I had missed before (probably because you have to walk through deadly swamp to get to it) and found myself in another multi-leveled system of caverns and corridors. I got down to the fifth level, which opened up into a maze of canals (with boats supplied) and thin walkways of land between them. But I got attacked there by "sea dragons," capable of killing my characters in one hit, and I adhered to my previous vow not to save-scum to defeat them. I marked the area for later return and limped my way back to the surface.
       
If I was playing under the game's intended rules, I would now have to somehow escape combat, make it all the way back up 5 levels with one character and 4 hit points, and make my way to the castle for resurrection. Or, more likely, start completely over with a new party.
           
I also explored the ruins of Yokohama. Even though the town was destroyed, the game still saved every time I initiated an attack against a party of skeletons or whatnot, just as it does in "real" cities. The whole area was filled with poison squares and I soon got sick of threading my way through them. I need to spend more time there to discover if there are any remaining NPCs amid all the monsters.
           
Note the subtle difference between poison squares to the left of the sign and non-poison squares to the right.
         
Finally, I retrieved the boat from Tokushima. Before leaving, I explored the northwest quadrant of the city, accessible only by boat, but it just had a tavern and a small treasure chamber. I then took the boat around the continent to the city of Tokugawa, which I'd already explored except for a small island in the southeast.

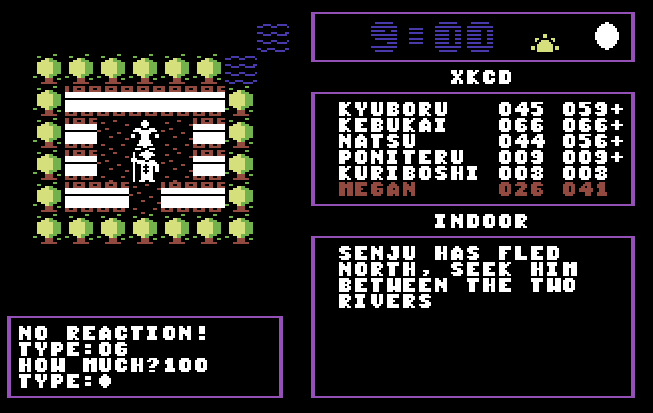
The game does something interesting with cities that I forgot to mention. Unlike Ultima, you don't enter a city by standing on it. Instead, you stand next to it, hit (E)nter, and specify a direction. The position from which you enter the city determines where you end up once the city map loads. If you enter from the north, you'll end up at the north side of the city map.

In the case of Tokugawa, there's an island in the southeast part of the city, and I wanted to see whether I'd be able to access it if I entered the city while still in my boat. It worked, making Deathlord the only game of this type that I know where you can sail your boat into a city. The island had a sign labeling it "Bone Island," and it just had one NPC. That NPC, when given gold, told me to seek Senju "between the two rivers," somewhere to the north.
                
North on this continent or north to another continent? Or north within this city?
             
Other NPCs had previously told me to "find Senju," and I suspect he's the wizard mentioned in Kawahara's letter.

Miscellaneous notes:

  • I don't care what game you're playing, there is little more infuriating than casting the equivalent of "Cure Light Wounds" on a character who really needs it and having it heal 1 hit point.
  • The maximum amount of gold a single character can carry is 10,000. Not 9,999: 10,000. What the hell?
  • Speaking of gold, my failure to adhere to permadeath means I have a lot more of it than I probably should. I can't think of anything to spend it on. Perhaps the other continents will offer opportunities, or perhaps the various NPCs will turn out to be right and my ships will get stolen frequently, forcing me to spend 10,000 on new ones.
         
There would be more joy in these moments if I knew there was a naginata +5 waiting in some weapon shop.
        
  • I found a sword called "Dragonslayer" at one point and took a screen shot of finding it, but I can't remember what circumstances preceded this.

Now I just have to find a dragon.
        
  • There are multiple creatures, pit traps, and chest traps that result in poison. Given that, it takes an awfully long time for characters to get a "cure poison" spell. I won't have it for two more character levels; I have to rely on a "slow poison" spell and healers until then.
  • Environmental changes are permanent in this game. There's no looting the same treasure room multiple times. I have noticed, however, that smashed doors seem to get repaired and closed again eventually.
  • When you step on a staircase, you automatically ascend or descend. Once you get to the destination, you have about two seconds to move before the game automatically "waits" a turn and sends you back to where you came from.
      
Trapped in an endless loop.
      
I started exploring the ocean, and all I can say is, the actual map bears no resemblance to the back of the box that someone linked me to. I went hundreds of squares in multiple directions and found no other land at all. Finally, I pushed off from the northern coast and figured I'd sail until I hit something or returned to where I started. After like three minutes of holding down the north button and going through multiple loading screens and one disk change, I finally came to the southern shore of a new island. If there's this much space between landmasses, I may have to break down and look at an online map.
     
I know it's a new shore because I've never seen those mountain textures before.
      
I didn't save here, though, because I have a lot left to do back on the first continent, including the lower levels of Wakiza and the eastern caves. Some wizard named Yang still menaces the southeast quadrant of Tokushima, and there's an imprisoned demon in the Emperor's palace. I don't know if any of it is necessary for the main quest, but I think I'm going to stick around until at least the fourth spell level.
  
Time so far: 32 hours

Sunday, January 21, 2018

Eye of the Beholder II: Reflexes like Jelly


I probably meant to cast "Fireball," but that works, too.
     
Darkmoon has an interesting dungeon structure, and I wish more dungeon-crawlers followed its lead. Instead of n levels of a relentlessly predictable size, all marching progressively (and unrealistically) downward, it offers a bunch of individual areas of smaller size, connected via a plausible maze of stairways. You don't so much explore new levels all at once as expose new parts of existing levels, and every new key has you scrambling back through your notes and maps to find the door to which it might apply. To this extent, Darkmoon is more "realistic" than some of its predecessors, and thus more of a bridge between earlier dungeon crawlers and Ultima Underworld than I may have given it credit for in my first entry.

My basic pattern hasn't changed. Upon arriving in a new area, I map as much of it as possible, annotating places that I can't pass in yellow for future exploration. After mapping as much as I can of the "obvious" rooms and corridors, I carefully study each wall for buttons or levers, and then bash into any walls that could plausibly hold illusory doors. I trust that this system is uncovering all or most of the valid pathways.

When I left off, I was heading down a staircase behind a secret door to an unexplored section of D-2. Spiderwebs, which I had to slash apart, blocked many of the passages, and I was delighted to find that the Webdings font has a spider web ready for this very purpose. There were six total webs, and a couple of Scrolls of Neutralize Poison at the end of a corridor, so I geared up for a fight with some giant spiders.
   
Not a large area, but an intimidating one.
  
It finally came when I stepped on a pressure plate in a short hallway. It generated exactly two spiders. Both died in a couple of hits without even hitting or poisoning me. That was a lot of build up for nothing.
  
That includes Bugsy's dramatic statement.
        
The purpose of the area seemed to be to put a copper key in my hands. Copper keys are necessary for a few doors on D+1 (the level above the main entrance) that I previously couldn't access. I headed there next.

D+1 consisted of a long, ring-like corridor that looped back on itself. The hallways were filled with clerics who respawned continually during my explorations. Numerous small corridors led off to bedrooms with various treasures.
    
The upper level.
     
In a room to the southwest, I was surprised to find one of those teleporters from the first game that looks like a stone doorway. It has a series of eight symbols--ankh, pendant, gem, staff, and so forth--and you have to find stone equivalents of these items to activate the teleporter in the center. I can't remember if objects correspond to the origins or the destinations of the teleporter. Either way, finding it disabused me of any notion that I was a significant way through the game. I'd mapped parts of six levels, but this was the first doorway I'd found and I hadn't found any of the objects.
         
I guess it makes sense; both structures were supposedly built by Drow.
         
A teleportation field in the southeast took me to a room with no apparent exits. The room had four slots in the walls, three with a different-colored gem, and a "soft spot" in the middle of the room. It didn't take me long to realize that putting all three of the gems in the same slot opened a secret door, but made the wall, the slot, and the gems disappear. That meant I could only open one out of four ways. I tried it on the south wall first and found myself in a short corridor ending in a 2 x 2 room with a Wand of Magic Missiles, several potions, and a "tropelet" seed; I don't think this is a real word, but it's an anagram for "teleport." Planting the seed back in the main chamber generated a teleporter that took me back to the temple.

Just for the purposes of mapping, I reloaded and tried the other three corridors. They all had the same configuration and ended in a room of the same size. There were different treasures in each room. The "best" of these had a plate mail +3, a two-handed sword +2, a "Raise Dead" scroll, and a Ring of Adornment. However, it also had a sign that said, "So much to take, and nowhere to take it!" and sure enough, the way back to the main chamber was closed. A skeleton in the chamber held a note that identified the owner as Lord James of Natingdale, and it said that despite fighting valiantly against "Dran and his minions," Lord James had been locked in the chamber with no way out. Anyway, I'm curious if there's any legitimate way out of this room. I tried everything I could think of, but ultimately I had to reload. I finished off by doing what seemed to be the fair thing and collecting the treasures I'd found in the original path I'd taken.
         
You cannot canonically get this message and survive.
       
"Dran" was a name I'd heard before. Outside, a chamber, we overheard two clerics arguing about Dran and his use of a local "hag" to help kidnap innocents; I assume the hag is the old woman we met in the forest. He's clearly someone important in this temple, if not the head.
 
How novel it would be to have an entire militia take on the temple instead of 6 bedraggled adventurers.
         
A jail cell in the upper chambers had a body and a note identifying the body as Amber, Khelben Blackstaff's "scout." The note confirms Khelben's suspicions and says that: "The clerics here have completely deceived the surrounding populace. Everyone believes them to be kind and helpful, while secretly they gather an army of undead warriors." I should probably resurrect Amber, but I'll need an empty spot in my party to do it, and I rather like my current configuration.

I left the upper floors with two areas unexplored. One was a corridor that insisted I needed "the mark of Darkmoon" to pass. The second was a southern door for which I lacked the right key. I was also a bit perturbed by a large empty area in the middle of the level, but I couldn't find any secret doors or buttons. It's possible that the ankh room (where you resurrect characters), otherwise accessible only by teleporter, is slotted in here.
          
It's not a giant hickey, is it?
       
The only path open to me at this point was a staircase down from D-3 to D-4. This led to a large dungeon level, the most difficult in the game so far. It was full of gelatinous cubes and margoyles, and they would not stop respawning. Moreover, the door to the previous level close behind me, blocking escape, and the level wouldn't let me sleep. I'm afraid I had quite a few reloads.
     
The lowest level I've explored so far.
       
Gelatinous cubes are one of the goofier AD&D monsters, but I don't remember encountering one in a non-wireframe game, so I thought the images and associated sounds were fun. What wasn't fun is when one destroyed my fighter/thief's shield +1. Fortunately, they die in a couple of hits and instantly from "Magic Missile" or "Melf's Acid Arrow."
       
Too bad there's no "Hot Water" spell.
        
The margoyles were a lot harder and more annoying, and they occasioned a few reloads. One memorable area closed a door behind me and spawned five of the creatures the moment I picked up an object. I had to go all-out to defeat them: "Prayer," "Bless," "Haste," Potions of Giant's Strength, and so on. Later, they swarmed a series of corridors in the southern part of the level and wouldn't give me a moment's peace, respawning as soon as I killed them.

Oddly, the problem I was having with unresponsive keys went away after the last session, so perhaps it was based on an animation peculiar to the skeleton warriors. The margoyles were more susceptible to the usual tricks like fighting retreats and the combat two-step. The problem is that the layout of the level itself offers few locations where the latter works, and the "fighting retreat" falls apart the moment you retreat right into another enemy, which happened quite often.
        
Backpedaling down the hallway as I fire off spells and missiles.
      
I'll never entirely be sold on Dungeon Master-style combat. I'm just not quick enough mentally or physically. At least Dungeon Master had nice big buttons, all in a row, for your attack options. In the Eye of the Beholder games, you have to right-click precisely on the weapons, spaced somewhat far apart from each other, in smaller boxes. I'm constantly clicking on the wrong thing, accidentally left-clicking and picking up an item instead of right-clicking to use it, opening the character sheet, clicking on the character's name and initiating a change of positions, and so forth. Sometimes I amuse myself by pretending this is all happening during tabletop play:

DM: A margoyle has just entered the corridor in front of you. What do you do?
Starling: Drop my sword!
Bugsy: Swap my axe for my shield, then swap them back!
Marina: Open my backpack, then swear, then close it!
Gaston: Try to swap my holy symbol for my bow! Throw my holy symbol at him!
Shorn: Swap positions with Marina! Never mind!
San-Raal: Open my spellbook and cast "Remove Curse!"
DM: [facepalm]
Marina: We have to get out of here! Strafe right!
DM: You hit a wall.
Marina: Strafe left!
DM: You hit a wall.
Marina: Turn left and then run forward!
DM: You hit . . . you know what? I'm out of here.

The game does a particularly good job with sound. Every enemy has both an attack sound and an "ambient" sound, the latter of which lets you know that he's in the area. The frequency and volume of the ambient sound creates a real tension as you explore and madly check up and down corridors for whatever's making the noise. But all the respawning on this level basically ensured that the ambient sound never stopped. It would have been nice to have a brief break now and then.

The level culminated in a puzzle by which I had to figure out the right selection of pressure plates to weigh down to open a door. There were nine of them, which is a lot of potential combinations, but I figured the solution would be symmetrical and worked from there. I got it after a few combinations: each of the corners plus the middle.

The corridors beyond delivered a lot more margoyles plus a couple keys I needed and a stone orb for the teleportation door, a second of which was on the level. As I wrap up, I can either take that door or a stairway downward, but either way, I really need to get somewhere where I can sleep.
       
This is bogus.
      
Miscellaneous notes:
       
  • It's a good thing that "Create Food" exists because I hardly ever find any food. Of course, the existence of the spell (which completely sates every character) makes the few rations I do find redundant.
  • I guess everyone has leveled up once by now. When it happens, you get a quick message at the bottom, but it's easy to miss it if you're in combat.
  • I keep finding "magic dust." I have like eight pouches now. I have no idea what it's for.
      
Is this a drug?
         
  • I also keep finding lockpicks. I have four sets now. A party doesn't need more than one set. I doubt they even really need the one. They hardly ever work.
  • On the upper level, I found that in addition to smashing windows, I could smash statues. I figure any act against the cult, even vandalism, is a net gain.
      
Not anymore!
   
As predicted, my use of an imported party means that I haven't been getting good equipment upgrades as regularly as a new party would. Most of the stuff I find is +1. But there have been some notable exceptions. I got a +5 robe, +5 bracers, and a +3 cloak called "Moonshade" that have lowered the AC for my mages. I replaced the +1 shield Bugsy lost to the gelatinous cube. Assorted wands, scrolls, and potions have all been valuable. I'm certainly not so jaded that I ignore treasure piles. And San-Raal's "Improved Identify" has been a god-send. This is what games ought to have instead of weird power orbs that you don't even find until the 8th level.
       
Finding a cursed weapon briefly sucked, but at least I could identify it.
     
I can't imagine I'm more than a quarter done at this point. I hope everyone's settled in for a long pairing of Eye of the Beholder II and Deathlord.

Time so far: 12 hours

Friday, January 19, 2018

Deathlord: Resurrection

The party, quite appropriately, wanders a graveyard.
          
Deathlord is just a really hard game to get into, as evidenced by the fact that I'm four entries and 20 hours into this game and can only barely say that I've "gotten into" it. After putting it on the back burner in July, I've spent the last half-year trying and failing to come up with reasons to abandon it. A couple of pesky commenters have made it clear that it's not just going to slip out of everyone's mind.

To recap, Deathlord is the product of a group of first-time game developers who fused elements from several sources. From Ultima, they took the top-down, tiled interface, NPC dialogue, many keyboard commands, and the shape of the main continent. From Wizardry, they took the combat system and permadeath. From Dungeons and Dragons, they took the races, classes, and spells; from RuneQuest, the attributes. After Electronic Arts agreed to publish it, they made the developers put a Japanese skin on everything, "translating" races, classes, spells, and other proper names into Japanese equivalents. 

The story concerns an "outcast wizard" who has raised monstrous forces and attacked the kingdom of Kodan. The emperor offers a reward to a party who can defeat this "Deathlord." The party's quest is going to somehow involve collecting seven words and six items.

The game is famously difficult. You have only one save file, which gets over-written every time you transition areas and, most importantly, every time someone dies. It doesn't even wait until the combat is finished; in fact, it saves so quickly after death in combat that the blank screen that accompanies disk access is generally how you find out that someone died in the first place. It also auto-saves when you do something in a town to turn the citizens hostile. It does not auto-save when good things happen.
         
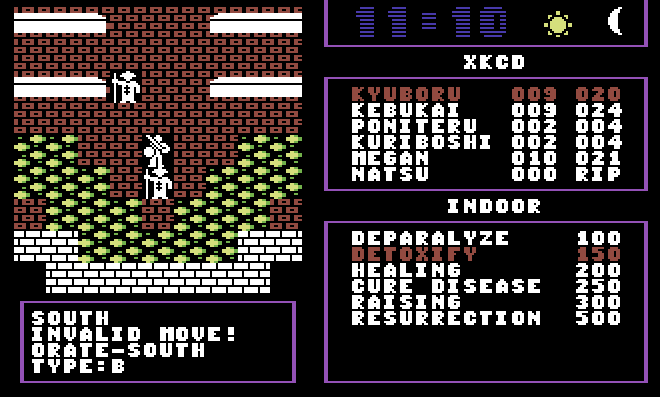
Resurrection is expensive. But you definitely want "Resurrection" unless you feel like losing a point of constitution every time.
       
Wizardry had permadeath, too, but it was a much smaller game in which the action was self-contained in one dungeon with a menu town on top. If a character died, it sucked, but you could replace him without a lot of difficulty, and eventually, given enough funds, you could resurrect him. Deathlord, on the other hand, takes place on a huge continent with only one healer that resurrects. Moreover, there's no way to boot a dead character and create a new one once the game has started. You have to accept the death until you can afford and find resurrection, unless you want to start over with a new party. Since new characters have hit points in the single-digits, it's near-impossible for a player playing "straight" to get through the first few hours.

Still, the difficulty doesn't bother me nearly as much as all the ways that they made the game . . . inconvenient. To enumerate some of them:
        
  • The towns are indecently large, making it very difficult to determine if you've visited every location. You have to make maps to be sure, and it's always tough to map top-down games.
  • There's no simple command to "open" a door. All doors must be picked or smashed, both of which have a greater than 50% chance of failing. Smashing causes hit point loss when it fails.
  • Towns are full of deadly creatures behind locked doors, so you can't fully explore them at early levels.
  • Towns don't have obvious names. NPCs sometimes refer to town names, but there's no clear "Welcome to Whatever" when you enter a town. You have to figure it out like a logic puzzle.
  • Most NPCs don't have names. And instead of one command to just talk with them, there are separate sub-commands for chatting, talking, and inquiring.
  • It's often not clear which NPCs run shops. You have to use the (B)uy sub-command to make sure.
  • You can pool gold but there's no command to divide it.
  • When you find new weapons and armor, you have to immediately decide whether to replace your old ones without testing effects on armor class first.
      
I don't know if anybody will.
      
  • Since the spell names are all in Japanese, you have to constantly refer to the manual.
  • Both towns and dungeons are full of secret areas. There are two types of secret doors: illusory ones, where you just walk through the wall, and hidden ones that you have to search with the "F" key. Thus, you pretty much have to walk into and F-search every wall. Oh, and the F-search might "fail" even if there is a secret door, so you have to try it on every wall multiple times.
  • Outdoors, swamp squares, containing deadly poison, look barely different from forest squares.
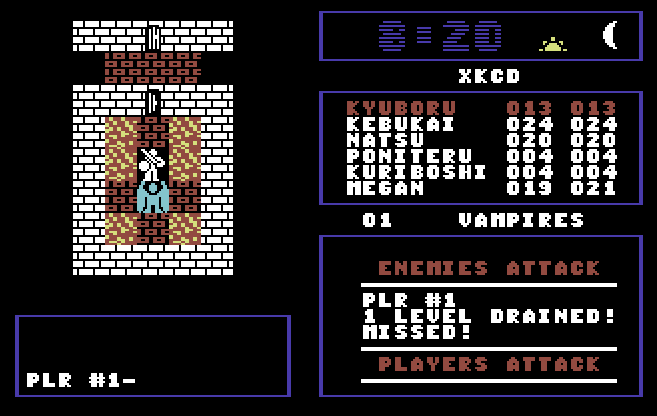
  • One I just discovered this session: there are neither spells nor healers that can restore levels lost to vampires and other level-draining creatures. A bad combat could send a super-character back to Level 1, permanently.
       
Note that there's no "restoration" option here.
    
To all of this, you have to add the size and scope. It was tough enough when I thought the main continent and its handful of dungeons was going to be the entire game. It turns out that there are over a dozen separate continents and islands. The manual isn't kidding when it promises to fill a "few hundred" hours. 

The answer to the difficulty is obvious enough 30 years later: I can use save states. I have been. But that just means I have to spend a few hundred hours feeling like I'm playing like a jackass. There's no question that, back in the day, I would have played this game with the disk drive open so it couldn't automatically overwrite my save game. I probably would have also backed up that single save game after every session, something that the manual mentions but says is "not the most honorable." You know what? Screw you, Deathlord manual. You haven't earned the right to lecture me on "honor." I'm the goddamned Avatar.

Since it's been 6 months, I spent most of this session re-visiting the cities and towns, checking them exhaustively for secret doors, talking with all the NPCs, and taking a new set of notes. I also peeked into a dungeon in the eastern part of the first continent. I had explored it before but missed a secret door.

I started in Tokushima in the northwest corner, thinking it was the town I had originally explored first but it turns out that was Kawa. Tokushima has the largest selection of stores on the continent, with shops for food, weapons, armor, and missile weapons, a shipwright, and a trainer. I don't really understand the purpose of missile weapons since you can't use them from the rear rank.

Behind a door I hadn't previously opened was a lava area shaped like a skull, and beyond that were fights with two stacks of zombies. I had just acquired "Turn Undead" (tsuiho, which Google translates as "addendum"), so that was a good excuse to use it, and it worked well. But in a room beyond that, with some treasure chests, a couple of ghouls came out and paralyzed two of my lead characters in the first round. I won't get a "Cure Paralysis" spell for another two character levels. I declined to hike all the way to the healer and reloaded instead, marking the area for later exploration.
        
Getting ready to turn some zombies.
     
From NPCs in Tokushima, I learn that ruins are rich, kobito hide gold, there is a group of mages staying at the palace, don't get caught outside at night, look to the north, seek the seven, find the words, map dungeons, the yakuza of Kawa are famous, and Kawahara awaits below the palace. No idea who that is. A plaque in a tower reads "Due south of the second stone."

I realized I had enough cash to buy some weapon and armor upgrades. You have to carefully watch the game when it comes to armor. Each character can only have one set at a time. If it's a type of armor they're allowed to wear, they automatically wear it; if not, they just carry it. You have to look at the armor class statistics to see what's happening for a particular character.

I'm a few thousand shy for a boat. That will have to come later. It looks like there's a section of the city only explorable once you have a boat. I smash my way into a cemetery in the south of the map and find a large mausoleum, but I can't figure out anything to do with it or the tombstones.
         
Soon.
       
I move on to Kawa, a large horseshoe-shaped city ringed by forest. I explore the forest exhaustively but find no one. I decide to smash my way into the chambers of the "Daimyo" or "Diamyo" depending on which text you read, and it's here that I have the unpleasant revelation about vampires and their ability to permanently drain levels. Fortunately, I get lucky with a couple motu ("paralyze") spells in a row and only my lead character is drained while the rest kill the vampire. A secret room full of treasure chests next door seems to make it worth it.
       
Level drains with no "restoration" ability is the apex of evil.
      
The vampire isn't the "Diamyo," though. The moment I smash open his door, he kills my second character in one hit, then kills two more the next round. I again reload and mark his chamber for a later visit.

In another chamber to the northeast, I smash a door and find myself in battle against 10 kobito. Thankfully, they're as bad at hitting us as we are at hitting them (my fighters miss at least 75% of attacks), and we're able to defeat them with the help of a mass-damage spell and a sleep spell. A chamber beyond holds a bunch of chests with almost 500 gold pieces; we might be able to afford that boat soon. (This area is probably the source of the NPC line about kobito hiding gold.) I'm feeling good, but the next door I smash has 6 shisai behind it, and within two rounds everyone is paralyzed.

Annoyed at getting my butt kicked every three minutes, I abandon my explorations and head to some caves to the east of here that I've already explored, figuring I'll grind a couple of levels. It turns out that I missed an entire level the last time I was here--one of those illusory doors--and it has an area full of pillars and a bunch of treasure chests. Awesome! I start opening them, and I release a vampire, and he kills us.
      
Just before the vampire. Note that the grinding worked, and everyone can level up.
      
I think my grinding idea was a good one. I'll just stay on the earlier levels of the caves. My only concern about that is that if a vampire is going to drain me either way, maybe I'd rather have him do it when I'm Level 3 rather than Level 6. But that's probably going to be an issue throughout the game, so I can't let it stop me from leveling here.

My apologies for the paucity of screenshots in this one. I started playing it right after a session of Eye of the Beholder II and forgot that CTRL-F5 doesn't do anything in VICE. I had to go around and recreate some of them from earlier saves.

The game is frustrating as hell, but I don't want to give up on it until I've at least finished exploring the main continent and purchased a boat. We'll see how long that takes. In some ways, it's convenient that this game will probably outlast Eye of the Beholder II, as it keeps a 1992 game from creeping into the second game slot before I make the 1991/1992 transition post. I'll be impatient for it to be over soon after that, though.

Time so far: 20 hours


Tuesday, January 16, 2018

Eye of the Beholder II: Descent

Not barbarians--just interrupted while sleeping.
      
The area one level below the main entrance turned out to have several guard barracks. When I opened them, I got attacked by guys in loincloths. I assumed they were barbarians or something, but after I defeated them, I entered their rooms and found beds with messages that they'd been recently slept in. The attackers were regular temple guards, and I interrupted them sleeping in their underwear.
         
Bugsy was wrong about the "long abandoned" part.
         
I even found a little bed character to put where there are beds.
          
The first time I rested after picking him up, the thief Insal ran off in the middle of the night, stealing Marina's Ring of Wizardry, Bugsy's Ring of Adornment, Starling's long sword +5, and several potions and rations. (Oddly, he left a few things behind, too, like the armor I'd given him and his own lockpicks.) I was tempted to reload and boot him from the party, but generally I believe in rolling with the punches, so I sighed and gave Starling a spare +4 long sword and continued.
    
This is where charity leads us.
     
In his departure Insal left me a note that hinted a secret door near where I'd originally found him. I checked the area and found what he was talking about: a tiny button on the wall that opened the way to a staircase. More on secret doors in a bit.

There were three staircases down from the dungeon one leading to a dead end where a skeleton held a scroll of "Lightning Bolt." The second went to a small corridor that went down again, into a level I've labeled "D-3," or three levels below the main temple.
         
D-3.
         
This level was full of priests and undead. It was the largest level so far, at almost 300 used squares. A northern room was so full of skeleton warriors that it took me almost two hours to fully clear them all. Towards the end, I was convinced they were respawning, but I eventually got rid of them all.
          
Just part of the horror awaiting in that room. I had to lead them out a few at a time.
       
The southern section housed a series of jail cells. Most of them just had bones, but I found living NPCs in two of them. One was a dwarf cleric named Shorn Diergar, who said he came exploring after he had visions of an evil temple. He found clerics who pretended friendliness and offered him hospitality, and then he woke up in a cell. I gladly took him, feeling I could use another cleric, but he didn't have his holy symbol with him and thus couldn't cast spells. I later looted it from a couple of guards. I gave him a sling and a bunch of rocks.
      
The game offers "good" and "neutral" options but no truly "evil" option.
       
The second NPC was a female fighter named Calandra, whose sister had been looking for her when I first entered the temple. I didn't really need another fighter, but I figured it couldn't hurt. I stuck her in the back with a spear and some daggers to throw.
         
But now the other sister is missing.
       
Calandra wasn't in the party long. Elsewhere in the dungeon, we found a set of bones that the game made a point of saying was a "complete set." I figured that meant I could get them resurrected. At the end of the session, I took them back to the ankh on the upper floors, and sure enough they resolved in to an elven mage named San-Raal. He didn't have anything to say as he joined my party, but a mage is more useful in the back ranks than a fighter, so I let Calandra go.
          
San-Raal mutely joins the party.
          
That covers my experiences in broad strokes, now let's get to some of the details. First, the unresponsiveness of the keys is maddening. I'll have an enemy attacking from my right, and I simply can't turn right. Or I want to back up down the corridor to flee, but the "back" key won't work. I think perhaps what the developers did, perhaps in an effort to combat "waltzing," is to make a system by which your movements don't activate until enemies have completed their own actions or movements for the round. There was something of this in the first game by which the game effectively froze until a spell animation completed. Now, it's like it freezes until any animation is completed, and regardless of whether the enemy is actually in view. But that's not quite it, because I definitely have more problems turning than strafing from left to right, and more problems moving backwards than forwards. [Edit: This turned out to be related to the NUM LOCK key. Toggling the key stops the unresponsiveness from happening. I still don't know why.]

As for combat waltzing, it is indeed impossible here, but not just because of the keys. Rather, the AI has changed. Before, if an enemy faced you and you side-stepped, he would reliably step forward on his next step, then turn to face you. Now, he doesn't do that; instead, he mirrors your action by side-stepping with you. You just have to attack, step to the side, attack, step to the side, and so on. On the other hand, it doesn't work well for every creature. Some, like clerics, seem to enter the square already executing their attack. It also doesn't work well for large groups, as they don't move in lockstep here the way they did in the first game. But for single or double skeleton warriors, it was still an effective strategy.
      
The new combat dance isn't a waltz; it's a two-step.
         
Still, the unreliability of combat trickery means that I've had to rely a lot more on spells, particularly buffing spells, than in the first game. This is a good thing. And of course it's more in line with AD&D rules. None of that makes up for how infuriating it is to pound the "9" key four times to turn once.

I haven't encountered any serious puzzles yet, just a lot of locked doors for which I had to ultimately find keys in other places on the level. There are also quite a few secret doors, and of different varieties. Some are illusory and you just walk through them. Others require activation with a tiny button that takes some serious scrutiny to see. There was a new type on D-3, in an area where I kept getting messages that the walls were weak. There was one place where I could bash down the wall and find a staircase behind it.
       
A "secret door" identified by bashing a wall with weapons.
     
My approach is basically:

1. Map out an area without worrying about secret doors. Mark all locations that I cannot pass (for instance, because I lack a key) in yellow. Mark all untested staircases in yellow. Mark any puzzles that I'm not sure about in yellow.

2. Once I'm done exploring every direction I can, look for places that might have secret doors and test them.

The Eye of the Beholder series uses the "worm tunnel" approach by which every corridor has 10 feet of wall space on the sides. Moreover, every doorway takes up a 10-foot block of physical space; it's not just an opening it the wall. Knowing these facts helps you limit where you need to search for secret doors. For instance, in the diagram below, there's no secret door that can open up into "A" because that would create shared walls. There's also no secret door that could open into "D" because even in the middle, where it wouldn't create shared walls, there isn't enough room for the door itself and something on the other side that doesn't create a shared wall. The "B" squares have the same problem.
 
       
Thus, the only interior walls that could house secret doors are marked with "C." (I actually missed a couple, in the northeast section of the middle room and in the corridor going south, but I didn't save the diagram and don't feel like re-doing it.) Obviously, most of the exterior walls could have a secret door, too.

Once I'm confident I've found all the secret doors there are to find, I fill in the color on the map. It's entirely possible that a staircase will later cut through some of those spaces and I'll have to render them transparent again.

Miscellaneous notes:

  • There is clearly some respawning happening on D-1. Every time I walk through the level, I face a couple of guards.
  • At one point, I found a dagger by clicking on a washbasin. You have to really search the environmental objects in this game.
      
And it was a magic dagger!
       
  • San-Raal came with an "Identify" spell in his spellbook, something I would have loved to have for the first game. 
  • Still enjoying the object descriptions as I click around.
        
The party comes upon a torture chamber.
       
  • I've found two horns that I think will be necessary to break the "Seal of the Four Winds" back on the temple level.
  • If you choose to heal the party when you rest, resting can take a long time. I'm glad these characters don't have ages or time limits.
       
That's quite a while to be studying spellbooks in a damp corridor.
    
  • Picking up all your daggers, arrows, and rocks after a missile-heavy combat is as annoying as ever.
  • I found a couple of journal pages belonging to the missing Wently Kelso, but they weren't a lot of help. One suggested that he might have died on a fireball trap.
       
Some of Kelso's comments.
   
Late in D-3, Khelben Blackstaff contacted me telepathically. We told him what was going on, and he asked us to keep adventuring while he consulted with the Lords of Waterdeep. I can't remember another RPG where the quest-giver periodically checks in on you.
             
I'm not sure if this was triggered by location or experiences.
          
As I close, I'm exploring the third way down from D-1. Starling thinks it's "a secret passage long ago forgotten." Giant spider webs are stretched across some of the corridors, making me grateful for my several Scrolls of Neutralize Poison.
            
I don't want to hack at it with my sword. That's how Frodo got in trouble.
       
So far, I'm enjoying the mapping part a lot, the combat somewhat less, and I'm still waiting for the first really tough puzzle. Of course, it's not impossible that I've overlooked it and am missing half the squares on the mapped levels. Feel free to drop me a hint if that's the case.

Time so far: 7 hours
Reload count: 2