Wednesday, May 25, 2022

Lands of Lore: Won! (with Summary and Rating)

Conrad, moments after Baccata confusedly asked him what is meant by the term "s@#$-eating grin."
        
Lands of Lore: The Throne of Chaos
United States
Westwood Studios (developer and publisher)
Released 1993 for DOS, 1995 for FM Towns and PC-98
Date Started: 2 April 2022
Date Ended: 20 May 2022
Total Hours: 40
Difficulty: Moderate (3.0/5)
Final Rating: 39
Ranking at Time of Posting: 376/460 (82%)
     
Summary:

A slick take on Dungeon Master-style gameplay from the team that created the first two Eye of the Beholder games, Lore benefits from high production values in graphics, sound, and voice acting and tells a story of more coherence and depth than the traditional DM clone (though not more than some other RPGs of the period). Freed from the restrictions imposed by their D&D license, Westwood regrettably chooses to simplify RPG mechanics, making for a less satisfying game in terms of character development, combat, and equipment. But even these reduced categories have a few things worth recommending, and playing Lore today is a perfectly pleasant experience.

****
 
Castle Cimmeria was only three levels, and I had explored one of them, so the rest of the game was only two levels--but wow, did Lands of Lore manage to stretch them out. I can't remember the last time I faced so many obscure buttons, so much backtracking, and so many dead-ends. It seemed like every other corridor was designed to send me on a one-way pit journey back to the first level, or sometimes the basement. Altogether, the final two levels took me about seven hours--and there are hardly any enemies on the third level.
   
Level 2 did have some tough foes. There were first these giant snake-spiders (multi-legged but with a snake-like neck and head). The second were like living buzz-saw blades with giant eyes. Both were capable of killing a character in three hits. Both could be killed with melee attacks, but they were hard to hit, so I generally had to blend physical attacks with magic attacks and, as usual, lots of resting. The damned things respawned like crazy. The buzz-saw eyes also had some kind of acid attack that destroyed armor. For a while, I kept taking it off when I encountered them, but eventually I just let them destroy it. What was I saving it for?
          
One of the more creative enemies in the game.
    
Level 3's only foes were giant frog-like things that appeared sparingly, usually when I hit a button to open a wall, and the frog turned out to be behind the wall. They died in a couple of castings of "Spark," but they had that annoying special attack that causes you to drop all your weapons. I came to really hate that by the end of the game. 
          
It would be nice if the game's enemies made any ecological sense. There's no water around here!
        
The puzzles on the levels weren't very challenging--nothing like the floor puzzle from my last entry. Most of them were of the "find a key here to open a door there" variety, only the keys and doors were in far-flung locations and required a lot of marching back and forth. There were also a lot of barely-visible buttons to press, but the game's flawless annotation of its automap ensured that I didn't miss any of these.
 
Despite the length and business of the levels, there were also some signs of cut content or perhaps a hasty development schedule. Large portions of the levels had nothing in them. There were long passages and doors that lead to absolutely nothing, button puzzles that opened and closed walls that didn't need to be opened or closed.
      
Finding the fourth figurine.
    
The other oddity of the levels was the sheer number of squares that caused projectiles to launch at us, including a section in the south of Level 3 where a constant stream of spikes and fireballs comes whooshing across several of the bottom rows. The problem is that these "traps" hardly do any damage, and since there are no monsters on the level, it's a trivial matter to rest and heal once they hit you.
   
To complete the game, I had to rescue and heal King Richard and defeat Scotia. The order was important. I had the pyramid "keys" and potions necessary to heal Richard once I found him, but Scotia had put a protective barrier around his container, and this had to be dispelled with four figurines. I believe I had three when I started the final two levels. Richard was on Level 2, but the final figurine was on Level 3. It was in a room to the southwest that couldn't be opened on first encounter. A sign read "the sum must be correct."

The sign refers to an "equation" spelled out in the wall patterns in the southern area of Level 3. By default, it reads: "1 + 1 = 3." You've got to hit a button a couple of times on one of the wall squares in the "3" to move it west and ultimately make the pattern say "1 + 1 = 2," which opens the southeastern area. The problem is that this area is the one swarming with those fireball traps, so you're not terribly incentivized to map out the wall patterns. I suspect most players find the button and hit it, opening the hidden area, without ever understanding what the "sum" is talking about.
     
It is correct, for certain values of "1."
    
Forcing the player to go to Level 3 before healing Richard on Level 2 increases the likelihood that he's going to encounter Scotia before he's ready. This, of course, happened to me. You have to find two keys to Scotia's lair in the center of the level. Once you pass through it, it closes behind you and offers no way to get back out. Thankfully, I had saved the game before entering the area and didn't lose much progress. 
      
You can look like anything, and this is what you choose?
    
Once we had the four figurines, we went to Richard's room on Level 2. Both Richard's and Scotia's rooms are small, single squares, which seems odd until I reflect that every cut scene in the game has taken place in a single square approachable from only one direction. I'm guessing it's a limitation of the engine. Anyway, you have to place the figurines on various pedestals around the room to reflect light in a particular way. None of this is obvious when you start the "puzzle," but there are only four pedestals and four figurines, and the game alerts you when you've chosen one correctly, so it didn't take long.
   
If you say so.
    
Once the business with the figurines was done, we then placed the four "keys" (again, they're pyramids) on the magic coffin. It wasn't obvious where to put them, but it didn't take much clicking around to determine that the game wanted me to put them in the corners.
         
If they don't unlock the coffin, they'll at least weigh it down.
      
The blue encasement fell away after the final pyramid was placed.
 
And Conrad starts speaking in tongues.
         
Finally, we administered the potion. Richard awoke and asked what was happening. He gave us his ring--apparently the Shard of Truth--and said it would help defeat the Nether Mask. He said he was too weak to accompany us but asked for a weapon to defend himself. I gave him a spare trident.
       
The annoying thing is that this is almost iambic meter. "Reveal" messes everything up.
       
Again, I have to praise the voice acting by Patrick Stewart here. He probably doesn't even faintly remember the gig, and I doubt he spent a lot of time learning his character's backstory and motivations before reading the lines. And yet he completely commits himself to dialogue like, "Legend says that only Truth can reveal the Nether Mask and foil the hag." I had been eagerly anticipating hearing from Sir Patrick again, and it occurred to me that this is probably the first time I've regarded voiced dialogue as a real "reward." It goes to show how important the voice actor is. No one else in this game even comes close, although with his thick speech and faux British accent, Baccata's voice actor is at least somewhat successful in creating a friendly character.
   
Fortunately, I had recently re-read the lore from the beginning of the game, and I knew that the Ruby of Truth had to be combined with the Shard of Truth to foil the Nether Mask. (Yes, it does occasionally occur to me that I'm a grown man of nearly 50 and I spend a lot of my time typing sentences like that.) I put them together in my inventory, and they made some kind of ball called The Whole Truth.
         
This now must be combined with yet another artifact called And Nothing But the Truth.
    
It was time to take on Scotia. We returned to Level 3 and opened her door. "So! You worthless dogs have come to your deaths!" she snarled. She scoffed at the "old tale" that the Whole Truth could defeat her Nether Mask and attacked.
   
Scotia uses the Nether Mask to take several forms in the final battle, starting with the same kind of giant frog that you find elsewhere on the level. After you defeat that, she turns into a giant, furry, one-eyed snake. Upon the demise of that form, she morphs into an indescribable four-limbed monster with claws, jaws, and tentacles with their own mouths and jaws. Apparently, she is completely indestructible in this final form, so to defeat her, you have to use the "The Whole Truth" earlier in the fight, during one of her transitions. Of course, if you don't have the artifact, there's no way to stop her from that final form, and thus you can end up in a situation where there's no way to win the battle and no way to escape her part of the dungeon. This happened to me the first time.
       
Scotia is indestructible in this form.
      
With the artifact, you just have to use it as she makes a transition. It dispels her chosen form, and you end up fighting her in her normal human form. The battle is still pretty hard--her attacks include that obnoxious "spectral snake" spell from the White Tower, plus she constantly shrieks during the battle, making it extra unpleasant for the player. Nonetheless, I had hoarded a ton of artifacts for this battle, including just about every magic playing card, several of those "Guardian" globes, at least eight potions that fully restore mana, and at least six uses of the "bezel cups" that fully restore health. I just spammed these items until she died.
         
CRPGs have featured plenty of devastating spells, but I think this is probably the most disrespectful spell.
   
She collapsed against some piece of furniture, shouting, "Fool! My death will not save you from our wrath!" I don't know what she was talking about, as I didn't face any "wrath" after that. Instead, an endgame cinematic commenced showing Richard's army triumphantly returning to Gladstone, Richard bestowing a medal upon Conrad, and the Draracle ominously watching the proceedings in silence. A credits sequence rolls for a while, with each of the game's enemies coming out of a pair of double doors and taking a bow.
      
Uh . . . maybe I'll pass.
      
Those ending credits are a good encapsulation of Lands of Lore. Not many games of this era have scrolling end credits, particularly not with extra content like a rotating parade of the foes you've faced. In the end, Lore didn't break much new ground in terms of game mechanics. There are even several ways in which it regressed. But it did kick the genre forward in production values. Although I have suggested otherwise at times, I am not completely immune to the appeal of nice graphics and professional-quality sound, and I've done my best to highlight those elements in my coverage. Indeed, they left such a positive first impression that I may have been a bit hyperbolic in my initial entry. In the end, however, I am an RPG fan for RPG mechanics, and in this area Lore did a few things that I suspect will collectively hurt the GIMLET and put the game a bit below the Eye of the Beholder series in the Dungeon Master-clone pecking order.
            
Those flying worm bastards come out and dance at the end of the game.
          
As for that GIMLET, I give the game:
   
  • 4 points for the game world. I wish I could give it more, but Lore really doesn't make effective use of its backstory, most of which is derivative anyway. The different races aren't well-explained and don't make much of an appearance except in choice of player character. People and monsters are seeded throughout the game with little thought as to whether they make any thematic sense.
  • 3 points for character creation and development. I was most disappointed with this category. I've read accounts that the Westwood development team felt straight-jacketed by TSR's rules when creating the Beholder games. Freed of those constraints, they created an extremely simplistic character system in which development doesn't make you feel especially more powerful, there are no choices along the way, and one-third of the class system (the "rogue") is horribly under-utilized. It occurred to me late in gameplay that the lack of traditional attributes makes Lore almost a non-RPG by my definitions.
  • 4 points for NPCs. NPCs are important to the game, and a few of them are memorable, but almost all of your interaction is one-way. There are no dialogue options or role-playing opportunities. I particularly don't like that your choice of NPC companions is so scripted and linear. I do like the way they make comments and asides throughout the game.
     
Voice acting creates more memorable characters, which in turn gives greater poignancy to moments like this.
    
  • 6 points for encounters and foes. Here, Lore does well by its Dungeon Master roots, creating an original slate of enemies with a variety of special abilities and defenses, a challenging set of puzzles (to me, these perhaps exceed Beholder but not Dungeon Master), and even a few basic role-playing options during cut scenes. I would have appreciated more of the latter.
      
I would have liked to see more choices like this, with more nuanced options.
     
  • 4 points for magic and combat. As with character development, Westwood did little with its freedom in this area. The lack of any length or complexity in the spell system is particularly vexing (no protective spells!), although I appreciate that the different levels of each spell do slightly different things.
  • 4 points for equipment. I have the same complaints here that I have with most Dungeon Master clones: it's too hard to determine exactly what various items do except their raw offensive and defensive scores. Looking through the cluebook later, I see that there was an axe that conferred a 5% chance to kill with each attack, a staff that has a 5% chance of inflicting triple damage, and a sword that has a chance of striking the wielder with every 7th blow. I'm not interested in doing all the testing and observation necessary to record these things. Even worse are the endless parade of single-use magic items, like the cards, whose use isn't possible to discern until you've already used them, at which point they're wasted. Interface oddities, meanwhile, made bows and throwing items mostly useless in my opinion; you cannot really play this as a "ranged" game. And why does the distribution of equipment in Dungeon Master clones always have to be so fixed?
      
You always find the exact same equipment in every location. Why not mix it up a little?
    
  • 2 points for the economy. It has one. There was hardly ever anything useful to buy, and I ended the game with over 5,000 gold. In a replay, I'd know to spend more on potions and not be so protective of them.
  • 3 points for quests. There's a main quest with multiple stages, but no choices, role-playing options, or side quests.
  • 6 points for graphics, sound, and interface. Graphics are top-notch. Some of the voice acting is very good; almost all of it is at least adequate. Sound effects are fine. Where I can't give a lot of points is in the interface. While the automap deserves a lot of credit, the scrolling inventory window is a horror show. There isn't nearly enough keyboard redundancy, and what little there is is mapped to uncomfortable keys. 
       
Even random textures were pretty cool throughout the game.
    
  • 3 points for the miscellaneous gameplay category. It suffers here in being far, far too linear, not very replayable, and a little bit too long. I challenged myself with the higher difficulty setting, but I would otherwise rate the default challenge level as just about perfect.
   
That gives us a final score of 39. That's where I thought it would fall. I put the Beholder games at 41 and 40. While Lore clearly improves on them in some ways, it doesn't give enough attention to its RPG roots to exceed those previous efforts.
       
"Throne of Chaos" just seems like political mudslinging. Like, give her a chance.
      
In the November 1993 Computer Gaming World, Scorpia offers a review that presages my own. She's a bit too in love with simplicity for its own sake, as when she says, "You do not, in fact ever see any experience points at all, which is a pleasant change from most CRPGs." What makes it pleasant? Why is knowing how much I'm earning from specific actions a bad thing? She similarly praises the lack of traditional attributes. I think she forgets that CRPG players like CRPGs because of those types of statistics. Aside from that, however, she hits on many of my points: praise for the automap, disappointment in the combat system, disdain for the whole Xeob/Knowles section, criticism for not being able to tell what items of equipment do. She doesn't have much to say about graphics and sound, which surprises me, but then again, my understanding is that the voice acting wasn't present in the initial release. 
   
MobyGames's summary of reviews shows the average (contemporary) score in the 80s, with most reviewers comparing it favorably to the first two Beholder games and extremely favorably to Eye of the Beholder III, released the same year. As positively as it was reviewed at the time, it seems to do even better in memory: It's not hard to find any number of retro sites, blogs, and YouTube channels offering exhaustive coverage and glowing praise. 
   
Detailed coverage of the development of the Lore series comes from the August 2009 issue of Retro Gamer. In summary, Westwood's 1993 project would normally have been Eye of the Beholder III, but the studio had just merged with Virgin Interactive Entertainment and was looking to create its own property. Comments from producer Rick Gush indicate that what I've called "dumbing down" was a deliberate choice on Westwood's part to make the game more "accessible." For instance, in terms of character creation, he says:
     
Imagine someone who'd never played AD&D getting tossed all those things along with some esoteric dice-rolling number system. They'd be lost and afraid of creating a gimped character that wouldn't be capable of completing the game and wouldn't be fun. Brett [Sperry] has us put in simple character creation: you picked one of four pre-made characters and that was it.
        
I'm not sure I understand why such a stark choice was necessary. Since the 1980s, games had been shipping with default characters while still allowing players the freedom to create their own, indulging both casual players and those (like me) interested in getting involved in all the statistics. This seems not to have occurred to Westwood.

The article goes on to address the elephant-in-the-industry that was Ultima Underworld. It came out during mid-development of Lore and caused a brief discussion about whether they should try for a new 3D engine. Ultimately, they decided to introduce a "blurred step and turn" approach (which I turned off and promptly forgot about) but otherwise spent money and time on improved production values. Chief among these was hiring Patrick Stewart for $30,000 for three hours of recording time. "I was concerned that the context of the lines would not always be clear," Gush said, "but once he started reading, it was obvious that he'd give us some wonderful stuff."
   
Still, the team went with proper continuous 3D movement for the sequel, Guardians of Destiny, which wouldn't be released until 1997. I had a look at some gameplay on YouTube, and I would compare it favorably to the Might and Magic games from the same period.

Let me tell you what surprises me the most: Geron didn't turn out to be a traitor. I thought for sure that an early scene, in which a crow flies up to his windowsill, was setting up the eventual revelation that he had been working for Scotia. Instead, he's there at the end of the game, praising you while King Richard hangs a medal around your neck. I wonder if there was some cut content there. If ever get Rick Gush or Brett Sperry on the line, that's what I'll be asking about.


Sunday, May 22, 2022

Ultima Underworld II: Test Anxiety

 
The Avatar starts to regret his life choices.
    
I begin this session by returning to the (now) deserted prison tower I first visited. Altara said to use her rod at places where the Guardian has touched the world. In this world, the only place I can think of is the magic prison cell at the top of the tower. I reach it and pound the staff against the floor. There's no textual confirmation that anything has happened, but the screen shakes and there are some freaky theremin effects, so I suppose that's enough.
   
Next stop: Killorn Keep. It's time to get into that secret basement. I head down through the barracks. The guard at the door tries to stop me, but I tell him to go pound sand. He reacts predictably. The combat that follows is easily the hardest in the game so far, though rendered a bit easier by the fact that I can just go back upstairs to rest and heal. Still, I have to reload about four times. The guard is supernaturally hard, and the reason for this becomes clear after I hit him about half a dozen times and he sheds his human body for the form of a demon. I spend a lot of time and a few wands killing him.
       
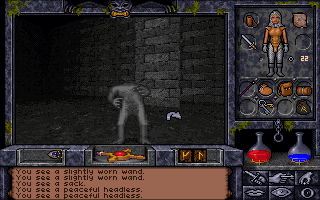
There are going to be a lot of demon shots in this one. I don't know if any of them are supposed to be gargoyles.
    
The massive door behind him is locked, but I'm surprised to find that I have the key on my keyring. I must have found it on a previous trip. The diamond-shaped room beyond has brass walls and a lava pit in the center of the floor. "Spacey twinkles" float in the air, as do two large "brain creatures." This is clearly the Guardian's place of power in this world, which I confirm by whacking the ground with the rod and getting the same audio-visual experience as last time. 
   
The weird guts of Killorn Keep.
     
I suspect that the brain creatures are what's keeping the keep flying. I wonder what would happen if I killed them. But I don't go beyond wondering; the creatures are "peaceful," and I have some friends and unfinished quests in the rest of the keep. If I think the Guardian's forces need to die, I can take them out more selectively.
   
On the way back to the exit, I run into an NPC I haven't met before: Relk, captain of the guards. He says that he's heard I am "wise in the way of virtue" and asks me to see him in his quarters sometime. After I pay Merzen to identify some items (I decide afterwards that I've sunk enough money in that money sink), I go looking for Relk, but I can't find him in any of the keep's chambers. I hope that wasn't important.
    
This could be interpreted a couple of ways.
      
The ice world is next. The fountain plaza in the old city's ruins seems to be the only place of importance in the entire area, and indeed the staff works here. Afterwards, I speak to the ghost of Beatrice, who says I've brought her peace. In the Talorid world, the place of power is in the chamber where new Talorids are made.
       
The welcoming committee as I return to the Talorid world.
      
It's time now for an unexplored world! I enter the south-southwest facet of the gem and find myself in a stone corridor. It dead-ends in a secret door, which opens into a large room. I find a robed man in a corner. He introduces himself as Elster, a student of the Scintillus Academy of Magic. He seems to think that I'm a professor, but I disabuse him of that. It transpires that we're in the staging area for the final exam, "a series of mazes and deathtraps [that] has claimed some of even the best students." Elster, he admits, is far from one of the best students, and thus he has been delaying taking the test--for 63 years. He says he keeps hitting the button on the wall that's supposed to summon a faculty member, but no one has shown up. "I fear some disaster may have befallen the Academy up there on the surface."
   
I open an eastern door, which takes me to another large room. There are three pressure plates on the floor and a gold coffer nearby, which I can use to weigh down the plates. Each plate opens a different portcullis. The middle one leads to a room with a couple of mongbats, and I soon determine that this area is the game's first respawning and grinding opportunity. Every time I cross the threshold of the room, another couple of mongbats appear. 
   
A teleporter in a different corridor brings me to an icy, frozen area. The moment I step off the arrival platform, I go sliding across the ice and am dumped into a chilly river. Remembering the jumping trick (jump until you stop, after which you move really slowly but can control your movement), I make it through the large, empty area. A button opens a door, which leads to a moving bridge across some lava, which leads to the exit.
       
Why does it always have to be lava?
      
The next area is smaller but far more difficult. A Wand of Telekinesis lies near the entrance corridor, which opens up to a deep room full of lava. A 5 x 3 grid of stone columns of varying heights seems to be the only way across the lava to the exit on the other side. It takes me a lot of practice (and reloading), but I train myself to jump the right distance to get from pillar to pillar. The extra twist is that each of the six pillars against the east and west walls have buttons next to them that raise and lower various pillars. Weirdly, though, it only takes the two buttons at the end of the first row (the first two you would encounter) to create a path that works. I don't know what the Wand of Telekinesis was for. You can't possibly see the buttons from far enough away to use it.
    
The next area is easy again--a maze of staircases in a large room full of easy enemies like rats, skeletons, and giant spiders. I have to find two keys and then the exit door. There's lots of jumping, but otherwise nothing special. 
     
Fighting a giant spider in a maze of staircases.
     
I notice some writing on the wall as I enter the next area: "Section Five: Effects and Constraints." This suggests that I missed similar titles in the previous four sections. I also notice that if I go to sleep, my mana does not recharge. Presumably this is to make the students pass all the tests on one mana pool. Since I have used no mana at all, except for "Night Vision" and healing, I start to wonder if I'm doing these tests wrong. All the alternate spells that I think might help, such as "Levitate" and "Fly," require runes I don't have.
   
This area takes me a while, and I get a bit confused. There are two doors out of the main chamber. One leads to a portcullis which blocks the exit. Near the portcullis is a chain. Pulling it just seems to release skeletons (another grinding opportunity). There are three corridors that dead-end in switches and a pole manifestly meant to flip the switches. At first, I don't understand why the pole is necessary because you can just walk right up to them. Later, I notice pressure plates on the floors, so I guess the plates probably negate the switches. Instead, you have to use the pole to flip them without crossing the plates.
      
Skeletons look pretty cool with "Night Vision."
     
Anyway, through some combination of things, I open the south door, jump across a pit, and get a key that opens the portcullis (again, how?). I kill a couple of skeletons for good measure on the way out.
   
This test is starting to get kind of long, I think as I enter the next area. And it doesn't seem to involve much magic--or, at least, the creators left non-magical alternatives for what might otherwise be magical solutions. The next area, according to the etched stone I am now primed to look for, is called "Risk Avoidance." The first room is large, with four pillars in the center creating a small area shaped like a "plus," strewn with bones. I figure out the puzzle after I bungle it. Stepping on any of the plates between the pillars causes a friendly, motionless headless to spawn in a different opening. These headless are clearly meant to soak up the damage from crossbow bolts that fire at you when you step on the central platform to collect a key. But I just suck up the damage and continue.
       
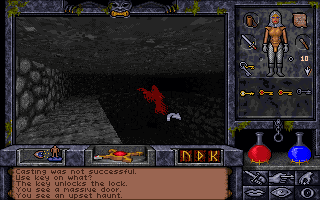
This headless is supposed to take an arrow for me, but that just seems mean.
      
The key opens a door to a teleporter maze. Some of the teleporters promise to return me to the beginning of the world, not just the level, so I have to watch out for them. (They're all marked with some nearby etching.) Some sketched notes help me figure out what teleporters lead to what destinations, and before long I'm out of the area and on to Level 7, "Nonreversible Processes."
   
This level has another pillar puzzle. To get to the exit, I have to jump from one stone pillar to another arranged in a 5 x 5 grid. I find that if I stand just at the edge of one, I can make it to another with SHIFT-JUMP, but it's easy to accidentally walk off the edge. The more difficult twist is that each pillar has an arrow on it, and stepping on the top of that pillar causes a different pillar to disappear in the direction that the arrow is pointing. Since I can't see the directions the arrows are pointing until I'm standing on top of them, I functionally end up having to map the entire area. I finally make it to the exit, then realize I don't have a key to the locked door or any more spell points left to cast "Open Door." I have to start the entire level over.
         
The trick is to never jump on a pillar that points to another pillar that you need later in the sequence.
        
I finally make it to Level 8, which is just called "Section Eight." It starts with a teleporter puzzle that I don't understand. A nearby message on the wall says: "3, 5, 2, 9." The rest of the maze has four rings of teleporters, and every time I step in the wrong one, I'm taken back to the beginning and an enemy spawns. Every time I find the right one, I advance to the next ring. I can't figure out what the numbers mean, so I just find my way through via trial and error.
   
I finally exit the test. The long-decayed bones of some academy instructor lie under a nearby table which has exam scores from previous students. There are several rooms off the exam area, and one of them has a note from a mage named Devrow who has noted "something monstrously powerful" approaching the planet. 
      
This suggests that some of Devrow's own colleagues were responsible for summoning the Guardian.
    
There's an exit back to Level 1, but I decline to take it. A large room has a pentagram on the floor with more bones strewn around it. I determine that this is the Guardian's place of power and successfully use the rod. There are some runes on the floor, and I finally get HUR and UUS. I nearly miss the blackrock gem in the middle of the pentagram, but fortunately I find it.
   
Yet another door leads to yet some other kind of series of tests. I'm all tested out, but I do my best. An initial door requires EX YLEM to open. Next is a door with a faraway button that requires ORT POR YLEM ("Telekinesis") to open. I fall into a pit with a monolith which takes me to a lake of fire with three doors. There are a few safe places to get out of the fire, and I end up resting there a lot, passing days and days in this one small area. An imp in one chamber guards a chain; a demon in another guards a key. I need both to get through the doors on the far side of the chamber, in between which is yet another demon. To defeat him, I have to unload virtually all of my remaining wands and scrolls and swallow my remaining healing potions.
  
Fortunately, he's trapped himself at the end of the room.
    
Once out of this area, the corridor just takes me back to the beginning. This doesn't seem right, so I start testing walls, and I find an illusory door in one of them. It opens into a small room with a single treasure chest. The chest contains a bunch of gold, a black pearl, and, at last, a FLAM rune. An illusory wall in this room leads to a corridor that ends in some of those light bars that imprisoned Bishop in the first world I explored. And of course I don't have the Fraznium gauntlets with me to get through it. 
     
This is not cool, Ultima Underworld II.
    
I return to the entrance to the world exhausted, starving, and badly poisoned from the last demon I fought. Elster is gone; he must have tried to enter the test. I search around, but there doesn't seem to be any shortcut back to the top, meaning that whatever's behind those bars better not be that important. Did I miss a clue somewhere that I would need those gauntlets?
    
As I return to Lord British's castle, I see that I reached Level 13 at some point and I have 18 skill points to spend. Nystul is the first person I run into, so I learn "Mana" and "Casting" from him and have him do whatever he does to the blackrock gem. I pick up another level in "Attack" and "Defense" from Geoffrey, then go study "Lore" from Nelson until I'm out of skill points and still can't identify everything in my pack (I get up to 28 points). 
      
I guess I'm going to be taking piles of gold to Killorn Keep for a while longer.
   
Nobody has anything new on Tory's murder. Feridwyn mentions a river I found in another world, noting that it has saved the castle from thirst. I don't know whether the game assumes I'm ferrying back water on the side or if other people are using the teleporter. Lord British is useless. Patterson says he's heard of the world peacefully ruled by the Guardian and wonders if living under the Guardian's control is necessarily all that bad. 
       
You can take the man out of the Fellowship . . .
    
A couple of people tell me Charles is excited about something, so I track him down after going down to the cellar to stuff some food into my backpack. He's excited about having found an old key next to a document about a battle with a sorcerer. I take it from him. 
   
Charles's discovery resonates with another of my priorities: finish exploring the Britannian sewers. Even before Charles discovered his key, I was planning to use the old "cast EX YLEM in another world" trick to try the still-locked door in the south of Level 3. Equally important, the HUR and UUS stones should let me reach at least one place I couldn't before: the top of the waterfall on Level 3. I go there, walking on water, and cast "Jump," which allows me to leap to the top of the falls. Down the river and around a bend, I find a ghost guarding a small chest. He dies in a few blows. The chest has a Chain Cowl of Valor and an unidentified magic scroll. Not everything I was hoping for, but not bad.
        
I finally make the leap.
      
At least Charles's key works. It opens into a large room in which an upset ghost flies around over a locked chest. I use my Wand of Smite Undead to kill the haunt, then open the chest with the key he drops. The chest has some gold, a gem, a scepter, a magic scroll, a NOX rune (finally!), a key, and a moonstone. That reminds me that I found a moonstone somewhere else, so now I have two. I can use them for the "Gate Travel" spell if I ever get the VAS stone.
     
A red ghost! Does that mean something?
     
Speaking of VAS, it and TYM are the only runes I'm missing now. I can live without TYM; it's only use is the "Freeze Time" and "Speed" spells. But VAS is used in four spells I really want--"Daylight," "Gate Travel," "Greater Heal," and "Fly"--and several others that will be very useful. Still, with what I have, I should start experimenting a lot more with spells. I'll report on that next time.
   
I didn't like this session much. The mage's academy section dragged on way too long and then really screwed me at the top (assuming I need to get behind those bars). I recognize that it's my fault--I suspect I was meant to leave it for when I was stronger or had more spell options. Knowing that it's my fault just annoys me more. I'm also really annoyed that I spent so many skill points on "Lore" and still can't identify half the scrolls in my pack. Still, I feel like I made a bit of progress, and I can't imagine there are more than two or three more worlds to go before the Guardian's threat is (for now) neutralized.
  
Time so far: 32 hours

Friday, May 20, 2022

Lands of Lore: Alien Logic

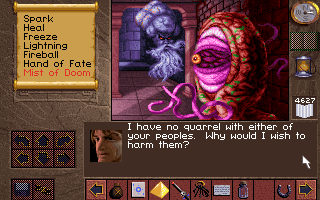
Conrad tries to be reasonable. It didn't work out.
        
We open with a bit of a mystery. I had closed the last session with Scotia appearing in the forest, disguised as Dawn, trying to trick us into giving her Dawn's key. She turned into a dinosaur when I refused her. I was having trouble defeating her, so I just decided to wrap it up and figure it out next time. "Next time" turned out to be two weeks later. When I reloaded my last save, the party was in the city of Yvel. I went out into the forest and couldn't find Scotia anywhere. Does she only show up sometimes? Did I defeat her and not remember? I spent the rest of the game worried that I wouldn't be able to win because of something I was supposed to get at that battle. Fortunately, it wasn't a problem, but the last few hours were angstier than usual.
  
I couldn't figure out anything else to do, so I returned to the chamberlain's little headquarters at the north end of Yvel. As I arrived, Geron shouted that "Yvel must not fall!" and said the city's fate was in my hands. I had just come through the entire city, so that it was in any danger was news to me.
       
        
Nonetheless, as I started circling the city again, I encountered parties of giant orcs and armored figures called "cabal warriors." They were a little easier than the ones I'd killed in the forest, or else I was just feeling the effects of my leveling up. I slowly made my way around the city, resting in buildings when necessary, and cleared out the orcs. Eventually, Conrad said that he could hear the "retreat horns" and thus "the battle has been won!"
    
Someone should have told the 200 orcs that were still crawling around the city after this.
     
We returned to Geron's building only to find it abandoned. He'd left a note on the door that someone had stolen his key during the attack. "I suspect the thief sought refuge in the Catwalk Caverns!" he wrote, adding that, "A passage may exist near Bruno's Lodge." I wasted a bunch of time looking for a passage "near" the tavern when it turns out that the passage is in the tavern, behind a door that had been closed before.
    
I always wondered where that door went in the show.
     
The caverns were full of cabal warriors. The manual says that they "continue fighting after death," but fortunately that doesn't seem to be true. 
 
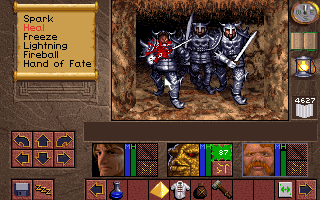
Cabal warriors . . .
     
I had only been in the caverns a short time before I walked into a room in which a group of Scotia's generals was meeting around a table. The leader, in gold armor, introduced himself as Frendor. His associate, "First Envoy of the Dark Path," was named Mylek. Victor, the king's blacksmith, had apparently joined the enemies.
   
. . . and the cabal.
      
Frendor suggested that we had passed a test. "Join us now and we shall rule eternal," Mylek said. Victor even chimed in: "Dark Army too powerful to beat." The game didn't even give me the chance, though. All three characters rejected the offer, expressing allegiance to Richard.

"Then you shall die!" Frendor snarled, and the game took us out of the cut scene and into combat. Frendor was the only unique enemy in the ensuing battle. I'm not sure if the other two cabal warriors were supposed to be Mylek and Victor or if they fled. Frendor was quite hard to hit, and he used a deadly long-bladed claw. But there was a pillar in the room, so I just did the trick where I backpedaled around it, attacking when he came into range and not giving him a chance to turn and strike me. He didn't last long.
   
He was a little too easy to kill. Perhaps he was just someone posing as Frendor--a "Frendor faux," if you will.
     
Frendor had Geron's key, a statuette (which opened a nearby wall), and a gauntlet. When I tried to wear it, it didn't erupt into long claws like it did for Frendor, but it did cast the "Hand of Fate" spell, which slaps some enemies back a square. I didn't find this very useful at the time. However, the gauntlet was also the key to opening several doors on this level.
     
How do people get around if they're not Frendor?
   
Throughout the rest of the level, I faced extremely weird and annoying enemies that presented as small balls of electricity--so small that I could barely see them, let alone discern their exact position. They made a buzzing sound when they were near. If they got close, they were capable of sapping a character's entire mana bar with a single hit, after which they did damage to his health. They were completely immune to normal weapons. The only thing that seemed to damage them was the "Spark" spell, which of course I could only cast if they didn't neutralize my magical ability first. I ended up fleeing and sleeping a lot on the level.
       
Believe it or not, there is an enemy in front of me.
    
The rest of the level was a maze of teleporters, spinners, one-way doors, secret doors, and secret one-way doors. The corridors had the effect of repeatedly funneling me to a room with two locked doors and two keyholes, so I had to find the two keys during my explorations. 
   
One notable area had some kind of item-replicator. It was offline when I found it. Three nearby corridors dead-ended in squares with electrical nodes on both walls. I eventually realized that what I needed to do was use the gauntlet to force the little electric wisps down the corridors, where they would get trapped between the nodes and thus charge the device. Unfortunately, I killed the damned things before I realized I needed them. I kept returning to the area throughout the level, and one wisp did respawn once, allowing me to confirm my theory, but I was never able to get the other two. Fortunately, it was unnecessary, but I can imagine it would have been useful to create copies of some powerful items.
     
A partial map of the area.
   
As it happened, I was overflowing with inventory at the time, so I'm not sure I would have welcomed yet another item, even a powerful one. Part of the problem was the same issue we all have with all RPGs--I was hoarding potentially-useful equipment for some hypothetical final battle where I "really needed them." These included about eight "Bannon's Reserve" potions, which fully replenish magic, a Wand of Death, and a handful of "Guardians"--globes that you can use once to summon a phantom sword that immediately kills or nearly-kills any enemy. I also had four magic playing cards, each of which cast a different spell, although at the time I wasn't sure that they weren't quest items.
    
I kept finding new weapons and armor, and I continue to simply evaluate them by their effects on my offense and defense statistics. I had to discard most of the others, even though I thought some of them had special abilities. I mostly gave up on missile weapons and throwing weapons; it just became too annoying to pick up the latter, and my thief skills were hardly increasing.
    
On this level, I found the sixth (and, as it turned out, last) spell: "Mist of Doom." The spell does the same thing as a Wand of Death, casting a mass-damage spell that causes specters to erupt from the ground and damage multiple enemies. The animation for this is perhaps the best animation we've had in RPG history up to this point. 
    
Despite my hyperbole, I forgot to take a video of the animation. Here it is in progress, though.
      
"Mist of Doom" helped a little in subsequent areas, but I never got to the point that I was able to cast it at Level 3, let alone the highest levels. I'm not sure I even ever made it to Level 4 with "Fireball." I wonder, does starting the game with the defined "mage" character make a huge difference? If not, I'm not sure how you really play the game as a mage. (This is also an issue I'm having with Ultima Underworld II.) The spells simply deplete your mana too fast. If you wanted to try to kill most of your enemies with spells, you'd have to spend an awful lot of time resting--which I feel I already did anyway. Moreover, I think you'd either have to try to play all the characters as mages or all (as I did) primarily as fighters. Since all characters refresh at the same rate as one character when you rest, it would be a waste of time to do all that resting just to replenish a single character.
    
I finally found the two keys to the final doors and exited the area. What followed was a relatively senseless diversion in a game that was already a bit too long. It didn't even make sense thematically. The final chamber had two creatures, a giant tentacled snail with a single eye (Xeobs) and a blue bearded face with a huge exposed brain (Knowles). (Some of my commenters have suggested that these creatures are aliens, but I don't think there was anything in the game that suggested that. They're not much weirder than the regular monsters you face in some areas. But I agree that it doesn't make sense that they are where they are.) They both said that their people had selected Conrad as their champion, and they both offered untold riches should we choose to fight for their side. Conrad naturally objected that he didn't have any reason to choose either side.
      
My general rule is: when someone forces you to choose something, choose against the person who's forcing you to choose. In this case, that's both of them.
     
My inclination was opposite: kill all of them. Unfortunately, I didn't have that option. I had to pick one of the two by going through a particular teleporter. I decided that the Knowles were slightly more obnoxious than the Xeobs, plus I once knew a guy whose last name was Knowles that I didn't like.
    
The teleporter took me to a new level titled simply "Dungeons." It was full of Knowles, horribly annoying foes. Their attacks could destroy my armor, so I had to take that off early (after reloading the first time). They also had a "tremor" attack that caused my characters to drop all their weapons. After lots of frustration and some experimentation, I settled in with a system of trying to kill them with weapons if they attacked individually and using "Mist of Doom" when they were collective. I could only cast three of those spells, so I retreated through secret doors to rest (enemies don't follow through secret doors) when my mana or health was down.
 
Misting the Knowles.
     
The dungeon had two important items. The first was Nathanial's key, found in a niche on the wall. It looked like all the other keys I needed to open Richard's shield, but a) I have no idea what it was doing among these weirdos; and b) I have no idea who "Nathanial" is. If his name has been mentioned before, I can't find it in the screen shots. The best I can figure is that he was the royal herbalist. The second important item was a diamond.
    
I kept making my way through the dungeon, opening chests, fighting with my inventory, committing genocide against Knowles for no reason. I found the headquarters of the Xeobs at one point and had the option to turn my attacks on them, but I didn't.
     
I don't suppose that means you'll fight with me against Scotia?
    
I kept fighting Knowles until I couldn't find any more, then returned to the Xeobs. They rewarded us by advancing everyone a fighter level (bringing them to Levels 8, 8, and 7) and giving us 50 gold, a weapon I don't remember, another Vaelan's Cube, and a key out of this place.
   
The key opened a door that led to a stairway that brought us to the main level of Castle Cimmeria, Scotia's castle. So somehow Scotia allowed those two weird races to live in her basement and wage their private war in the middle of her takeover of the world.
    
Disembodied axes attack in Scotia's ornate halls.
    
Vaelan's Cube was immediately useful, as Castle Cimmeria was swarming with phantom cabal warriors (ah, I get it now). I hadn't known how to use the cube in the White Tower, but I knew how to use it here, and it makes such a difference that most of my complaints about the White Tower have to be dismissed. It not only kills the phantoms; it turns their life essence into mana that can be transferred to a character. You can keep up an unending cycle of enemy damage and self-healing when facing undead foes. The Cube did not, alas, work against disembodied phantom axes, but those responded to physical attacks and "Spark."
    
In an early room, I found Dawn imprisoned in a glass globe. The diamond shattered it and freed her. She said she'd "gather our forces" and zipped off.
   
"Baccata! Go @#$* yourself!"
      
Elsewhere on the level, I found two figurines--cobra and dragon--that turned out to be important. To get to the second level, I had to solve a long puzzle that I want to highlight here. It was probably the most complex puzzle of the game (although, admittedly, there were some optional ones that I never solved). It took place in a 7 x 7 room, as below. As I entered the room, the game stripped away my automap and made the compass go wonky so I could never be sure if it was pointing in the right direction.

Cimmeria's Level 1 puzzle area.
      
The objective was to first get into the southeast corridor, where I found the dragon figurine. I then had to get into the middle-south corridor and its stairway upward. The difficulty is that the room was full of teleporters (both 1* squares bring you to *1), spinners (@), and pits (white circles). There were four pressure plates (black squares) that I had to weigh down; together, they closed the pits on the squares marked in gray.
      
This isn't a bad puzzle. I always think of this kind of puzzle like a maze. You try a variety of paths, many of which lead to dead ends, before you figure out the right sequence. Of course, you have to map to make sure you've stepped on each square and noted the consequences. The teleporter maze in the final dungeon of Crusaders of the Dark Savant is the same type of puzzle. With enough time and a pen and paper, you can figure it out. It's not unsatisfying when you do, but it doesn't call to mind any creativity, or lateral thinking. Something like a riddle or word puzzle is the exact opposite of this.
    
Dungeon Master, in my memory, excelled at a rare type of puzzle--mechanical puzzles that do call into play creativity and lateral thinking. (There is an extent to which I may be conflating Dungeon Master and Chaos Strikes Back.) The closest that Lore ever comes is in that optional puzzle where you force the electric wisps into servitude as power sources, and even that one I think was cribbed from a similar one in Chaos. One of my frequent complaints about Dungeon Master clones is that they never seem to rise above purely mechanical puzzles. Then again, I've thought that so often that perhaps I have a tendency to forget the exceptions.
   
Well, this is getting pretty long, so I'll wrap up here and cover the endgame (with summary and rating) next time. There's definitely some good stuff in these final hours, even if the alien business was a bit unnecessary.
        
Time so far: 30 hours