Saturday, December 25, 2021

Revisiting Pool of Radiance (1988), Part 4

 
The party takes on a mass of thieves in Kovel mansion.
       
In my previous experiences with Pool of Radiance, I found the three areas across the bay from downtown Phlan--the "wealthy area," the Temple of Bane, and Kovel Mansion--to be the least memorable of the bunch. They're presented as a kind of "suburb" of Phlan where the rich used to live away from the rabble-filled center of town. One map putatively holds a variety of manors and mansions (in truth, the same nondescript textures of every other map), long-since looted by monsters. One notable manor, Kovel Mansion, occupies its own map and has been taken over by thieves.
   
The "wealthy area" connects to the other two--Kovel to its north and the Temple of Bane to its west--so I did it first. It is essentially an extension of the Temple of Bane map, roaming with the same bands of orcs, hobgoblins, and ogres displaying Bane's holy symbol. You can kill any number of them and loot them for their symbols, but the encounters don't end until you've cleared the Temple of Bane. (These encounters exist in Ruins, but only in the Temple of Bane area.) It's easy to avoid combat, as all parlay options result in the enemies' peaceful departure. There are three sets of replies:
   
  • Nice or Meek: "We have orders to check out suspicious individuals, but youse guys look harmless enough." After talking the four orcs wander away.
  • Sly: One of the orcs says, "Oh, yeah. Youse them guys who know where de treasure is. We not supposed to kill you yet." The orcs then wander away.
  • Haughty or Abusive: In a deep threatening voice one of the orcs says, "You moles better watch your step or you shall feel the wrath of Bane!" After saying this he spits and leaves.
         
This comment is really confusing until you read the module.
     
These might vary based on charisma or other attributes, but in any event I like how the game uses its conversation "stances" here.
   
There are a few fixed combats with the same types of creatures in the mansions, and searching some of the mansions results in various small treasures, including a really heavy tapestry not worth hauling back to town. In a cell in one of the mansions (gods know why a mansion has a cell) you get a clue that has always mystified me: Scratched on the wall is a message that reads "NORTH WALL. RI  T FRONT GLAS .  SE." There is nothing in the area that seems to have anything to do with a glass case. I now see from the hint book that this is a "false hint."

The tabletop module Ruins of Adventure offers the same basic map as Pool but annotates no encounters whatsoever. Instead, it offers the map as a kind of black template for miscellaneous NPC missions to recover treasures hidden before the fall. For instance, one of the special encounter charts offers this:

The princess with a problem: This encounter is designed to get the PCs to go to Sokal Keep, Kuto's Well, or Kovel Mansion if they haven't been there already, by having a beautiful princess hire them to go to one of them and retrieve a particular item or clear out the block, or something.
   
The Temple of Bane map in Pool consists of a central temple ringed by empty buildings. Clearing the temple (it used to be dedicated to Il-Mater) is the main quest of our companion, the cleric Dirten. The same parties of orcs, hobgoblins, and ogres wander the area.
   
The leather holy symbols looted from the orcs don't help avoid the random encounters, but they do help you get into the central temple, as they fool a blind orc whose job is to feel for their presence. This avoids a combat outside the temple and prolongs the time you have to explore inside before the orc leader, Mace, senses you and orders his followers to attack.
     
The crafty orc waited for us to find the good stuff.
    
Mace's army is likely meant to be saved for after the party acquires "Fireball." The arrangement of enemies is practically begging for it. I didn't have it yet, though, so I won the old fashioned way, with lots of castings of "Sleep," "Stinking Cloud," and "Hold Person." Again, my decision to make all my party members multi-class magic users really paid off. When the battle was over, Dirten left the party and I destroyed the altar to Bane, finishing off the area. 
       
This was a challenging battle without "Fireball"
      
The Temple of Bane is a rare area in which Ruins offers a more interesting adventure than Pool. First the backstory is different. The Pool party gets the quest when the town clerk tells them that Bishop Braccio (cleric of Tyr) wants to see them. Braccio foists Dirten, a human cleric, on the party. The goal is to clear the temple and rededicate it to either Tyr or Ilmater. It's a crusade. In Ruins, on the other hand, "Dirtan"--a gnome cleric--approaches the party independently, on a mission to find some relics in the temple.

Ruins offers a map of the area that's similar to the book, but mirrored so that the party enters the temple from the east rather than the west. The buildings on the periphery are not all empty, though: one of them is set up as Mace's living quarters. The party can encounter a large group of orcs there--they'll be surprised for one round if the party sports leather holy symbols--and loot Mace's collection of jeweled and silver maces. Mace himself may show up to help fight, but the module is clear that he cannot be killed in his residence and will always find a way to escape so that he can show up in the temple.
    
The tabletop module doesn't give you the ability to destroy Bane's altar.
     
The encounter with the old blind orc outside the temple is identical. However, the party isn't attacked as they explore. Mace wants the relics, too, it turns out, and he's content to let the party search where they want, attack who they want, and deface what they want until they unearth the relics. (This is only hinted in Pool by the "sly" encounter dialogue with orcs, as above.) But if they don't find anything within two hours, Mace orders the attack and 40 orcs swarm the party from the outside. "If the characters try to flee," the module says, "the orcs pursue relentlessly, even to the gates of civilized Phlan."
  
Like the game, the module also offers three caches of equipment hidden beneath floorboards. You get six clerical scrolls, five magic user scrolls, four illusionist scrolls, four potions, a Wand of Fear, Dust of Disappearance, seven gold and silver statuettes of gnome kings, and eight +1 magical weapons. When I read that, I was thinking that this is a much better deal than Pool gives you, but in fact the game gives you almost all the same things, except you only get a couple of scrolls and the seven statues only sell for 87 gold pieces instead of the thousands that they're worth in Ruins. In previous tries at this game, I must have missed some or all of the caches because I absolutely do not remember the Dust of Disappearance making an appearance in Pool. I would have used it during the kobold battles.
      
That sounds like a pretty miserable deal.
        
The module is silent about how Dirtan reacts to the artifacts and which ones he demands to keep. My Dirten was happy enough to have cleared the map and didn't want anything.
    
Dirten leaves the party.
  
I returned to civilization before trying Kovel Mansion. It's a thief-intensive area, and I wanted to see if my thief would level first. I did my usual round of visiting Sasha, identifying my magic items, selling what I didn't need, distributing the ones I wanted to keep, and resting to heal and re-memorize spells. As readers of my previous Pool of Radiance coverage know, the economy is horribly broken in this game. There's hardly any reason to spend any money on anything after the initial equipment purchase, and you keep amassing more and more of it. By this time in the game, you can safely leave every silver and gold piece on the ground and you won't run out of money before the game's end. However, I've been forcing myself to pick everything up. I wanted to see how much total wealth I could amass by game's end. Well, I won't be able to answer that question because something has gone wrong. At one point in the shop, I went to pick up my cash, and I found that the party had 65,542 jewelry pieces (they can carry maybe 5,000 of those, and they'll barely be able to move). Since individual jewelry pieces sell for thousands of gold pieces, my party is the richest group of people ever to set foot in the Forgotten Realms. They only occupy that top spot for a few minutes, though, as I have to leave about 65,000 pieces of jewelry sitting on the shopkeeper's counter. I hope he has a hell of a safe.
      
I want to know how I got 65,542 of something. I could imagine all kinds of errors that would give me 65,535 of them, but I would think that would be the maximum.
   
Halfdir was able to train to a Level 5 thief. Hoping that's enough, I head back across the bay to Kovel Mansion. It has been occupied by a band of thieves, and the council has given me a quest to clear it out. My preparation was hardly enough; I guess you want more like a Level 7 thief here. Halfdir missed most traps, set off the ones he detected, and failed to pick almost every lock. I made it through with "Knock," "Cure Light Wounds," and bashing. The place is curious. There are two large battles with thieves between Level 1 and 6 (mostly Level 1) plus lots of individual battles with single thieves who try to backstab you as you explore the rooms. There are a lot of traps, some the moment you walk into the room, some attached to chests and coffers and such. You get some scrolls and low-level magic items here. 
    
This takes me back to Wizardry.
     
There's no single named leader, but one of the Level 6 thieves has a suit of leather armor +4 on him, so that's probably him. However, there's evidence that some crafty leader has been collecting copious intelligence on the resettlement of Phlan. The area is useful mostly for this lore. You find a number of documents with individual bits of information organized into "facts," "strong rumors," "rumors," and "vague rumors." It's from these scraps that the party learns that Porphyrys Cadorna is employing thieves and mercenaries, and that the Boss is a dragon (possibly a metallic one, odd as that would be) and holed up in Valjevo Castle. Valjevo is surrounded by a hedge maze, and the thief leader has a map of one of the maze's quadrants. You also get some flavor text that fleshes out the characters of Bishop Braccio (he opposes selling "miracles") and council leader Ulrich Eberhard (he hates Cadorna and is cheating on his wife).
     
These bits of intelligence are important to Pool but not found in Ruins.
    
Except for the map, which is completely different, the Ruins module is faithful to Pool here, down to the random thieves surprising the party members with backstabs. The module mentions various traps and ambushes, and groups of around 18 thieves Levels 1 through 6. There are some creative traps that would have been hard to model in the computer game, such as a room that locks and slowly fills up with burning oil and a room where a net falls from the ceiling. You find the same basic sorts of treasure, including a short sword +2 and a cursed broad sword, but nobody has a +4 leather armor. The scraps of information are entirely lacking from the module, however, and the rumors the party finds in Pool are not delivered in any other context in Ruins. Braccio and Eberhard have less presence in the module, where they're mentioned only once in a brief paragraph.
     
When I finished with Kovel Mansion, I had four active quests from the Council:
   
  • Valhingen Graveyard.
  • Stop the nomads from joining the enemy. 
  • Stop the kobolds from joining the enemy.
  • Find the source of the river's pollution and end it.
  
I didn't feel that my triple-classed clerics were ready for the graveyard. The other three requests require leaving Phlan for the overland map. The overland map offers coordinates with the origin point in the northwest. The party can travel from 2 to 41 on the x-axis and 2 to 32 on the y-axis, although owing to the irregular shape of the shores of the Moonsea, the southernmost square in any column can be as low as 24.
  
In addition to Phlan and its boat landings to the east and west, the wilderness area has seven locations. From west to east, these are: the ruined castle in the middle of a swamp in which lizardmen live, the kobold caverns, the camp of the nomads, Yarash's pyramid, the dragon cave, the buccaneer base, and Zhentil Keep. While the map looks mostly similar in Ruins of Adventure, and is roughly the same size (Ruins uses hexes, of course), many of the locations are different. Ruins has the kobold caves, the nomad camp, and the lizardman camp, but not the other locations. There is a mission to Zhentil Keep, but the keep does not appear explicitly on the map, and I gather from the description that the party is meant to travel there more ore less automatically rather than actually moving across a hex map. But Ruins curiously has additional locations, including a hobgoblin cave, an orc camp, and a thri-kreen village. These locations are more heavily detailed than the ones that came from Pool; the hobgoblin caves take up five pages, for instance, compared to only a single page (or sometimes half) for any of the Phlan sections. I wonder whether the hobgoblins, orcs, and thri-kreens were added by the module authors or whether they were originally planned for Pool but later cut. The thri-kreen camp in particular has some seriously cool items, including a short sword +3 and a Ring of Protection +2. The hobgoblin caves serve up a long sword +3 and a Ring of Regeneration.
     
The outdoor map from Ruins of Adventure. Why "referee" and not "dungeon master"?
    
Exploring outside in Pool puts you at risk of random combats with monsters like kobolds, gnolls, trolls, giant lizards, and spiders. These are consistent with what Ruins offers in the wilderness, but Ruins also has a lot more. I gather that a long and varied list of random encounters is part and parcel for tabletop RPGs. I'm not sure how often the dungeon master was supposed to roll for them (that's probably in the Dungeon Master's Guide), but assuming that the characters are wandering through a forest, there are 1d20 potential encounters, including elves, wild boars, ogres, stirges, bandits, hill giants, phase spiders, snakes, black bears, jackals, leopards, and a pilgrim under attack by one of the other monsters. Seven of the potential outcomes have you refer to other charts with their own 1d20 selection of possibilities. Some of these are "special" encounters, in which instead of just getting hit with enemies, something unique can happen. Some examples:
    
  • The group meets a beggar asking for a bit of gold to help fill his stomach. If the party gives gold, the beggar tells them a generic password good for several places in the inhuman areas. It they don’t pay up, he gives the “curse of the beggars;” for the next ten encounters, there are 2 hit dice more of whatever faces the party than there should be.
  • A single inhuman warrior comes up to the adventurers and challenges one of them to personal combat. The fight is to the death and the winner takes the equipment of the loser. If the PCs all attack, the challenger simply runs. There should be a 10% chance of magical treasure with every fight. The list of monsters should include: orcs, ogres, humans of various types, goblins, and hobgoblins.
  • The doppelganger attack: The doppelgangers are designed to replace PCs that fall in battle. These doppelgangers then start attracting large numbers of other doppelgangers in a series of constant attacks on the party.
  • The Rumor Monger appears with news.
  • The bardess Tabat wishes to join the group for three adventures.
      
It's rare to find a CRPG that implements random encounters like this. Some of the later Gold Box games, in addition to monsters, had wandering merchants, clerics, and trainers. Even this one has a few interesting things, like the party sees a dragon flying overhead or meets some friendly nomads. But can you think of any CRPG that has random encounter tables with the level of breadth and depth of a tabletop module? There are plenty of games with a large variety of encounters, but they're almost always fixed.
      
A rare non-combat random encounter on the Pool map.
      
I can only wish there were more interesting encounters in Pool. As much as I like the combat system, I've always hated fighting outdoors in every Gold Box game. The rules of the terrain are hard to figure out (e.g., you can stand on the base of a tree but not the top), distances and area-of-effect rules change, and the maps are absurdly large, with the enemy usually starting a couple dozen squares away. Emulating the game, I typically set it to auto-combat and then hold down the "warp" key combo. If the enemy is too tough for that, I'm more likely to kill the emulator and reload than spend 20 minutes fighting a group of boars for 25 experience points.
    
The pyramid is my least favorite of the Pool quests, but I suppose I've come this far, and it frankly seems downhill after that. There's no way I'm going to try the kobold caves until I have "Fireball," and I think either the nomad camp or the lizardman camp benefits from having gone to the pyramid first, so I guess that's next.

Thursday, December 23, 2021

Dark Sun: The Dark Web

In this setting, it's apparently "wrong" to just slaughter giant spiders.
    
The first area south of Gedron has a bunch of mineral springs. As we approach what looks like an elevated bath, some guy pops up from under the sand where he was hiding. He asks if we're the gladiators escaped from Draj. We answer truthfully. "You are of the Veiled Alliance," he says, which I guess maybe is a name that someone came up with for our attempt to unite the slave towns. He warns us that a templar named Theofil is in the area, convinced he can mine copper here.
   
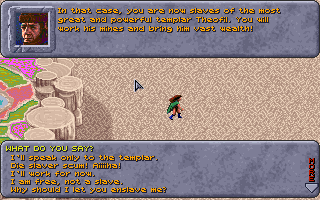
Mere steps away, we meet Theofil and his guards, who demand to know our business. I choose something banal ("we're just travelers"), at which point one of the guards announces we are now slaves to Theofil. 
   
One of these days, I'll have to do a special entry on my general role-playing tendencies, no matter what the game or character. There are times when I try to force myself to go against those tendencies and role-play a particular character, but otherwise I'm going to choose the "good" option 95% of the time. I will almost always be kind to children, generous with my money (this is partly because the economy is so broken in most games that you're grateful for the opportunity to spend it), and protective of the innocent. I will be unmotivated by choices that have to do with loyalty to my own family or clan if they're the ones in the wrong. I almost always take choices that involve speaking truth to power and denying the divinity of gods. Most important for present purposes, I have no patience with or sympathy for slavers. The moment I find out that's what I'm facing, my general tendency is to attack. 
        
While I agree with the sentiment of #2, I wish the game had given me a less cringey way of expressing it.
   
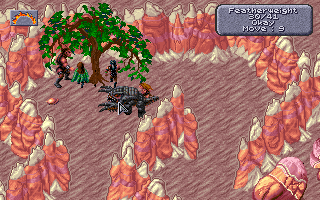
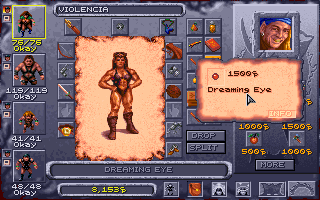
Thus, although the game offers a path of guile here, Theofil and his guards are soon dead at the ends of our swords. Man, you commenters weren't kidding about El's sword. It's terrifying. Not only does it do plenty of damage on its own, it has a "Vampiric Touch" effect that effectively doubles the damage. Violencia can sometimes kill three enemies per round with it. One problem I'm having, though, is that the game "forgets" my strength bonuses in between sessions. I have to have Violencia unequip and re-equip her belt, and Featherweight unequip and re-equip her sword, to get the strength bonuses back again.
   
Theofil has a magic shield that provides protection against fire, which is nice. I give it to Sunstroke.
     
Inventory items remain relatively clear about what they do.
     
Elsewhere on the map, we find a mercenary band heading to Draj to join the army "to smash the slave villages." Again, there's a guile option ("I, too, am a soldier traveling to Draj"), but we don't see any reason to take it. The combat is brief and easy enough that I check out the auto-combat option for the first time. It works well enough. It favors bows more than I would like and doesn't cast spells at all, and I don't think there's a way to enable this (unlike the Gold Box).
   
The only new way to go from here is to the south. The next map has more of the mineral springs, plus large crystals growing out of the sands. We meet a mul who calls himself the Druid of the Steaming Waters, exiled from his oasis by a defiler and his band of guards. The "defiler" turns out to be another Drajan templar, this one named Takan. As before, his guards challenge us as we approach. As before, we decline to lie our way in, and again a bunch of guards and a templar lie dead on the shifting sands. This templar has an obsidian necklace that casts "Disintegrate." For some reason, he didn't use it on us. The grateful druid tells us about a treasure hidden in the badlands to the east; based on his description, it is the very treasure Violencia wears around her waist.
   
Next map south, we find a bunch of geoglyphs on the overhead map, including one of a dragon. I suspect this is where we might collect the "dragon's eye" treasure that the announcer told us about. (I have no idea why I didn't kill him.) Unfortunately, clicking in and around its eye produces nothing, and there's no "search" command in the game. However, I remember that some of the guards two maps ago had tools that I didn't pick up. When I get back to the location of that battle, most of the dropped equipment is gone, but both a shovel and a pick-axe remain. I take both.
     
This all looked pretty cool, but none of it amounted to much. At least not yet.
     
Back at the geoglyph map, before I reach the dragon's eye, I find a lizardman named Ssovan chasing a dust devil around the desert. He says that he's lost his tribe, so he's looking for a totem to gather new people, and he thinks the dust devil will somehow turn in to this totem if he proves his stamina by following it around long enough. He thinks we might be there to help him, or might be there for him to kill to prove his strength. Either way, he's uninterested in our "city wars."
   
I think dust devils are the very antonym of "plan."
    
Digging in the dragon's eye with the shovel produces a chest with a "Flame Arrow" and the heart crystal of A'Poss, the cleric from the temple who betrayed Tynan and Tristram.  
     
This is a pretty obvious place to dig, when you think about it.
    
In the northwest, amidst a geoglyph for a sideways "2," we find a man named Maris, a former instructor at the psionic institute in Draj. He is annoyed that we have interrupted his following of "the path." He invites us to follow him by simply walking the contours of the "2" three times. Each time we reach an end, the game notes that we're closer to enlightenment. At the end, we gain some experience. He then offers to sell us some psionic bracelets, but having no psionics in the party, I can't use them. I offload some items, including two previously-looted psionic bracelets, and get up to ¤63,000.
        
I guess I won the game!
       
Nothing else happens at the other glyphs in the area, some of which look like futhark runes. Rather than continue west or south, we decide to head back to Teaquetzl and a couple of other earlier maps. On the way, we find Laussa the lizardwoman in the desert and tell her about the would-be chieftain to the west. She likes what she hears and says she will seek him out. 
   
We also stop by Nokatu in Red Mesa and sell our accumulated sand howler eyes and fire eel tongues, but he otherwise has nothing new for us.
  
Back in Teaquetzl, almost everyone has new dialogue. Everyone, including Chahl, is happy with the new alliance. The Visionary tells us we have one hand clasped in friendship but the other remains empty, suggesting we need at least one more ally. Katura is hanging out in our house. I have Yester (male) speak to her, and indeed there are some flirtation options that lead to Katura giving Yester a ring to remember her by. She expresses some interest in learning about her birth parents, but we don't have any idea who they are, just that Chahl saved her from sacrifice.
   
Down in the ruins below the well, A'Poss's heart crystal does nothing for us. I guess we need Tynan's and/or Tristram's.
   
In the geoglyph area, Ssovan and Laussa have found each other and have started a new tribe. Laussa gives us a magic ring as a reward. This "metal steadfast ring" increases constitution by 3. I give it to Featherweight, who has the lowest at 14. Ssovan still isn't interested in helping us against Draj, but he has designated us "not prey," so I guess that's something.
   
We exit to the west to a new area, where men immediately start screaming at us: "The wyverns! The wyverns! Run for your lives!" Sure enough, a bunch of wyverns land in the area, and their riders jump off and join the battle. The battle is short--there are only three wyverns and guards, and we're way overpowered by now.
   
Fighting a wyvern.
   
Afterwards, it turns out that I'm in Cedrilte Village. The place is the worst-off of any of the three villages I've found so far. The place has been decimated by bandit raids. Their crops are gone, their huts are little more than ruins, the well water is fouled, and game is scarce in the area. They are subsisting on roots and grubs, believing that it is their fate to be destroyed. They're far too busy trying to stay alive than to think about rebelling against Draj. Their leader, Chaya, won't even talk to us until we agree to end the bandit threat. At that point, she softens. She says that they live in the castle on the mountain. It's so steep that we can't climb it, but someone named Kirkor knows a way. We've been carrying four or five sacks of grain since the first map, and we get some experience for giving it to Chaya.
      
The town's designated carpenter isn't much use.
     
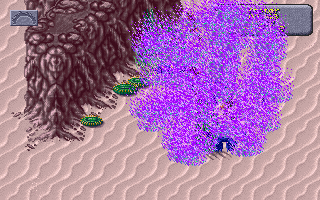
The town's loremaster tells us that to get a Terror Bloom, we'll have to get a rampager to chase us, then slay it under the shade of a serpent tree. I'm starting to think this little side quest is going to be too much of a pain, but it turns out there's a serpent tree in the northwest corner of the village, and I can summon a rampager just by blowing on a horn. Rampagers damage your armor, so before we blow the horn, I summon a creature to take the brunt of the rampager's initial attacks. I'm confident that if we delay acting until he exhausts himself against my summoned ally, we can kill him before he acts again. The plan goes as I hoped, and a Terror Bloom grows in the shade of the tree after we've killed the beast. We grab it to return it to Nokatu later. 
     
Fighting the ravager under the shade of a tree.
   
A ladder in the well takes us to the same ruined underground temple that we can access from Teaquetzl. A ghost named Zeefram greets us and tells us to wander no further, but we appease him by telling him we are not here to plunder. We find Tynan's old chambers and his diary, although it tells us nothing new. A couple of ghosts attack as we explore, and we're forced to kill them. We don't find anything else in this section--most of the passages are blocked by rubble--though it occurs to us that we didn't try climbing down the well in Gedron and should perhaps go back.
   
A dwarf named Kirkor is highly annoyed that we're bothering him, but he grudgingly shows us a stone concealing the entrance to a cave--the only exit from the village other than the way we came in. We move the stone and enter. The cave opens into a maze of tunnels.
    
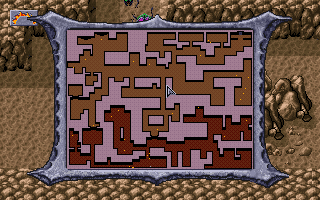
It is a legitimate criticism that the overhead maps give away too much. The player should have to actually explore to uncover these areas.
     
Other than bugs, the tunnels are inhabited by little blue creatures that the game labels "first folk." They are telepaths, and they live connected to other first folk, sharing all thoughts and experiences. They call their cave dwellings "mindhomes."
      
One of the "first folk" describes the issues with the spiders.
    
Recently, the intelligent spiders who inhabit the upper parts of the caverns (the "Darkhold") have become inexplicably hostile. The first folk were of two minds as to what to do about it--attack or maintain the peace--and thus the hive mind was split into two groups, the peaceful ones living in the east caverns and the warlike ones moving to the west. Unaligned with either is the "Outsider," who nonetheless wants peace and peaceful trade with the spiders. Each faction asks me to help. I agree to help the Outsider.
   
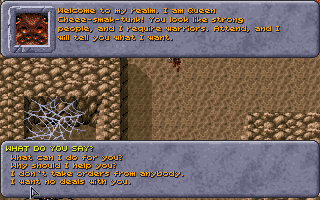
After we scale the walls to the upper caverns with the Outsider's silk rope, we meet the spiders. They have a prince and a queen with absurd names that I'm not even going to try to recount. Anyway, they're also mystified as to the sudden violence shown by some of their species. There's talk that it has something to do with a "curse" localized in a northwest chamber or an "entity" occupying the south fungus grove. She wants me to destroy this entity. As we leave her chambers, her son stops us and says that his mother is devious and evil. She will kill us after we've done her bidding and will never re-establish trade with the first folk. He asks us to help him overthrow her after we've lifted the curse.
    
Negotiating with the spider queen.
   
We find the supposed "cursed" room, marked by a floor glyph. We have to break down a wall to get into an inner chamber (this summons some red slaad for a brief battle). The inner chamber has three skeletons chained to the wall. A chest contains a journal written by someone named "Nagi," presumably one of the ancient people to inhabit the castle above us. Nagi writes that he wanted to lead a society called the Inner Eye, but someone named Tara usurped his place. It was Tara's evil that summoned the entity that took over the fungus grove. She then imprisoned Nagi in the chamber we broke into. He used his time in prison to fashion several necklaces to protect against fungoids, and one that will somehow destroy the entity. We scoop them up.
 
On the east side of the dungeon, we find the fungus chamber protected by "evil" spiders and have to kill them. They've apparently been guarding a hole from which a sense of evil emanates. I fiddle around for a while before discovering that the way to lift the curse is just to hurl Nagi's golden pendant into the hole. This lifts the evil miasma and releases the spiders.
      
Killing the last spider before the evil hole.
   
On the way back, a group of spiders tries to kill us ("the queen promises great rewards!"), but we make short work of them. The prince intercepts us on our way to the queen's throne room and assures us that he's right behind us. When we reach the queen, she assures us that she's thankful for our service, but then she orders her spiders to attack. The ensuing battle has a few spider mages who cast "Lightning Bolt," but they're otherwise not very hard. We have to kill eight of them.
     
He was not "right behind us."
 
Afterwards, though, I find no sign of the prince. The other spiders in the area are non-hostile and thank us, but back in the lower caverns, the Outsider yells at us for killing his spider friends and refuses to help us any further. So I'm not sure what I did wrong. Maybe I accidentally killed the prince in the battle, not realizing that he was an ally. But do I have to handle the upper caverns without killing any spiders? I'm not sure that's possible.
      
I object to the characterization of what I did as "slaughter."
     
My last save is from the village, so I'll contemplate replaying the area. I'm starting to get a bit impatient, though, and it's all tied to the game's level caps. I have no problem running around doing side quests if the experience is going to do me some good, but in this case only Sunstroke and Featherweight have any levels left to gain, and in both cases the experience points necessary are so high that I doubt I'll make it. I'm slightly mollified by the knowledge that there's a sequel, so presumably the extra experience isn't completely wasted.

I otherwise continue to enjoy the encounter design, and I'm finding the NPCs relatively interesting and memorable--not late-1990s quality, of course, but definitely in comparison to other games of this era.
   
Time so far: 27 hours


Tuesday, December 21, 2021

Angband: Played On

Bro...
    
This session, I reached dungeon Level 10 and character Level 15. I still have not experienced a character death. The mechanics of the game haven't changed since my previous entries, so all I have is a bunch of miscellaneous things to tell you:
   
  • As is often the case with me and roguelikes, I struggle to effectively use missile weapons. I recognize their importance to effective tactics, but I hate having to swap them in and out. Angband gives an "off-hand" slot for exactly that purpose, but I have to switch to my pick-axe so often that prefer to keep that there. I've been mostly using wands in lieu of missile weapons when I really need to hit something from afar.
  • The creators of this game really like slimes, jellies, molds, and other icky things. It seems like half the enemies are some variety thereof.
  • Lots of enemies can poison, but so far they've only been capable of short-duration poisoning, such that it wears off before it's worth using "Slow Poison," let alone "Neutralize Poison."
  • I was well into the game before I realized that the number of experience points that you get for each enemy is dependent partly on your level. It is possible to get less than one experience point for a foe. For instance, at Level 13, I only got 0.23 experience points for killing a giant louse. At Level 15, it was only 0.20.
    
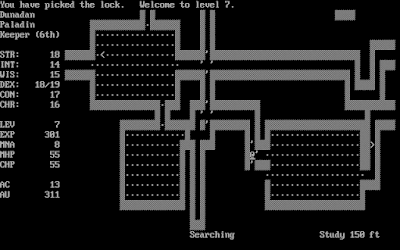
Picking a lock puts me over to the next level.
     
  • Lots of things deliver experience, including casting spells for the first time, picking locks, and disarming traps. At 10 experience points, disarming traps is more rewarding than most monsters on the levels.
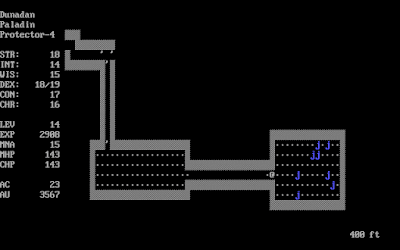
  • There are classes of creatures that, in the game's own words, "breed explosively," meaning that it's hard to kill them faster than they appear. Such creatures include giant lice and worm masses of several colors, one of which is invisible. I sometimes have to abandon dungeon levels to their infestation. This is less of a problem than it is in roguelikes where dungeon levels are permanent.
         
I can't kill the louses fast enough to keep up.
      
  • One of the most useful features of Angband is found in its textual descriptions of monsters, which you can call up with the slash (/) key. The description slowly fills in as you experience more of the monster's special abilities and defenses.
    
This is a pretty awesome feature.
       
  • Monsters are denoted by both uppercase and lowercase letters and color. The letter indicates the class of monster and the color indicates the specific type, although some monsters only have one type. For instance, "j" is the letter used for jellies, which include blue oozes, blue jellies, yellow jellies, silver jellies, green oozes, and white jellies. Uppercase letters seem to denote more difficult monsters, to the extent that I haven't met most of them. These include Ancient (D)ragons and (V)ampires.
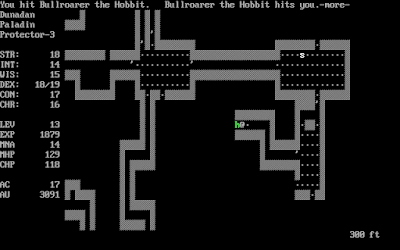
  • You occasionally run across a unique capital-lettered monster. I've met three: Fang, Farmer Maggot's dog (C); Grip, Farmer Maggot's other dog (C); Mughash the Kobold Lord; and Bullroarer the Hobbit. That last bastard got about six actions per round, stole my money and items frequently, and disappeared in a puff of smoke like a rogue. He was immune to the effects of wands. It took me three Potions of Heroism, one Potion of Speed, and one Potion of Berserk Strength to finally kill him. Mughash had no special attacks but hit hard and had a lot of hit points. I had to "Portal" away from him several times, heal, and re-engage before I finally killed him.
        
Fighting a named NPC. I think it's safe to say that the developers took names from Tolkien but not the actual personality of the characters.
     
  • I guess Fang, Grip, and Bullroarer are all Tolkien characters. The game also has "snaga," which I now understand is a term for the non-Uruk Hai orcs. The movies never made me understand who was an orc, who was a goblin, and who was an Uruk Hai.
  • The letter "p" seems to be used for the most enemies (people), including novice rangers, novice warriors, novice priests, novice mages, novice archers, novice paladins, novice rogues, battle-scarred veterans, mean-looking mercenaries, aimless-looking merchants, singing happy drunks, squint-eyed rogues, mangy-looking lepers, pitiful-looking beggars, village idiots, boil-covered wretches, blubbering idiots, and filthy street urchins.
  • In the place of mimics, the game has "creeping coins." They make you think they're piles of gold, but then they attack you. These same enemies could be found in Wizardry, but they make less sense there because the mechanics of that game didn't allow you to be fooled by piles of money. Thus, if you told me that Wizardry adopted them from some other source, that would make sense to me, except I can't find any evidence for that source.
  • Not all monsters try to kill you. A lot just chill where you found them, only attacking if you come within range and threaten them. (Oddly, the ostensible monster "alignment" has nothing to do with this. Paladins attack my paladin with abandon.) My list of monsters to avoid includes green oozes (release gas that damages your equipment), blue oozes (damage your equipment with frost), giant salamanders (set you on fire, which can destroy scrolls), red naga (drain strength), and rogues and halflings (steal your stuff).
      
Maybe I'll leave this room alone.
      
  • I get my strength drained a lot. Fortunately, stores back in town sell Potions of Restore Strength. Sometimes they don't have it in stock when I desperately need it. I often go down in the dungeon and just wait a couple hundred turns until the stocks change.
  • SHIFT-S, which turns on searching permanently, has helped a lot with searching. A lot of things turn it off, though, and I often forget to turn it back on.
  • I have found a ton of Wands of Confuse Monster, and they're really useful. They not only make monsters bumble around randomly, they also forget to use their special attacks. 
  • I have found several chests, but I can't figure out any way to put things into chests.
  • Because of the above problem, inventory gets full fast. Usually when I have to warp back to town it's because of a full inventory rather than any particular danger.
  • The haggling mechanic in shops got old fast. I enabled the option to turn it off, and I almost always get better deals now anyway.
   
The game bargains for me automatically.
     
  • Selling unknown items identifies them. While shopkeepers won't buy bad items (e.g., Scrolls of Darkness, Potions of Weakness) or cursed items, they will often take a chance on unknown items. If they turn out to be bad, the shopkeeper usually screams or weeps or yells at you.
  • If you carry an unidentified item, you slowly learn at least some of its properties over time.
  • Whatever was stopping me from learning new prayers last session eventually went away. I now have "Detect Evil," "Cure Light Wounds," "Bless," "Remove Fear," "Call Light," "Find Traps," "Detect Doors/Stairs," "Slow Poison," "Blind Creature," "Portal," "Cure Medium Wounds," "Chant," "Sanctuary," and "Remove Curse." I get the most use out of the healing spells and "Call Light," but "Portal" (which does the same thing as a Scroll of Phase Door) has saved me from a couple of deaths.
      
I prepare to "Portal" away from some orcs who have nearly killed me.
   
  • "Detect Invisibility" is somewhat useless in this game. It only shows the presence and positions of invisible characters for one quick round.
        
I won't see those worms anymore after I acknowledge the message.
      
  • Since I got the "good feeling" about the level in the last entry, and found the Shining Phial, it hasn't happened again.
  • There is a "wounding" system distinct from the loss of hit points. I'm not sure what it does, however, because any wounds I've received so far have healed within a couple of rounds.
  • Scrolls of Words of Recall take about 30 rounds to work. 
  • Scrolls of Identify are, as usual, some of the most useful items in the game. It always enrages me when I get back to town and there are none for sale.
  • Your house in town is a really useful place to stockpile things you want to save but don't need just yet.
      
For inventory, my main weapon is a longsword. I found a pretty good one with +2 to hit, +1 to damage. Having "settled" on it, I've been periodically buffing it with Scrolls of Enchant Weapon, so now it's up to +8 / +5. I'm wearing an iron helm, leather scale mail, a large metal shield, a set of gauntlets, a pair of hard leather boots, and a cloak, none of which I'm particularly wedded to, so I haven't been doing the same with Scrolls of Enchant Armor (which are less plentiful anyway). I have a Ring of Searching +10 and a Ring of Protection +8. So far in the game, I haven't had a lot of other ring options. I had a Ring of Feather Falling for a while, but you don't fall that often. A Ring of Slow Digestion seems to be a waste in a game where food is plentiful.
      
My equipped inventory at the end of this session.
   
I ended my last entry asking what you particularly liked about what I felt was a somewhat bland game. What I can say now is that the game satisfies me in a few areas. The first is the constant improvement loop as you find new equipment, acquire gold, and level up. We meet so many games that regard character development as an afterthought; roguelikes have always understood its importance. Second, I like how the number of potential combat tactics are growing as I gain spells and equipment.
   
Third, I think the "town level" really adds a dimension that roguelikes of the NetHack line lack. Finally, I like that you can essentially control the pace at which the game becomes more difficult.
    
NetHack, though a better game, is also a very claustrophobic game. Every time you start a session, you take a deep breath, enter the dungeon, and don't quite feel safe until you leave. When death comes, it often feels like a relief from the constant tension. Angband, with its easy first levels and ability to retreat to town, is a much more casual game. You don't play every session in a cold sweat.
    
As I mentioned above, I did make it to Level 10, but I was getting ahead of myself. I nearly died a couple of times at the hands of large groups of hill orcs. Keeping the dungeon level to about half my character level seems a good strategy if I want to continue not to die. At this point, that's more important to me than making quick progress, although that may change as the game drags on.
   
Time so far: 10 hours

Saturday, December 18, 2021

Dark Sun: Emancipation Day

The party finally finds an ally.
      
This session begins with a return to the wyrm caves so that we can report our success in destroying Balkazar to the spirit Tanelyv. He rewards us with his paladin armor, which I equip on Violencia the gladiator. It's a good set, lowering her armor class from 2 to -6. 
   
We continue counter-clockwise around the borders of the game world. There's no way to move east or north from the wyrm area, so we backtrack to the area labeled "Red Mesa" and take the canyon north. We arrive in a map area with a swamp. There are critters jumping about, but I can't figure out anything to do with them. Literally the only thing that happens in the entire map area is that we meet the announcer from the arena (at the beginning of the game) surrounded by a bunch of guards. In exchange for his life, he tells us of a chest buried in the "salt flats" near the "dragon's eye."
    
An interesting area in which I could get nothing to happen.
        
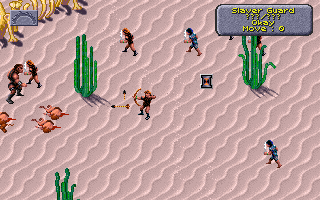
North of this area is another desert map with some fences in the northwest corner. We have to stop for a quick battle against some blue slaads and bulettes on the way there. Guards stop us as we approach and we demand to see their leader. An escort marches us into the inner area, but then demands that we surrender our weapons and get into a pen. We refuse, and he yells for guards. A long but easy battle ensues. There are about a dozen guards, some with bows, but my party is well above the level that any non-magic human enemy has much of a chance against us. Yester finds a couple of good opportunities for mass damage spells, and in general we mop the floor with them.
   
Afterwards, some captured slaves from various nearby villages thank us and flee the area. I gather that we've interrupted an expedition from Draj collecting slaves for the arena.
       
In the midst of combat with a bunch of slavers.
      
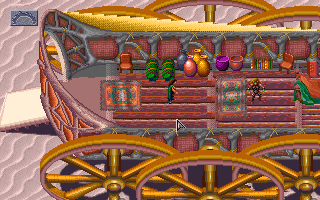
North of this area is a dead-end canyon with a parked wagon caravan. A guard challenges us as we enter their pickets. He warns us against violence but says we're otherwise welcome to visit the wagons and rest. Some fire eels attack as we explore the area, but otherwise the little settlement is violence-free. Drisana, the caravan master, occupies a huge wagon in the middle of the area. (There is no indication whatsoever as to what pulls these wagons.) She tells us that the caravan has been attacked repeatedly by bandits riding wyverns and asks us to try to stop them. They're coming from somewhere in the southwest.
      
This wagon is pretty cool, but what in the world pulls it?
     
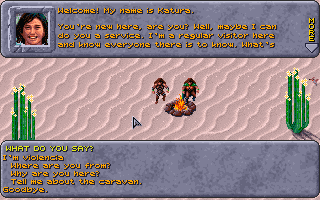
At the campfire, we meet Katura, Chahl's daughter from Teaquetzl, and I'm a bit disappointed that the dialogue only allows us to ask things like "Teaquetzl?" and not to tell her that we've already met her father and know who she is. She recommends that we visit the wagon of Kel, a magician-in-hiding who has "amazing" stuff.
        
The dialogue options are disappointing here.
    
I don't know about Kel. He claims to be a mage hiding under a false name because he's made so many powerful enemies, including sorcerer-kings. That doesn't seem like something you volunteer. He's traveled far and wide, he says, looting ancient magic items from ruins in places we've never heard of. We look at his stuff and ask him about it, but most of it doesn't seem to be even magical (at least, according to the statistics), and it's all suspiciously cheap. We buy some anyway, because if you don't otherwise have a helmet or cloak, you might as well buy something called "Departea's Helm" for ¤20 and something called "Koeatl's Cloak" for ¤40. He does have a couple of (expensive) spell scrolls that Yester buys and learns. I forget what one is, but the other is "Web." He also has the gem for this area's monolith.
        
One of the few places in the game to spend money, and I can't tell what this does.
     
A weird thing happens in the wagon of Tobrian, the wine-maker. She gives us a free sample of wine, and the game alerts us that it has a particularly bitter aftertaste. The dialogue options include one in which we can accuse her of poisoning us. That seems like a heck of a leap of logic, but I go with it because I've just saved. She expresses shock at the accusation and demands that we go see Drisana, the wagon master. Drisana hears both our sides of the story; Tobrian claims that we barged into her wagon and demanded wine while we tell the truth (though there is an option to lie). Drisana decides the matter in our favor, fines Tobrian ¤5,000, exiles her, and gives us ¤500. So I guess it all worked out except that I'm not convinced that Tobrian did try to poison us. I've tried lots of wines with bitter aftertastes.
   
We wrap up the area with a visit to the wagon of Larissa, a self-proclaimed seer. Like everything else in this caravan, she seems to be a sham. For ¤35, she gives a generic prophecy: "A rising storm troubles your heart. I see your pain. You seek trust in those you befriend. Fear not! Place your trust where faith demands. In turn, truth shall provide friends to earn that trust." Meanwhile, she disparages the abilities of the seer in Teaquetzl.
   
The caravan area is a dead-end, so we backtrack to the "slave pens" area. There, another group of guards tries to capture us, saying, "See? We didn't need to pay Tobrian. They come to us like a dog to its master." So I guess Tobrian was bad after all. They mention capturing us for a "Commander Obour," sent by the Templars of Draj. Combat is inevitable. The six human guards would be easy, but for some reason four daggoran (froglike beasts) get involved. One thing I forgot to mention is that Yester is fighting with Balkazar's staff, which automatically casts "Slow" on the surrounding area every time it hits something. I wonder if it will run out of charges.
       
Balkazar's Staff casts some area-effect spell every time it hits something.
      
When the battle is over, we leave the area to the west and onto a new map, which seems to be just more generic desert. There are exits to the north and west (Teaquetzl is to the south). At first, it looks like we're not going to find anything in the area, but eventually we run into "a man wearing the livery of a Draja messenger." He announces that he "will not be stopped!" and summons a blue slaad. In the second round of combat, he summons three more. We kill both them and him in short order. On his body, he has a message from a Templar Pentuci to a Count Kalkin. It is coincidentally about us, warning Kalkin about our escape and asking that he watch for us. He also has a "Fire Shield" scroll.
   
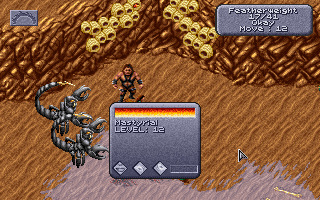
Finding nothing else to do in the area, we leave to the north. The landscape finally changes from featureless desert to one of grass and trees, so you can imagine our reluctance to pay heed to the face-painted lunatic who runs up and yells, "No! Leave this area while you can!" He says that the area is teeming with monsters, which killed his companions. Sure enough, two mastyrials attack us immediately after he leaves, followed by three mountain stalkers.
     
The party assesses two mastyrials as combat begins.
     
My party is killing it in melee combat lately, particularly with three characters' strength above 20 thanks to various magic items. My overconfidence proves to be my downfall in this area, as shortly after the mountain stalker battle, we're attacked by six air elementals, who absolutely take us apart. We win the battle, but with virtually no hit points and healing spells--and then we get attacked by three more mountain stalkers. They knock out Yester and Featherweight in the first round and Violencia in the third. Sunstroke wins the battle with 7 hit points to spare. As we see yet another group of air elementals floating towards us, Sunstroke grabs Llod's Rod and warps us back to the monolith in the caravan village. 
   
The gate guard greets us as we arrive. He tells us some rumors from Draj. Earlier in the game, we heard that the sorcerer-king was "missing." The guard tells us that "the templars in Draj are desperate, fearing the sorcerer-king will withdraw his power." This time as we arrive at the campfire, we meet not Katura, but a woman named Tidzio and a man named Metikit. Tidzio is an adventuress, and she shares intelligence about some of the surrounding areas. Metikit is a con man who is happy having recently fleeced a templar. 
         
We warp back to the safety of the caravan camp.
       
After resting, we make our way back to the grasslands, this time hustling through as fast as possible. We run into a party of lizardmen who are waiting to purchase gladiators from someone named Arant. I guess everyone is involved in the slave trade in this setting. Upon questioning, they say they were hired by some mage named Wyrmias to buy gladiators from Arant and resell them to the mage. There doesn't seem to be anything else to do in the area, so we continue out of the region to the north, fighting a few air elementals and mountain stalkers on the way.
   
Like the previous area, this new area is set on grassy mesas surrounded by ocean. I suddenly realize how unexpected it is to see an ocean in this setting. But it almost completely surrounds the elevated peninsula on three sides, so it's reasonably sizable. ("Almost" because there's a thin strip of land heading west.) As we move forward, a magera challenges us and says that "our kind" isn't welcome here. We ask why not, and he relates that the drumming we hear in the distance is to summon their master, Dakaren, a great beast who can consume all of us. They have a sacrifice chained up to the northeast to offer to him. When we refuse to leave, he attacks with three compatriots. We have to kill a few more as we head north.
   
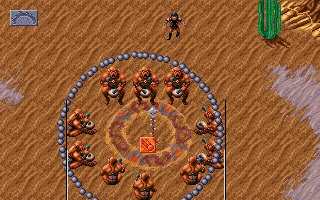
We reach the mageras' little drum circle, and when we're unable to convince them to stop drumming, we let "Fireball" do the convincing for us. 
       
It's like they set this up with "Fireball" in mind.
     
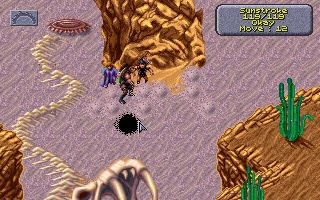
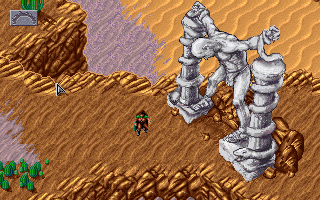
A colossal statue blocks our way across the bridge where the sacrifice must be (we don't find him or her on our peninsula). We don't find a way past it, but we do find a grappling hook near a tent to the northwest. This lets us snag the fallen end of a collapsed bridge and pull it up so we can reach the east side of the area. At the north end of a promontory, on a small island accessible only by walking down the skeletal spine of a dead sea monster, we find a woman chained to a rock. As an aside, when we get to the bottom of the mesa, it turns out we can just walk across the water. I guess it isn't an ocean after all. Either it's very shallow or what I interpreted as water is something else.
      
Some more excellent artwork.
      
As we free the woman, who gives her name as Jasmine, tentacles erupt around us. I don't know how tentacles are coming out of water so shallow we can walk across it. I pause the game to consult the manual for help, and I see numerous references to the "silt sea." I guess maybe what I perceived as water is in fact salt blowing over dry land. The monster must be under the salt.
        
Tentacles erupt beneath us as we free the chained woman from the rock.
      
There are about 10 tentacles, but they each only have about 10 hit points, so we deal with them in two rounds. When the tentacles disappear, a druid appears. "I am betrayed," he shouts. "How dare Wyrmias send people to kill me! I promised him my piece of statue in return for sacrifices! I kept my part of the bargain--how dare he betray me!" Before we can explain we have nothing to do with "Wyrmias," he attacks and we're forced to kill him. His body has a piece of a statue and some magical +3 leather armor that bestows the "Free Action" spell. I give it to Featherweight.
   
Jasmine explains that Wyrmias has taken over her town, Gedron, and is controlling all of the villagers. He's apparently obsessed with a statue he's building; Jasmine suggests we use the piece to complete it and then kill Wyrmias while he's distracted by it. She gives us her spellbook to prove to her sister, Linara, that she's alive, plus a couple of spell scrolls. 
   
We take the thin strip of land going west, hoping it will lead to the town of Gedron. Alas, we find ourselves on yet another mesa sticking out into the Silt Sea. Before we've walked more than a few steps, a human guard orders us to halt and state our business. He's not very good at his job, admitting that he's "just too tired" to yell and threaten to kill us the way he's supposed to. He freely admits that his company is rounding up villagers to serve as gladiators. The detainees are all surprisingly docile, worried that someone back in their village will kill their families if they resist. That must be this Wyrmias.
  
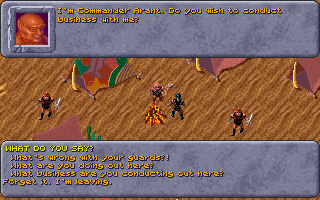
At the center of the camp, I meet Arant, their leader. I don't know what race he's supposed to be. He has pointy ears and what looks to me like reddish skin. He curses his lazy guards and says he's waiting for some ssurrans (I guess that's what I've been calling "lizardmen") to show up with payment. We ask if he'll sell them to us instead, and he quotes a price of ¤10,000 or a magic sword. We could just kill him instead, but we like the role-playing element of it, plus it gives us something to do with our money (we have just over ¤12,000). We pay him and he takes his guards and leaves, giving us the camp, which although it has a fire, lacks the official fire circle that we need to rest and heal.
       
Perhaps enriching a slave-trader is a bad use of "role-playing" options.
     
We find the slaves, about eight of them, in a pen to the north. They thank us but refuse to return to Gedron for fear that Wyrmias will kill their friends and family. We tell them to wait there. We find nothing else in the area; the only exit is to the south.
    
South at last brings us to the village of Gedron, which consists of seven buildings. All the people we speak to are in some kind of trance, talking lunacy and praising Wyrmias. The one merchant in town, Melkor, is convinced there's a carnival going on around him. He has nothing but junk for sale.
      
Gedron. Note that the northern "exit" is barely there, but as long as even the smallest piece of land touches the border, you can usually transition to a new map.
          
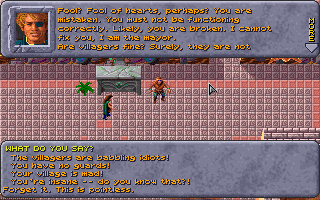
The mayor greets us with senseless babbling until Wyrmias takes control of his body from somewhere else and demands to know what we want. When we insult him for taking control of the village ("only children play with puppets"), he says he'll kill everyone if we mock him again. He offers to release the village if we bring him two statue pieces. Sensing that we already have one, he asks us to meet him at the well in the center of town.
        
The dialogue options suggest the party is fond of the "direct confrontation" method of addressing mental illness.
       
Before we meet Wyrmias, we finish exploring the town and meet Linara, a mage who is unaffected by the spell. She is Jasmine's sister from a couple of maps ago and is also the one to whom we are supposed to bring the pith extract. In exchange for the news of her sister, she tells us that Wyrmias hangs out in a room behind a tapestry in the mayor's house and has a safe hidden under a rug.
   
We find Wyrmias hanging out near the statue. He demands the piece that we carry. Since I've recently taken a save, I refuse. In the ensuing combat, we kill him in about two hits, but true to his word, he manages to kill literally everyone in the village. This seems antithetical to the alliance that we hope to form, so I reload and we give him the statue piece. He demands that we get the second one from the ssurrans to the east.
   
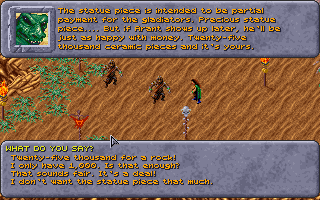
We visit, and they demand either the gladiators or ¤25,000 for the statue piece. None of the dialogue options will prompt combat. I don't like killing people if they don't attack first, but we don't have anywhere near ¤25,000, so I reluctantly order the party to attack. The battle is simple, and soon we have the second piece.
      
The ssurans price themselves out of continued existence.
      
We bring it back to Wyrmias. After he installs it in the statue, he keeps his word and frees the town from his control. Then he challenges us to combat. "I will even give you the first hit," he offers. We've seen The Green Knight, but we take the challenge anyway and kill him in a single blow. 
   
Moments later, the stone statue comes to life and slithers from the platform. We feel "waves of evil magic radiating from this thing." It speaks in Wyrmias's voice: "I have achieved my destiny! My death has propelled me to greater power than you can imagine . . . you have no idea what you have set in motion--a new age for Athas!--under my command!" He says he'll spare us for now, but the next time we see him, we will die. "I must be off to begin my conquest of Athas!" he proclaims, and starts to slither away. Figuring we'd better solve the problem we just created, we attack.
     
The leader of a town sheds his mortal body and turns into a giant serpent. Wasn't this a Buffy the Vampire Slayer episode?
    
The statue hits hard--up to four times per round, up to 20 or so damage per hit. After he kills Featherweight the first time, I reload and have Sunstroke cast a series of buffing spells before combat begins. We also summon a fire elemental to distract him. I have Sunstroke attack him in the first round but hold back the other characters until Wyrmias exhausts his first-round attacks on Sunstroke, who has over 100 hit points. Then everyone else closes in, swinging away. Wyrmias dies early in round two.
   
I have to run back north to convince the gladiators to return home. I loot Wyrmias's chambers (my thief is able to pick and disarm the safe) for a +2 sword called "El's Drinker" and the gem to the area's monolith. Finally, I speak to the mayor, and although reluctant to imperil his city for a second time in a week, he agrees to ally with Teaquetzl against Draj. Finally, an accomplishment on the main quest!
      
I think that the "psi-bracelet" can only be used by psionics.
      
As I played through this session, it struck me how perfectly it anticipates Baldur's Gate. Although there's a main quest, the party is largely free to just explore, and that exploration is rewarded with at least a couple of fixed encounters per map, usually with more than one way to approach them. If Dark Sun had featured a fogged-in map that slowly clears as you explore, it would be almost indistinguishable except for combat. Again, I wonder why Dark Sun isn't remembered as more of a landmark.
  
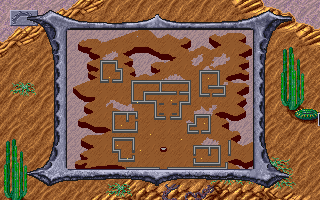
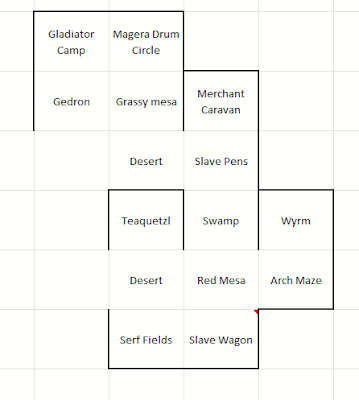
The portion of the world map that I've explored so far.
    
I only have three significant complaints about the game. First, the level cap, which I've already ranted about. Second, any game set in this kind of setting really needs a survival element. It makes no sense to tell us that "water is more valuable than gold" and then have such a statement play no role in the subsequent gameplay. Third, the control system is a bit clunky. I really want to like it because it offers dual mouse/keyboard controls, but there are small things that don't work well. The mouse often gets stuck, the inventory and character screens take just a little too long to open, and having to right-click all the time to change the mouse cursor all add up over time. Beyond those things, I can't see why we're not looking at a very high rating for Dark Sun and a place on the "must play" list.
    
Time so far: 23 hours